

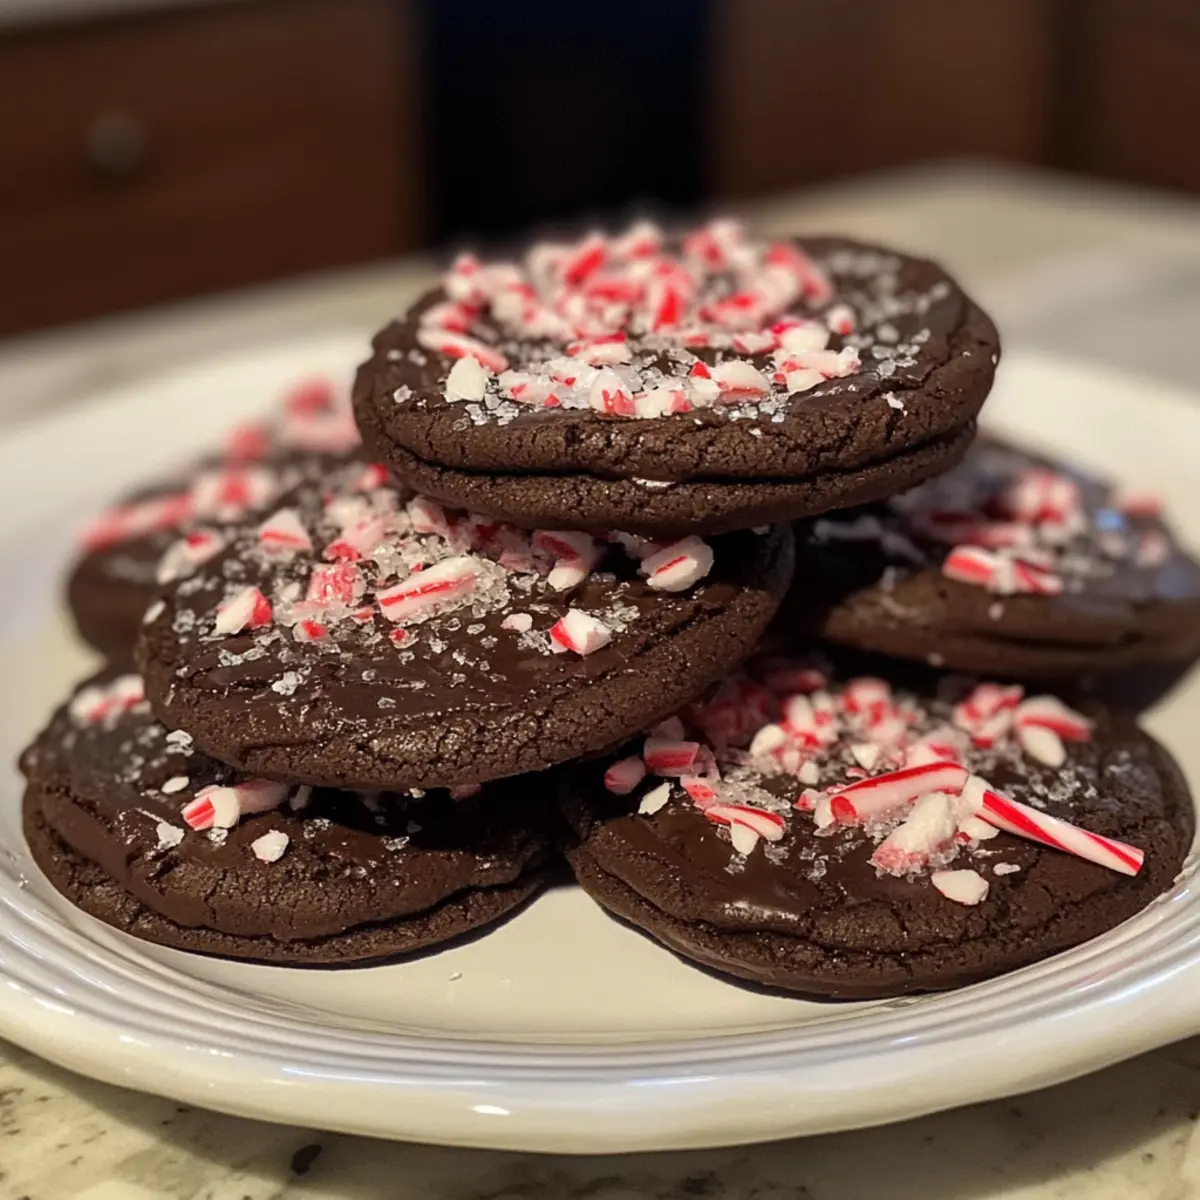
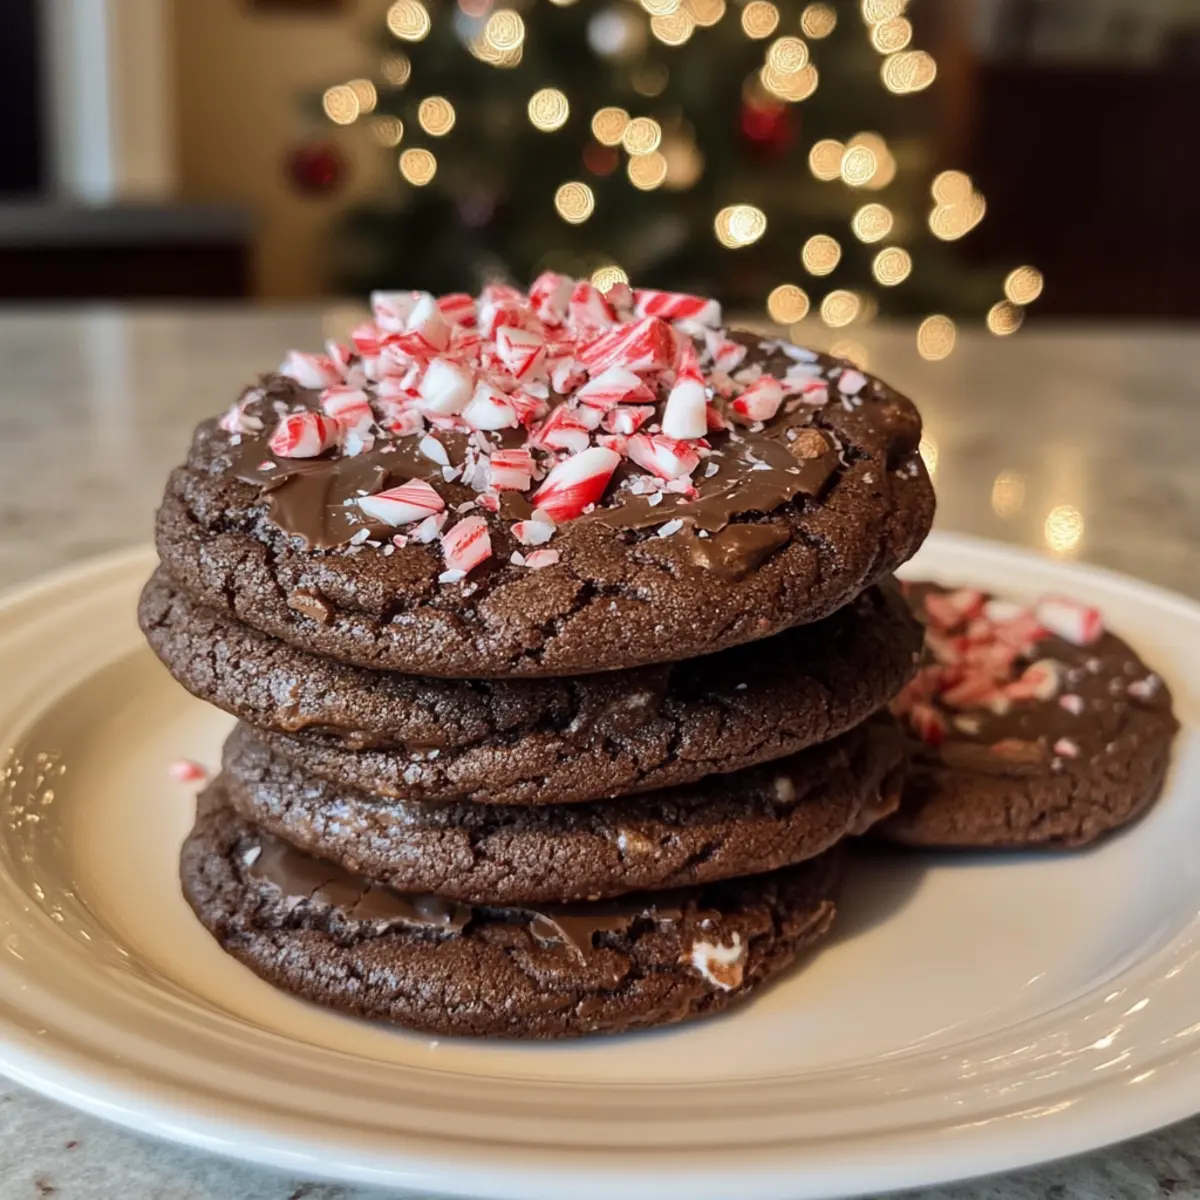
As the holiday season approaches, I found myself knee-deep in a mini crisis—what to bake that perfectly captures the spirit of the festivities? Enter my beloved Chocolate Peppermint Bark Cookies! These chewy delights are not only a treat for the taste buds, thanks to the creamy Ghirardelli peppermint bark and a dash of crushed candy canes, but they also fit wonderfully into any holiday gathering or cozy night in. Plus, they’re a quick and easy recipe, making it simple to whip up a batch even amidst the seasonal hustle and bustle. Whether you have leftover chocolate from your holiday stash or just want to delight your friends and family, these cookies are calling your name. Are you ready to dive into this delicious adventure?

Why are These Cookies So Special?
Irresistible Flavor: The combination of rich chocolate and refreshing peppermint creates a festive harmony that is simply delightful.
Quick and Easy: With straightforward steps and minimal prep time, you’ll have a batch ready before you know it.
Versatile Options: Customize with your favorite mix-ins, whether it’s white chocolate chunks or toffee bits.
Perfect for Sharing: These cookies are ideal for holiday gatherings or as thoughtful gifts for friends.
Festive Presentation: Topped with crushed candy canes, they not only taste great but look charming on any dessert table.
For those seeking an extra cozy experience, pair these treats with a warm glass of hot cocoa or milk!
Chocolate Peppermint Cookie Ingredients
• For the Cookie Dough
- All-Purpose Flour – Provides structure; substitute with gluten-free flour if needed.
- Unsweetened Cocoa Powder – Enhances the chocolate flavor; Dutch-processed cocoa delivers a richer taste.
- Baking Soda – Acts as a leavening agent; make sure it’s fresh for optimal rise.
- Salt – Balances sweetness, enhancing overall flavor.
- Unsalted Butter – Adds a rich texture; can swap with margarine for a dairy-free option.
- Brown Sugar – Provides moisture and depth; feel free to use white sugar for a lighter cookie.
- Granulated Sugar – Sweetens the cookies perfectly.
- Egg – Binds the dough and adds moisture; use a room-temperature egg for best mixing results.
- Ghirardelli Peppermint Bark – Infuses each bite with flavor and texture; alternative chocolates can be switched in.
- Crushed Candy Canes – Offers festive crunch and peppermint zing; optional or substitute with similar toppings.
Enjoy baking these Chocolate Peppermint Cookies, and let the delicious scents fill your home with holiday magic!
Step‑by‑Step Instructions for Chocolate Peppermint Cookies
Step 1: Preheat Your Oven
Start by preheating your oven to 350°F (175°C). This is an essential step to ensure that your chewy Chocolate Peppermint Cookies bake evenly and develop that perfect texture. While the oven warms up, gather your ingredients and prepare your baking sheets with parchment paper, ensuring a non-stick surface for easy cookie removal.
Step 2: Combine Dry Ingredients
In a mixing bowl, combine 1 ¾ cups of all-purpose flour, ¾ cup of unsweetened cocoa powder, ½ teaspoon of baking soda, and a pinch of salt. Whisk these dry ingredients together until they are well mixed and free of lumps. This step not only helps integrate the flavors but also ensures that the baking soda is evenly distributed, fostering a delightful rise in your cookies.
Step 3: Cream the Butter and Sugars
In a separate bowl, add ½ cup of softened unsalted butter, ½ cup of brown sugar, and ½ cup of granulated sugar. Using a hand mixer, beat the mixture on medium speed for about 2-3 minutes until it becomes light and fluffy. This step is crucial as it incorporates air, helping your Chocolate Peppermint Cookies achieve that chewy texture everyone loves.
Step 4: Incorporate the Egg
Add one room-temperature egg to the butter-sugar mixture. Mix well on low speed until the egg is fully incorporated into the mixture, roughly 30 seconds. This binding agent will add moisture and help keep your cookies from crumbling. After mixing, scrape down the sides of the bowl to ensure everything is well combined for the best flavor in your cookies.
Step 5: Blend Dry and Wet Ingredients
Gradually add your dry flour mixture to the wet ingredients, mixing on low speed until just combined. Aim to blend for about 1-2 minutes, so you don’t overwork the dough, which can make your Chocolate Peppermint Cookies tough. The goal is to maintain that soft and chewy texture, balancing all the flavors beautifully.
Step 6: Fold in Peppermint Bark
Gently fold in 1 cup of chopped Ghirardelli peppermint bark into the cookie dough using a spatula. This adds that festive flavor and an enjoyable texture within each cookie. Ensure the peppermint bark is evenly distributed without overmixing, maintaining the dough’s integrity for delightful cookies that melt in your mouth.
Step 7: Scoop the Dough
Using a cookie scoop or two spoons, portion out evenly sized balls of dough, about 1-2 tablespoons each, and place them onto the prepared baking sheets, leaving about 2 inches between each cookie. This spacing allows them to spread without merging into each other, ensuring that your Chocolate Peppermint Cookies bake evenly and maintain their shape.
Step 8: Add Candy Cane Topping
Sprinkle crushed candy canes on top of each cookie dough ball before baking. This will provide a festive crunch and a burst of peppermint flavor. Be generous but avoid piling them too high, as a little goes a long way in adding that holiday charm to your cookies.
Step 9: Bake to Perfection
Bake the cookies in your preheated oven for 10-12 minutes, or until the edges are set and the centers appear just slightly soft. Keep an eye on them, as visual cues are essential; you want them to be perfectly chewy and not overbaked. The key to delectable Chocolate Peppermint Cookies is to pull them out just before they seem fully done.
Step 10: Cool and Enjoy
Allow the cookies to cool on the baking sheet for about 5 minutes before transferring them to a wire rack. This cooling time allows them to firm up while still maintaining that mouthwatering chewiness. Once completely cool, serve and enjoy the delightful flavors that these Chocolate Peppermint Cookies bring to your holiday festivities!

Make Ahead Options
These delicious Chocolate Peppermint Bark Cookies are perfect for making ahead, saving you precious time during the busy holiday season! You can prepare the cookie dough and refrigerate it up to 24 hours in advance, keeping it covered in plastic wrap to prevent drying out. If you’re looking to plan even further ahead, you can freeze the scoop-sized dough balls for up to 3 months; just place them in a single layer on a baking sheet until solid, then transfer to a freezer bag. When you’re ready to bake, simply add an extra minute or two to the baking time for frozen dough. This way, you’ll have fresh, chewy Chocolate Peppermint Cookies whenever the craving strikes!
What to Serve with Chewy Chocolate Peppermint Bark Cookies
As you savor the festive flavors of these delightful cookies, consider pairing them with complementary dishes to enhance your holiday celebration.
-
Creamy Hot Cocoa: A warm cup of rich hot cocoa perfectly complements the chocolatey goodness of the cookies and enhances the peppermint flavor.
-
Vanilla Ice Cream: The cool creaminess of vanilla ice cream balances the cookies’ chewy texture, making it an indulgent match for dessert lovers.
-
Festive Fruit Salad: A refreshing fruit salad with cranberries and citrus can cut through the sweetness, adding a light and zesty touch to your holiday feast.
-
Nutty Biscotti: Pair with nutty biscotti for a delightful contrast in texture; they add a satisfying crunch that enhances your cookie experience.
-
Espresso or Coffee: A strong cup of brewed coffee or espresso highlights the chocolate’s depth, making for a delightful after-dinner treat.
-
Peppermint Tea: A warm cup of peppermint tea echoes the cookie’s flavors while providing a soothing end to your holiday meal.
-
Cheesecake Bars: Mini cheesecake bars offer a rich, creamy dessert that complements the cookies’ chocolate and peppermint, perfect for sharing during gatherings.
-
Spiced Mulled Wine: Enjoy a glass of spiced mulled wine alongside these cookies to infuse your festive atmosphere with warmth and complexity.
Embrace the spirit of the season with these delicious pairings, creating a memorable feast for family and friends.
Helpful Tricks for Chocolate Peppermint Cookies
-
Room Temperature Egg: Ensure your egg is at room temperature by soaking it in hot water for 5-10 minutes. This helps the dough mix smoothly and evenly.
-
Uniform Sizes: Use a cookie scoop to ensure even-sized dough balls. Adjust baking time for larger cookies to avoid uneven baking.
-
Do Not Overmix: When blending wet and dry ingredients, mix until just combined. Overmixing can lead to tough cookies instead of the desired chewy texture.
-
Chill the Dough: For a richer flavor, chill the dough for 30 minutes before baking. This allows the flavors to meld beautifully for your Chocolate Peppermint Cookies.
-
Watch the Time: Bake just until the edges are set and the centers are slightly soft. Pulling them from the oven at this point will ensure that delightful chewy center every time.
Chocolate Peppermint Cookie Variations
Feel free to get creative and make this recipe your own by incorporating delightful twists and substitutes!
-
Dairy-Free: Substitute unsalted butter with coconut oil or margarine to make these cookies dairy-free without compromising on flavor.
-
Gluten-Free: Swap all-purpose flour with a gluten-free flour blend for a festive treat that everyone can enjoy during the holidays.
-
Flavor Boost: Mix in dark chocolate or caramel chocolate squares for an extra layer of rich flavor that perfectly complements the peppermint.
-
Nutty Delight: Add chopped walnuts or pecans into the dough for a crunchy texture contrast that elevates these cookies to the next level.
-
Sweet Twists: Instead of crushed candy canes, try sprinkling the tops with mini marshmallows for a whimsical, hot cocoa-inspired finish.
-
Holiday Spice: Add a teaspoon of ground cinnamon or nutmeg to the dough for a warm, spiced twist that captures the essence of the season.
-
Minty Freshness: Swap the peppermint bark for crushed Oreos for a delightful cookies-and-cream variation that will surprise your taste buds!
-
Extra Crunch: Fold in some toasted coconut flakes for an exotic texture and flavor that will make your chocolate peppermint cookies truly stand out.
Dive into these variations and discover the exciting possibilities that await! You might even enjoy these sweet treats best when paired with a warm cup of hot cocoa or alongside a festive dessert tray filled with treats including Chocolate Chip Cookies and Sugar Cookies. Happy baking!
How to Store and Freeze Chocolate Peppermint Cookies
Room Temperature: Store cookies in an airtight container at room temperature for up to 3 days to maintain freshness and chewiness.
Fridge: If you want to prolong their life, keep the cookies in the fridge for up to a week in an airtight container, but you’ll lose some chewiness.
Freezer: For longer storage, freeze baked cookies in a single layer on a baking sheet, then transfer to a freezer-safe container. They can be frozen for up to 2 months.
Reheating: To enjoy your frozen Chocolate Peppermint Cookies, thaw at room temperature and warm in a preheated oven at 350°F (175°C) for 5-7 minutes.
Chocolate Peppermint Bark Cookies Recipe FAQs
How do I choose the best peppermint bark for these cookies?
Absolutely! When selecting peppermint bark, I recommend using high-quality chocolate like Ghirardelli, as it melts beautifully and adds a rich flavor to your cookies. Look for bark with visible peppermint pieces mixed in; this enhances both taste and texture.
What’s the best way to store leftover cookies?
Very simple! Store your cookies in an airtight container at room temperature for up to 3 days to keep them fresh and chewy. Alternatively, you can keep them in the fridge for up to a week. Just remember, refrigeration may cause them to lose a bit of chewiness.
Can I freeze the cookie dough for later use?
Absolutely! To freeze the cookie dough, scoop it into balls and arrange them in a single layer on a baking sheet. Place the sheet in the freezer until the balls are firm, about 1-2 hours. Afterward, transfer them to a freezer-safe container or freezer bag. They can be stored for up to 3 months! When you’re ready to bake, simply preheat your oven and add a couple of extra minutes to the baking time while they bake from frozen.
What should I do if my cookies come out too dry?
If your cookies end up too dry, check whether you overmixed the dough or perhaps baked them a tad too long. For next time, I suggest adding an extra tablespoon of butter or making sure you don’t overbake them—pull them out when the edges are set but the centers still look a bit soft.
Are there any dietary considerations for these cookies?
Yes, indeed! If you have gluten sensitivities, opt for gluten-free all-purpose flour, which works beautifully in this recipe. For dairy-free versions, you can substitute unsalted butter with margarine or coconut oil. As always, double-check that your peppermint bark and candy canes don’t contain allergens if you’re making them for guests with dietary restrictions.
How can I make these cookies even more festive?
Very easily! You can customize these chocolate peppermint cookies by adding seasonal mix-ins like white chocolate chips, chopped nuts, or even some dried cranberries for a pop of color. Don’t hesitate to get creative and make it a fun baking experience!
Chewy Chocolate Peppermint Cookies for Holiday Magic
Ingredients
Equipment
Method
- Preheat your oven to 350°F (175°C). Gather your ingredients and prepare baking sheets with parchment paper.
- Combine the dry ingredients: whisk together flour, cocoa powder, baking soda, and salt in a mixing bowl.
- Cream together butter, brown sugar, and granulated sugar until light and fluffy, about 2-3 minutes.
- Incorporate the room-temperature egg into the butter-sugar mixture until fully mixed.
- Gradually blend dry ingredients into the wet ingredients, mixing until just combined.
- Gently fold in chopped peppermint bark into the mixture.
- Scoop out portions of dough, approximately 1-2 tablespoons each, and place them on the baking sheets.
- Sprinkle crushed candy canes on top of each cookie dough ball before baking.
- Bake for 10-12 minutes or until edges are set and centers are slightly soft.
- Cool on the baking sheet for about 5 minutes before transferring to a wire rack.