

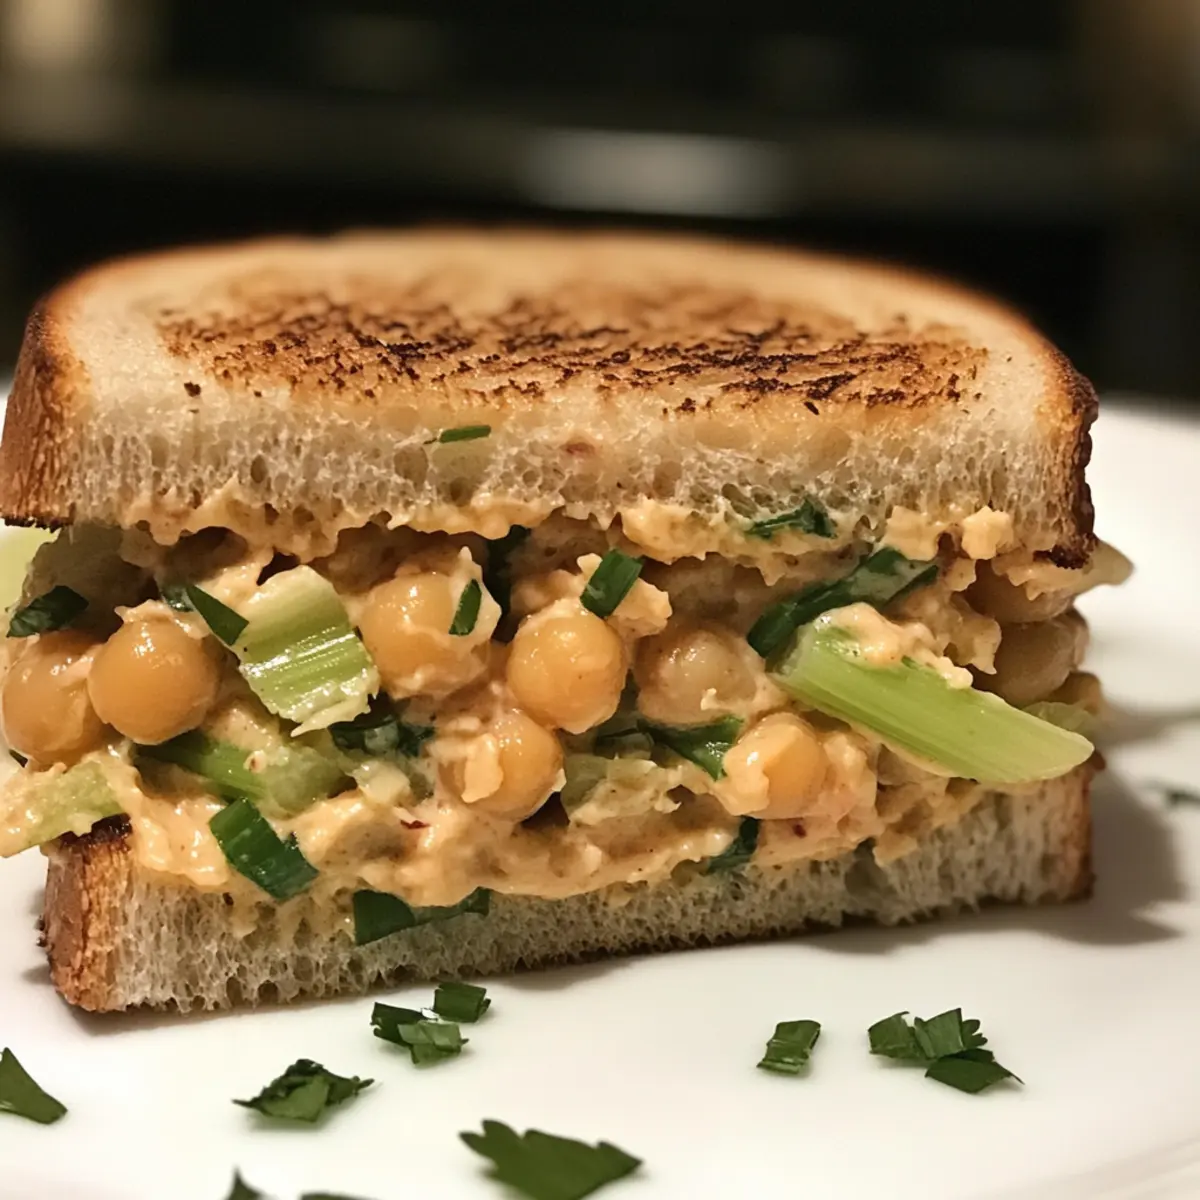
As I stood in my kitchen, a cascade of sunshine streamed through the window, illuminating the aromas of a delightful veggie twist on a classic comfort food. Enter my Chickpea Salad Melts, the warm and cozy alternative to traditional tuna melts that I can’t resist! These easy-to-make creations not only soothe cravings but also cater to both vegetarians and those seeking a scrumptious vegan option. Packed with protein-packed chickpeas and a blend of vibrant ingredients, they offer a hearty yet light meal perfect for lunch or dinner. With minimal prep and maximum flavor, these melts are destined to be a hit with the whole family. Are you ready to dive into a deliciously satisfying experience? Let’s get cooking!

Why are Chickpea Salad Melts a Must-Try?
Flavorful Delight: The creamy chickpea filling is zesty, savory, and utterly satisfying, offering a delicious twist on traditional melts.
Easy Preparation: With just a few quick steps, you can whip up these delightful sandwiches in no time, making them perfect for a busy weeknight.
Kid-Friendly: These tasty melts are a surefire hit with kids, making them an excellent choice for family dinners or lunchboxes. Try pairing them with a refreshing Mango Cucumber Salad for a balanced meal!
Versatile Options: Customize with your favorite spices or use tofu for a unique twist—there’s no limit to creativity.
Healthy Ingredients: Packed with protein and fiber, chickpeas provide a nutritious base that you can feel great about serving.
Perfect Anytime: Whether for lunch, dinner, or a cozy weekend snack, Chickpea Salad Melts are sure to satisfy any craving!
Chickpea Salad Melts Ingredients
For the Chickpea Salad
• Chickpeas – This protein-packed base can be used canned or cooked, making it super convenient.
• Celery – Adds a delightful crunch; swap it with diced bell pepper for a bit of sweetness.
• Dijon Mustard – Infuses a zesty kick; yellow mustard works well too if you prefer a milder taste.
• Mayonnaise – Binds the mixture for creaminess, or use vegan mayo for a dairy-free option.
• Onion – Offers aromatic sweetness; choose red for bold flavor or green for freshness.
• Lemon Juice – Brightens and balances flavors; vinegar can stand in when you’re out of lemons.
• Cheese (optional) – Melts into a rich addition; feel free to use dairy or your favorite vegan variety.
• Bread – The foundation for your melts; go for whole grain, gluten-free, or whichever type you love.
This Chickpea Salad Melts recipe is a delightful way to enjoy a cozy meal that’s hearty and fulfilling!
Step‑by‑Step Instructions for Chickpea Salad Melts
Step 1: Prepare Chickpeas
Begin by draining and rinsing 1 can of chickpeas under cold water. In a mixing bowl, use a fork or potato masher to mash the chickpeas until they’re slightly chunky, leaving some whole for texture. This usually takes about 2-3 minutes. Set the bowl aside as you prepare the other ingredients for your Chickpea Salad Melts.
Step 2: Mix Ingredients
Add ¼ cup diced celery and ¼ cup diced onion to the mashed chickpeas, followed by 2 tablespoons of Dijon mustard, 3 tablespoons of mayonnaise, and the juice of half a lemon. Stir everything together until well combined and creamy, ensuring all flavors meld beautifully. This mixing process should take about 2-3 minutes and will create the delightful filling for your melts.
Step 3: Assemble Sandwiches
Take two slices of your chosen bread—whole grain or gluten-free work well—and spoon the chickpea salad mixture generously between them. If desired, sprinkle a layer of cheese on top of the salad before closing the sandwich. Press the sandwich gently to help keep the filling intact as you prepare to toast them for your Chickpea Salad Melts.
Step 4: Heat and Toast
In a non-stick skillet, heat a dash of olive oil over medium heat, allowing it to warm for about a minute. Carefully place the assembled sandwiches in the skillet, cooking for about 3-5 minutes on each side. You’ll know they’re ready to flip when they’re golden-brown and the cheese (if added) starts to melt. Flip them gently to avoid spilling the filling.
Step 5: Serve and Enjoy
Once both sides of the Chickpea Salad Melts are perfectly toasted and golden, remove them from the skillet. Let them cool for a minute before slicing each sandwich in half. Serve them hot, and feel free to pair with a side of pickles or a fresh salad for a complete meal full of flavor!
What to Serve with Chickpea Salad Melts?
Elevate your Chickpea Salad Melts experience with these delightful pairings that bring warmth and pizzazz to your table!
- Crispy French Fries: A classic side that offers the ultimate crunch, perfect for dipping into your favorite sauce alongside the melts.
- Fresh Green Salad: Bright and zesty, a mix of greens with a light vinaigrette will beautifully balance the rich flavors of the melts.
- Pickles and Olives: Tangy and briny, this combo adds a refreshing bite that complements each creamy, savory mouthful.
- Sweet Potato Wedges: Roasted to crispy perfection, their natural sweetness pairs wonderfully with the zesty chickpea filling. A win-win for texture and flavor!
- Roasted Vegetables: Seasonal veggies like zucchini and bell peppers will add vibrant color and enhance the overall meal’s freshness.
- Tomato Soup: Creamy and comforting, a warm bowl of tomato soup is a delightful counterpart to your melts, making every bite feel cozy and satisfying.
- Chilled Lemonade: Refreshing and invigorating, this zesty drink contrasts beautifully with the savory flavors, offering a burst of sweetness.
- Chocolate Chip Cookies: For dessert, the classic sweetness of cookies provides a delightful end to a hearty meal, leaving all taste buds happy!
Make Ahead Options
These Chickpea Salad Melts are a fantastic option for busy home cooks looking to save time during the week! You can prepare the chickpea salad mixture up to 3 days in advance, storing it in an airtight container in the refrigerator to maintain freshness. To prevent the salad from becoming soggy, keep the assembled sandwiches separate until you’re ready to toast them. When it’s time to eat, simply spread the chickpea salad between your bread, add any cheese, and toast in a skillet for 3-5 minutes on each side until golden and melt-in-your-mouth delicious. This way, you’ll enjoy a cozy, homemade meal with minimal effort!
How to Store and Freeze Chickpea Salad Melts
Fridge: Keep any leftover Chickpea Salad Melts in an airtight container in the fridge for up to 3 days to maintain freshness.
Freezer: For longer storage, wrap individual sandwiches tightly in plastic wrap and foil, then freeze for up to 1 month.
Reheating: To reheat, place frozen sandwiches in the skillet over medium heat for about 5-7 minutes per side until heated through, ensuring they’re golden and crispy.
Make-Ahead: Prepare the chickpea salad filling in advance and store it separately; assemble and toast the sandwiches when ready to serve for optimal texture.
Chickpea Salad Melts Variations & Substitutions
Eager to personalize your Chickpea Salad Melts? Let your creativity shine with these fun twists and substitutions!
-
Low-Carb: Replace chickpeas with crumbled tofu for a lighter version without sacrificing flavor. Perfect for those watching their carbs!
-
Spice It Up: Add a pinch of curry powder or smoked paprika for an exciting flavor kick. These spices can bring a whole new personality to your melts!
-
Crunchy Alternative: Swap celery for diced pickles or sweet relish to add a tangy crunch that’ll excite your taste buds. It’s a lovely twist reminiscent of classic tuna salad!
-
Herb Infusion: Stir in fresh herbs like dill, cilantro, or parsley for a burst of freshness. This offers an aromatic enhancement that dances in every bite.
-
Vegan Creaminess: Use mashed avocado instead of mayonnaise to create a creamy, plant-based filling. Avocado adds healthy fats and a delightful richness!
-
Zesty Kick: Incorporate a small amount of sriracha or hot sauce for some delightful heat. This provides an exciting contrast to the creamy goodness of your melts.
-
Crustless Wonder: Serve the chickpea salad filling on a bed of lettuce instead of between slices of bread for a gluten-free option. This lightens things up while offering a fresh crunch!
-
Cheesy Delight: For a classic touch, go with slices of pepper jack cheese for a spicy, melty experience. This sumptuous addition is sure to please cheese lovers!
Feeling inspired? Pair these delicious melts with a refreshing Strawberry Spinach Salad or a hearty BBQ Chicken Salad for a complete meal that the whole family will love!
Expert Tips for Chickpea Salad Melts
-
Mash Properly: Ensure to mash the chickpeas just enough to leave some texture. Over-mashing can lead to a mushy filling that lacks variety in each bite.
-
Choosing Bread: Opt for thick slices of bread for better structure. Thin bread may get too soggy from the creamy filling, losing that delightful crunch.
-
Customize Spices: Don’t hesitate to experiment with spices like garlic powder or paprika. They can elevate the flavor profile of your Chickpea Salad Melts!
-
Toasting Tips: Press down gently on the sandwiches while toasting to achieve an even, golden-brown crust. This extra step helps with crispiness all around.
-
Storage Suggestions: Store any leftover chickpea salad in an airtight container for up to 3 days. Reheat your sandwiches in a skillet for the best results—this keeps them crispy!
-
Cheese Substitution: For a vegan version, use nutritional yeast or vegan cheese that melts well. This gives that rich taste you desire without dairy!
Chickpea Salad Melts Recipe FAQs
How do I choose the right chickpeas for this recipe?
Absolutely! You can use either canned or cooked chickpeas. If you choose canned chickpeas, select a can that doesn’t have added sodium or preservatives for the best flavor. Always rinse them under cold water to remove excess salt and any canning liquid.
How should I store leftover Chickpea Salad Melts?
For the fridge, place any leftovers in an airtight container; they can stay fresh for up to 3 days. This will help keep the bread from getting soggy. When you’re ready to enjoy them, I recommend reheating in a skillet or toaster oven to restore that delicious crispiness!
Can I freeze Chickpea Salad Melts?
Absolutely! If you want to freeze them, wrap each sandwich securely in plastic wrap, followed by foil to prevent freezer burn. They can last up to 1 month in the freezer. When you’re ready to eat, just heat them in a skillet over medium heat for about 5-7 minutes on each side after thawing, and you’ll have a delightful meal ready to go!
What if my Chickpea Salad filling is too dry?
If you find your filling a bit dry, simply add a tablespoon more of mayonnaise or a splash of lemon juice. Stir it in well until the desired creaminess is achieved. If you want more flavor, a dash of hot sauce can also add a delightful kick!
Is this recipe suitable for my allergies or dietary restrictions?
Very! This Chickpea Salad Melts recipe is naturally vegetarian and can easily be made vegan by using vegan mayo. Also, always check your bread choice for allergens if you’re catering to gluten-free diets, and ensure that any cheese used is dairy-free as needed.
What can I substitute for celery in this recipe?
Great question! If you’re not a fan of celery, diced bell pepper or shredded carrots are excellent alternatives that will bring their crunch and sweetness to the dish. You could even try using finely chopped pickle for a tangy flavor boost.
Chickpea Salad Melts: A Cozy Vegetarian Comfort Food Fix
Ingredients
Equipment
Method
- Begin by draining and rinsing the chickpeas under cold water. Mash them in a mixing bowl until slightly chunky and set aside.
- Mix in the diced celery, diced onion, Dijon mustard, mayonnaise, and lemon juice until well combined and creamy.
- Spoon the chickpea salad mixture generously between two slices of bread. Optional: sprinkle cheese on top before closing the sandwich.
- Heat olive oil in a non-stick skillet over medium heat. Cook the sandwiches for about 3-5 minutes on each side until golden-brown.
- Remove from skillet, cool slightly, slice each sandwich in half, and serve hot.