

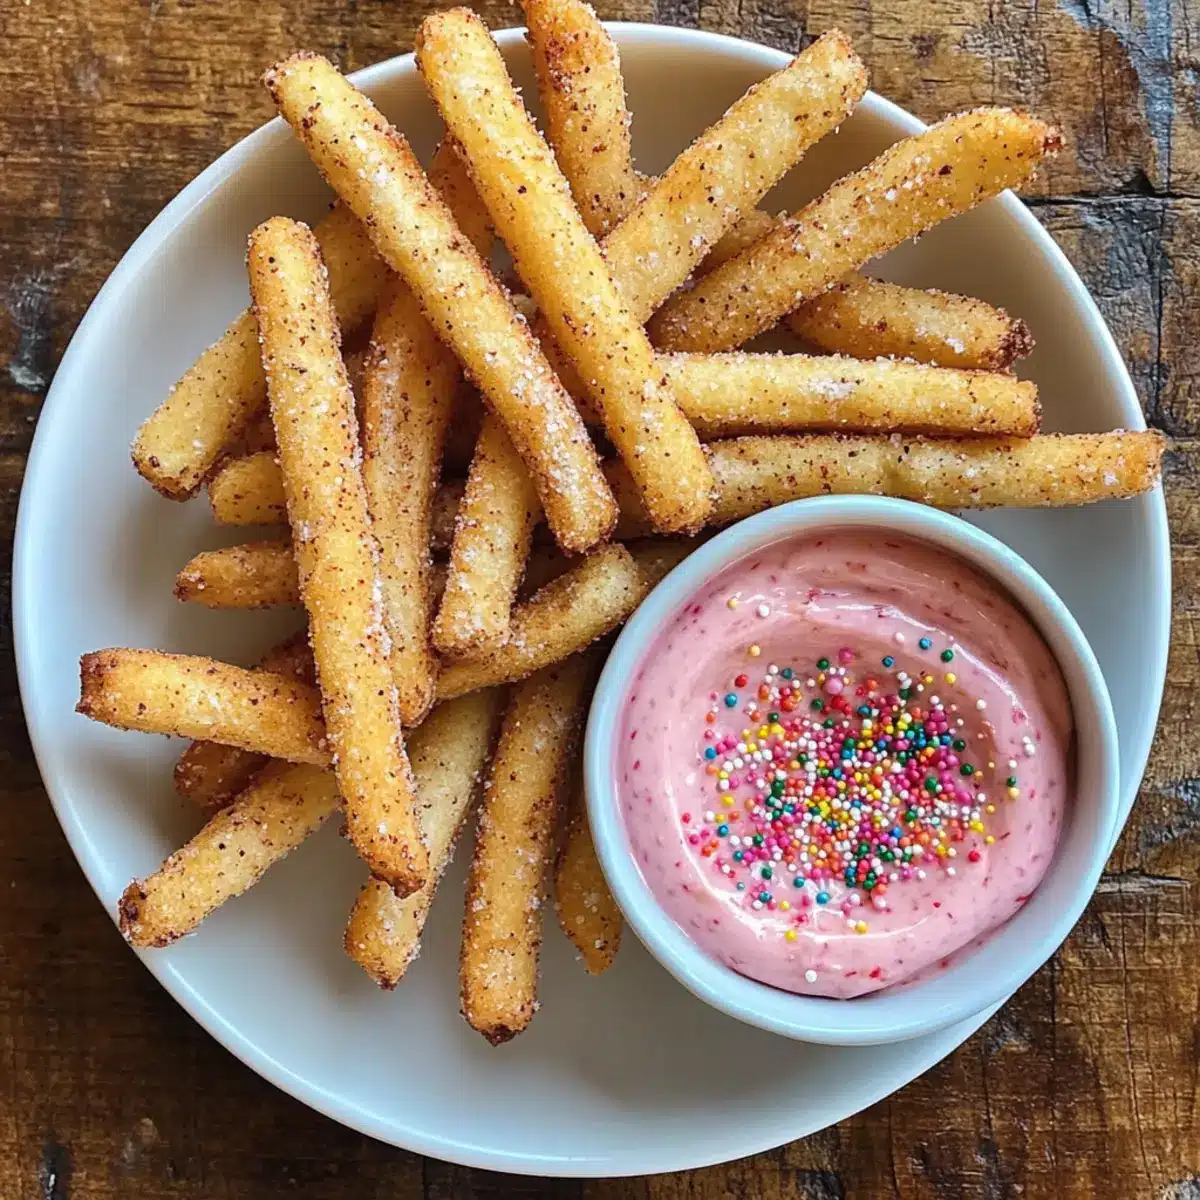
As the sun sets and a gentle breeze dances through the kitchen, I find myself daydreaming about a dessert that captures the joy of childhood while being perfect for all ages. Enter the delightful Cookie Fries with Frosting Dip—these innovative treats are not your average cookies! With their buttery softness and playful shape, they bring a fun twist to your dessert table and spark joy during family baking sessions. What makes these cookie fries irresistible is not just their unique presentation; they’re quick to whip up and provide an interactive experience that everyone can enjoy. Imagine dipping those crispy, cookie fries into a creamy frosting dip—a sweet collaboration that will tickle your taste buds. Are you ready to indulge in this delightful dessert? Let’s dive into the recipe and make some sugary memories!
Why are Cookie Fries so Irresistible?
Playful Presentation: These Cookie Fries switch up traditional cookies by embracing a fun shape, making them perfect for sharing at gatherings or parties.
Interactive Desserts: Dipping them into the sweet frosting adds an engaging twist to your dessert, creating delightful moments for both kids and adults.
Quick & Easy: With straightforward steps, this recipe is ideal for novice bakers or anyone short on time. In just a flash, you can whip up these tasty treats!
Versatile & Customizable: Feel free to experiment with different dip flavors or cookie add-ins like chocolate chips or nuts for a personalized touch. Plus, check out Fruit Dip for another fun pairing!
Deliciously Decadent: With a perfect balance of crispy exterior and soft, buttery center, these cookies are sure to please any sweet tooth looking for something unique. Who wouldn’t love cookie fries?
Cookie Fries with Frosting Dip Ingredients
For the Cookie Fries
- All-purpose flour – This gives your cookie fries their structure; gluten-free flour can be used for a gluten-free version.
- Cornstarch – It adds tenderness and lightness to the cookies.
- Kosher salt – Enhances the cookies’ flavor; if using table salt, adjust the quantity as it is more potent.
- Baking powder – An essential leavening agent that helps the cookies rise; avoid substituting unless using self-rising flour.
- Unsalted butter – Provides rich flavor and moisture; can be replaced with margarine or coconut oil, but texture may differ.
- Brown sugar – Adds sweetness and moisture, creating a chewy texture; while white sugar can be used, it will alter the flavor and texture.
- Large egg – Binds all ingredients together; a flax egg or applesauce can serve as a vegan alternative.
- Pure vanilla extract – Enhances sweetness and flavor, though imitation vanilla can be used as a cost-effective substitute.
- Colorful edible confetti or sprinkles – A fun decoration to make your cookie fries pop; chocolate chips or nuts can be alternatives for added flavor.
For the Frosting Dip
- Heavy cream – Adds richness to the dip; for a lighter option, consider half-and-half or milk.
- Cream cheese – Provides a creamy base for the dip; you can substitute with Greek yogurt for a lighter version.
- Powdered sugar – Sweetens the dip; sugar substitutes can be used, but sweetness may vary.
This delightful assembly of ingredients for your Cookie Fries with Frosting Dip is designed to create a playful dessert experience that’s easy and enjoyable for everyone. Happy baking!
Step‑by‑Step Instructions for Cookie Fries with Frosting Dip
Step 1: Prepare Baking Sheets
Start by lining 2 large baking sheets with parchment paper. This prevents the cookie fries from sticking and makes clean-up a breeze. Make sure the sheets are flat and even, ensuring that your cookies will bake uniformly as you prepare to create your delicious Cookie Fries with Frosting Dip.
Step 2: Mix Dry Ingredients
In a mixing bowl, whisk together the all-purpose flour, cornstarch, kosher salt, and baking powder until well combined. This dry mix will form the backbone of your cookie fries, providing the right texture. Set the bowl aside to keep your dry ingredients ready for the next step, as patience pays off in baking!
Step 3: Cream Butter and Sugar
Using a hand mixer or stand mixer, beat the unsalted butter and brown sugar in a large mixing bowl until the mixture is light and fluffy, about 2 minutes. You’ll know it’s ready when it has increased in volume and is smooth in texture. This butter-sugar combination is crucial for achieving the soft, buttery center of your Cookie Fries.
Step 4: Incorporate Egg and Vanilla
Add a large egg and pure vanilla extract to the creamed butter and sugar. Beat the mixture for about 30 seconds until everything is well combined and the batter appears smooth and glossy. This step enhances the flavor and binds all your delicious ingredients together, ensuring that your cookie fries are delightful from the first bite.
Step 5: Combine Mixtures
Gradually add your dry ingredient mixture to the wet ingredients, mixing just until combined. Be cautious not to overmix, as this will affect the softness of your cookie fries. At this stage, fold in colorful edible confetti or sprinkles, giving your Cookie Fries a playful look ready for dipping fun!
Step 6: Chill Dough
Cover the dough with plastic wrap and refrigerate it for about 30 minutes. Chilling the dough helps prevent spreading during baking, ensuring your cookie fries maintain their cute shapes. While you wait, tidy up your space and dream about the deliciousness you’re about to create.
Step 7: Roll Out Dough
Once chilled, dust a clean surface with flour and take one-third of the dough. Roll it out to about 3/8” thickness. This thickness will give your Cookie Fries their signature crispness while keeping the center soft. You want to see a light sprinkle of flour as you work, which makes rolling easier and prevents sticking.
Step 8: Cut Cookie Fries
Using a crinkle cutter or a knife, cut the dough into shapes that are ½ inch wide and 4 inches long. Aim for uniform shapes to ensure even baking. These playful cookie fries are getting exciting! Place them on your prepared baking sheets, making sure they’re spaced out for airflow.
Step 9: Freeze Cookies
Place the baking sheets with the cookie fries in the freezer for about 20 minutes. Freezing prior to baking helps the cookies hold their shape and prevents them from spreading too much in the oven. It’s worth the wait to achieve those perfect, crispy edges for your Cookie Fries with Frosting Dip!
Step 10: Preheat Oven
As your cookie fries freeze, preheat your oven to 350°F (175°C). This temperature is ideal for creating that soft interior while still achieving a light golden color on the outside. Once preheated, you’ll be ready for the baking magic to happen.
Step 11: Bake
Remove one tray from the freezer and place it in the preheated oven. Bake the cookie fries for about 10–12 minutes, or until they are soft and lightly golden. Keep a close eye on them; a slight puff and a faint golden hue indicate that they’re perfectly baked and ready for the grand reveal.
Step 12: Prepare Dip
While the cookies cool, it’s time to whip up the frosting dip! In a mixing bowl, combine heavy cream, cream cheese, and powdered sugar. Mix until smooth and creamy. This dreamy dip pairs beautifully with your Cookie Fries, making each bite a sweet, indulgent treat that everyone will love!
What to Serve with Buttery Cookie Fries with Sweet Frosting Dip
As laughter fills the air and sweet aromas waft through your kitchen, it’s the perfect opportunity to create a memorable dessert table.
-
Fresh Fruit Skewers: Bright, juicy fruit pairs wonderfully with cookie fries, providing a fresh contrast to their sweetness and crunchy dip.
-
Chocolate Chips: Serve a bowl of semi-sweet chocolate chips for an indulgent and fun addition that complements the sweetness of the frosting dip.
-
Whipped Cream: Light and airy, a dollop of whipped cream elevates the experience, adding a creamy texture that pairs perfectly with the cookie fries.
-
Ice Cream: A scoop of vanilla or chocolate ice cream alongside the cookie fries transforms it into a delightful dessert sundae, making it a special treat.
-
Milkshakes: Creamy milkshakes, whether chocolate, vanilla, or strawberry, are an enjoyable pairing that brings a nostalgic twist to your dessert experience.
-
Coffee or Hot Cocoa: A warm drink such as coffee or hot cocoa adds a cozy vibe and contrasts nicely against the cold sweetness of the frosting dip.
-
Mini Brownies: Chewy brownie bites provide a rich, chocolatey counterpart to your cookie fries, creating a delightful combination of textures and flavors.
-
Sprinkles: Set out a variety of sprinkles for guests to add fun, colorful flair as they dip their cookie fries, enhancing the playful aspect of the dessert.
These pairing suggestions offer a delightful array of flavors and textures, ensuring that your Cookie Fries with Frosting Dip become the star of the dessert table!
Make Ahead Options
These Cookie Fries with Frosting Dip are perfect for meal prep enthusiasts! To get ahead on your baking, you can prepare the cookie dough up to 24 hours in advance. Simply mix the ingredients, scoop them into shapes, and freeze the cookie fries on the baking sheets. Once frozen, transfer them to an airtight container or freezer bag, where they can be stored for up to 3 months. When you’re ready to bake, just remove the desired amount from the freezer, preheat the oven, and bake directly from frozen—there’s no need to thaw! This way, you’ll have the same delicious, melted-in-your-mouth cookie fries ready to dip at a moment’s notice, saving you time for more family fun.
Expert Tips for Cookie Fries with Frosting Dip
-
Watch the Baking Time: Keep a close eye on the cookies while baking; remove them when they are just lightly golden to avoid overbaking, which can lead to hard cookie fries.
-
Proper Dough Temperature: Ensure your butter is softened, not melted, for optimal mixing. This prevents greasy dough and ensures the perfect texture in your Cookie Fries with Frosting Dip.
-
Chill for Success: Always chill the dough before rolling out; this helps prevent spreading and guarantees that your cookie fries keep their fun shape while baking.
-
Experiment with Dips: Don’t hesitate to get creative with your frosting dip! Try adding flavors like chocolate or caramel to customize your Cookie Fries experience.
-
Uniform Size Matters: Cut the cookie fries into uniform sizes for even baking. This ensures that every piece is perfectly cooked, adding to the fun and enjoyment.
Cookie Fries with Frosting Dip Variations
Feel free to embrace your creativity and tailor these delightful cookie fries to your taste!
-
Gluten-Free: Swap all-purpose flour with gluten-free flour blend for a gluten-free treat that everyone can enjoy.
-
Flavor-Infused: Experiment with almond or coconut extracts instead of vanilla to add your unique twist to the cookies’ flavor.
-
Colorful Sprinkles: Use seasonal or themed sprinkles to match the occasion, creating cookie fries that are not only delicious but visually captivating.
-
Vegan Alternative: Substitute the egg with a flax egg or applesauce and use coconut oil for a different flavor profile while keeping it vegan.
-
Chocolate Delight: For a decadent twist, fold in mini chocolate chips into the dough, making every bite even more delightful.
-
Frosting Flavor Boost: Transform the frosting dip by incorporating a spoonful of cocoa powder for a rich chocolate fix or caramel for a luxurious touch.
-
Nutty Crunch: Add crushed nuts or cookie crumbles as toppings on the dip for an exciting texture that adds extra flavor.
-
Chilled Treat: Serve the frosting dip chilled, or even freeze it for a fun, ice cream-like experience that takes your cookie fries to the next level.
Whether you’re looking to brighten up a gathering or indulge in a personal treat, these variations promise to keep your cookie fries exciting and satisfying. And if you ever want to mix it up further, consider serving them with a light and fruity Fruit Dip for a refreshing contrast, or try something savory like Breakfast Tacos Avocado to round out your dessert platter! Happy baking!
How to Store and Freeze Cookie Fries
Room Temperature: Store cookie fries in an airtight container at room temperature for up to 5 days. This helps maintain their soft, buttery texture while keeping them fresh.
Fridge: If you prefer a chilled treat, you can refrigerate the cookie fries for up to a week. Just ensure they’re in an airtight container to prevent dryness.
Freezer: For longer storage, freeze the baked cookie fries for up to a month. Place them in a single layer on a baking sheet to freeze, then transfer to a freezer-safe bag or container.
Reheating: To enjoy warm cookie fries, simply reheat them in the oven at 300°F (150°C) for about 5–7 minutes. Serve with frosting dip for a delightful dessert experience!
Cookie Fries with Frosting Dip Recipe FAQs
How do I choose the right ripeness of my ingredients?
Absolutely! When selecting your ingredients, make sure your butter is slightly softened but not melted; this ensures optimal mixing. If you’re using eggs, choose large eggs that are fresh—typically, a date on the carton indicates ripeness. For your optional add-ins, look for sprinkles or edible decorations that are vivid and vibrant, avoiding any that seem faded or clumped.
How should I store my cookie fries?
I recommend storing your cookie fries in an airtight container at room temperature for up to 5 days. This keeps their delightful soft and buttery texture intact. If you prefer, you can refrigerate them for a week. Just make sure they are in an airtight container to prevent them from becoming dry or hard!
Can I freeze cookie fries, and if so, how?
Absolutely! To freeze your cookie fries, first bake them and let them cool completely. Then, arrange them in a single layer on a baking sheet and freeze until solid. Once frozen, transfer them to a freezer-safe bag or container, separating layers with parchment paper, and store for up to a month. When you’re ready to enjoy, reheat at 300°F (150°C) for about 5–7 minutes.
What are some common issues I might encounter when making cookie fries?
Very! A common issue is overmixing the dough, which can make your cookie fries tough instead of soft. To avoid this, mix until just combined and fold in any add-ins like sprinkles gently. Also, remember to watch your baking time closely; underbaked cookies will be soft and cheeky, while overbaked ones can become hard. Keep an eye on those precious treats!
Are there any dietary concerns I should consider?
Of course! If you’re making these for anyone with allergies, be cautious of common allergens like eggs, dairy, and gluten. For a vegan version, use a flax egg or applesauce, and swap cream cheese for Greek yogurt in the dip. You can also use gluten-free flour to accommodate those who need gluten-free options. Always check labels to ensure ingredients meet dietary requirements—it’s a smart habit to keep your loved ones safe.
Can I modify the frosting dip flavors?
Very much so! Customizing the frosting dip is a fun way to enhance your Cookie Fries experience. Try adding cocoa powder for a chocolatey flavor or caramel syrup for a sweeter twist. For something refreshing, you could even mix in a bit of citrus zest. The more, the merrier—experiment and find your perfect match!
Delicious Cookie Fries with Frosting Dip for Fun Treats
Ingredients
Equipment
Method
- Prepare Baking Sheets: Line 2 large baking sheets with parchment paper.
- Mix Dry Ingredients: Whisk together flour, cornstarch, salt, and baking powder.
- Cream Butter and Sugar: Beat butter and brown sugar until light and fluffy.
- Incorporate Egg and Vanilla: Add egg and vanilla, mix until combined.
- Combine Mixtures: Gradually add dry ingredients to wet, fold in sprinkles.
- Chill Dough: Wrap dough and refrigerate for 30 minutes.
- Roll Out Dough: Roll one-third of the dough to 3/8” thickness.
- Cut Cookie Fries: Cut dough into ½ inch wide and 4 inches long shapes.
- Freeze Cookies: Freeze cookie fries for about 20 minutes.
- Preheat Oven: Preheat oven to 350°F (175°C).
- Bake: Bake cookies for 10–12 minutes until soft and lightly golden.
- Prepare Dip: Mix heavy cream, cream cheese, and powdered sugar until smooth.