

As I stood at my kitchen counter, the sun streaming in and the sweet aroma of ripe bananas filling the air, I couldn’t help but smile at the thought of making Banana Peanut Butter Baked Oatmeal Cups. This delightful treat combines the creamy richness of peanut butter with the natural sweetness of bananas, creating a quick breakfast that’s not just wholesome but also a breeze to prepare. With no mixer required, these bites of goodness are perfect for meal prep, allowing you to savor a hearty snack any time of the day without a fuss. Plus, their make-ahead nature means you’ll always have something ready for those busy mornings! Ready to whip up a batch that will keep your taste buds happy and your mornings stress-free? Let’s dive in!
Why Are These Oatmeal Cups So Amazing?
Quick Meal Prep: These Banana Peanut Butter Baked Oatmeal Cups are the ultimate solution for busy mornings, ready in no time!
Deliciously Nutritious: Each bite bursts with the delightful combo of sweet bananas and creamy peanut butter, making them a guilt-free indulgence.
No Mixer Needed: Say goodbye to complicated kitchen gadgets! A simple bowl is all you need for preparation.
Versatile Variations: Feel free to customize with your favorite ingredients – think blueberries or chocolate chips for an extra treat!
Perfect Snacks: Great for kids and adults alike, they are hearty enough to keep you full and satisfied between meals.
For more quick and delicious meals, check out my Baked Bbq Chicken or try the flavorful Garlic Butter Brazilian for a dinner that won’t disappoint!
Banana Peanut Butter Baked Oatmeal Cups Ingredients
• Prepare to create these mouthwatering Banana Peanut Butter Baked Oatmeal Cups with ease!
For the Oatmeal Cups
- Mashed Banana – Use ripe bananas for maximum sweetness and moisture.
- Natural Peanut Butter – Choose a smooth variety for easy mixing and a rich flavor.
- Milk – Any milk or milk substitute like almond milk will work to create a moist batter.
- Old-Fashioned Rolled Oats – This is the base that gives heartiness; avoid quick-cooking oats to maintain texture.
- Baking Powder – Helps the oatmeal cups rise and attain the perfect fluffiness.
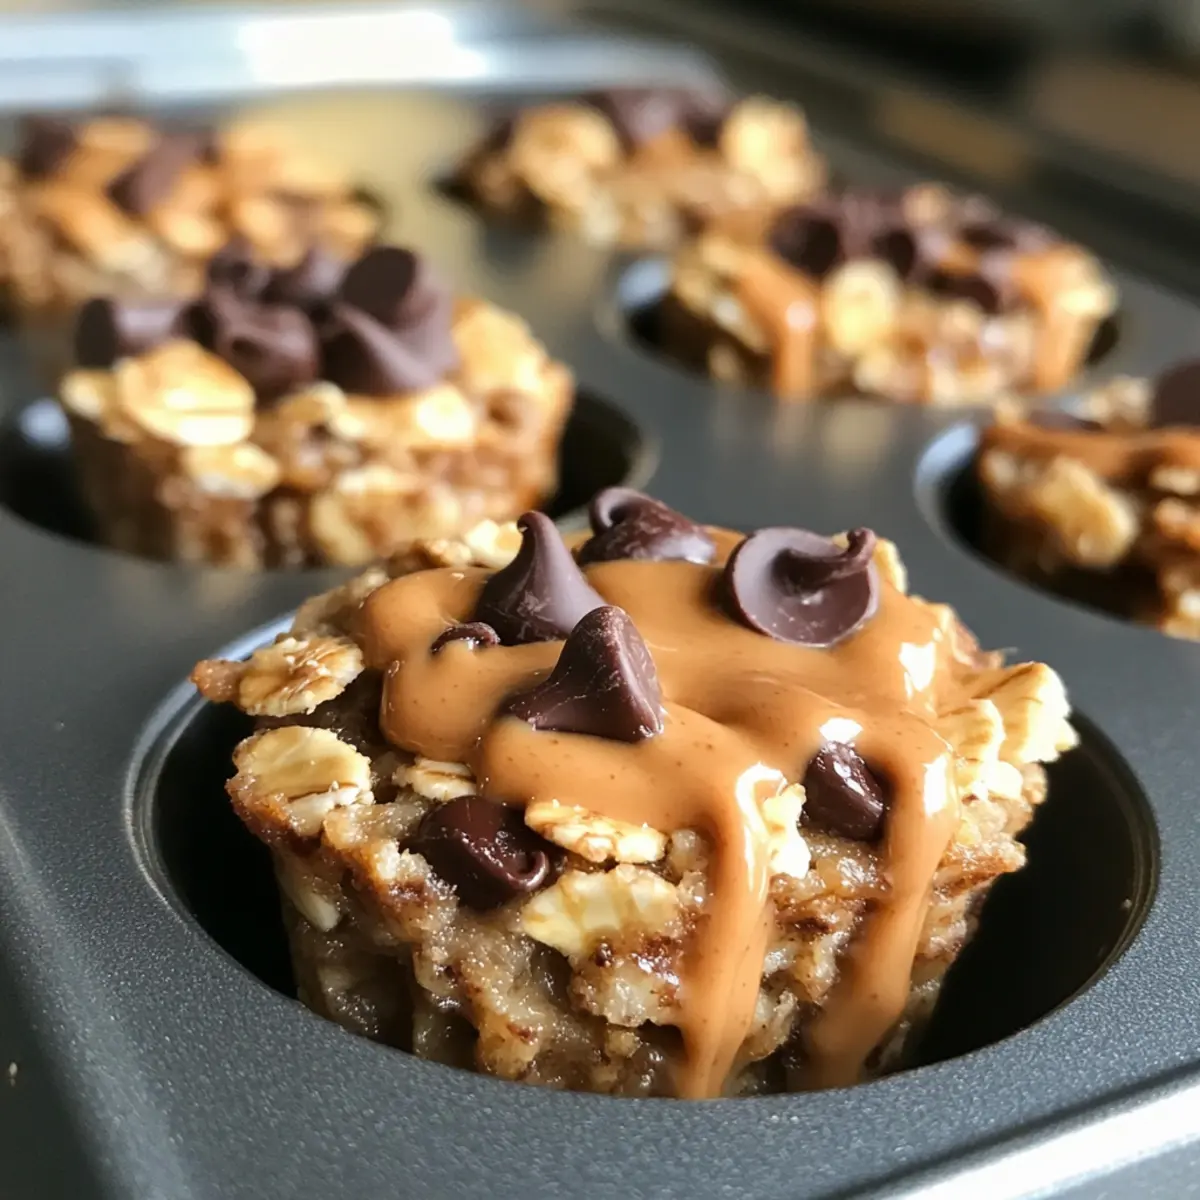
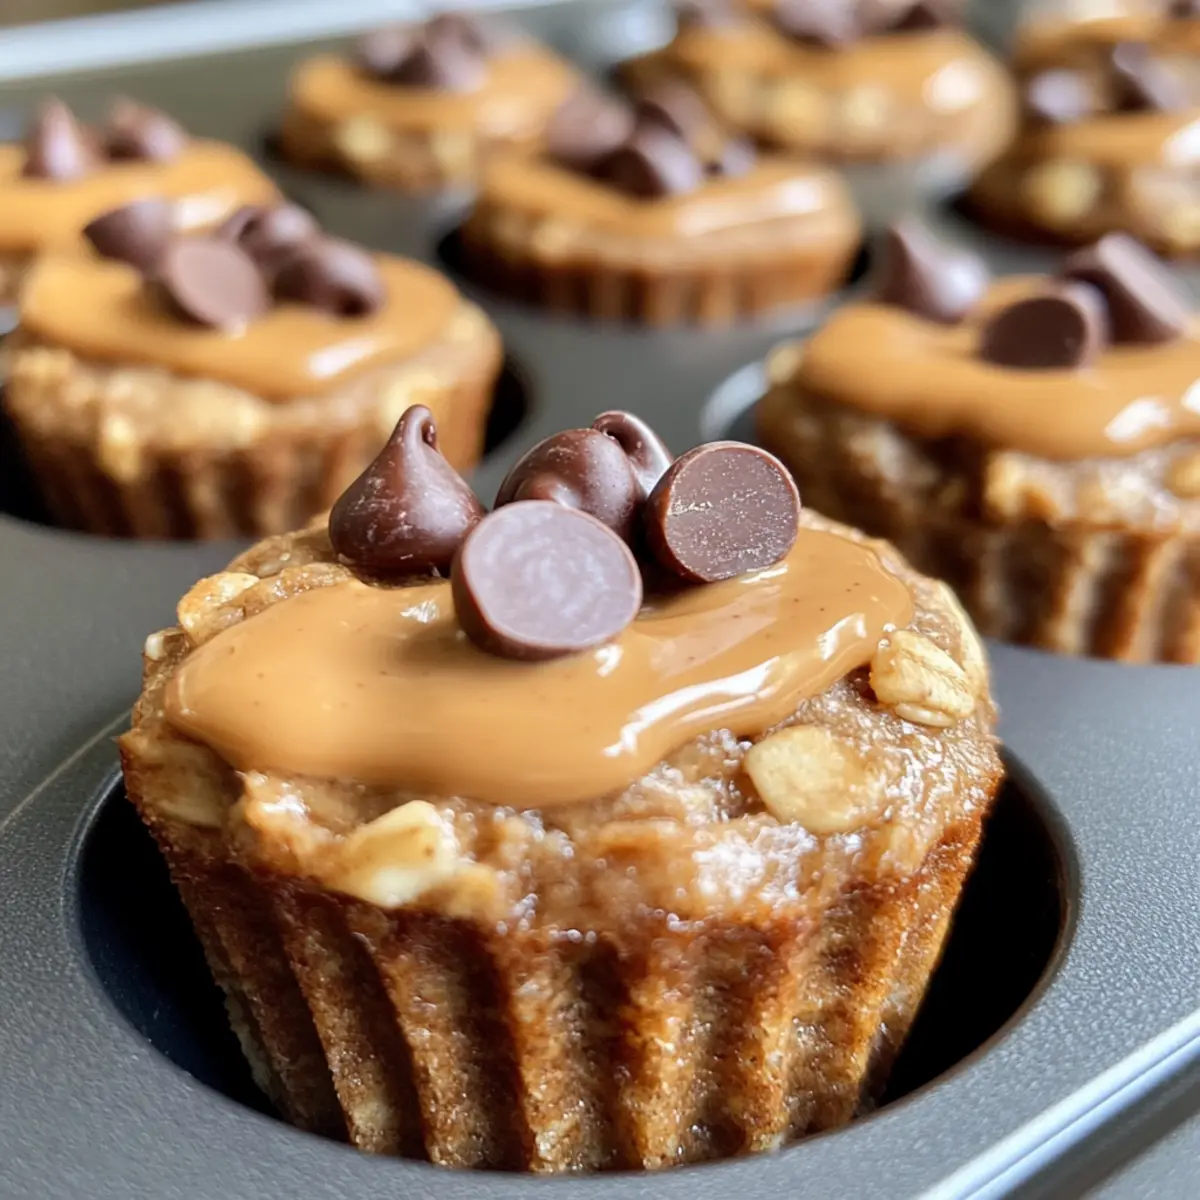
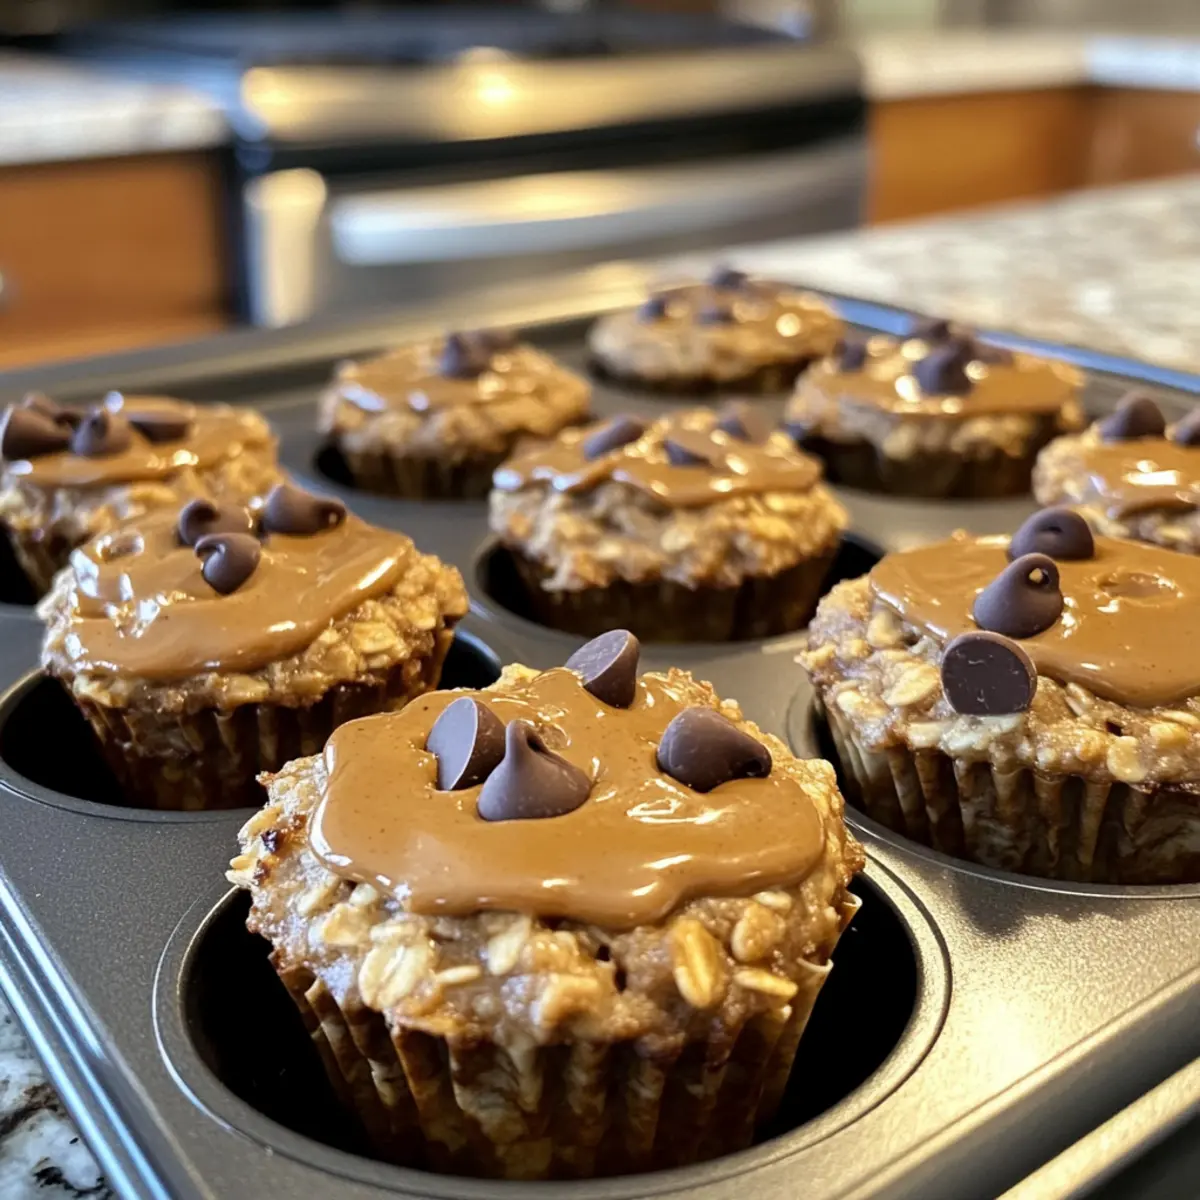
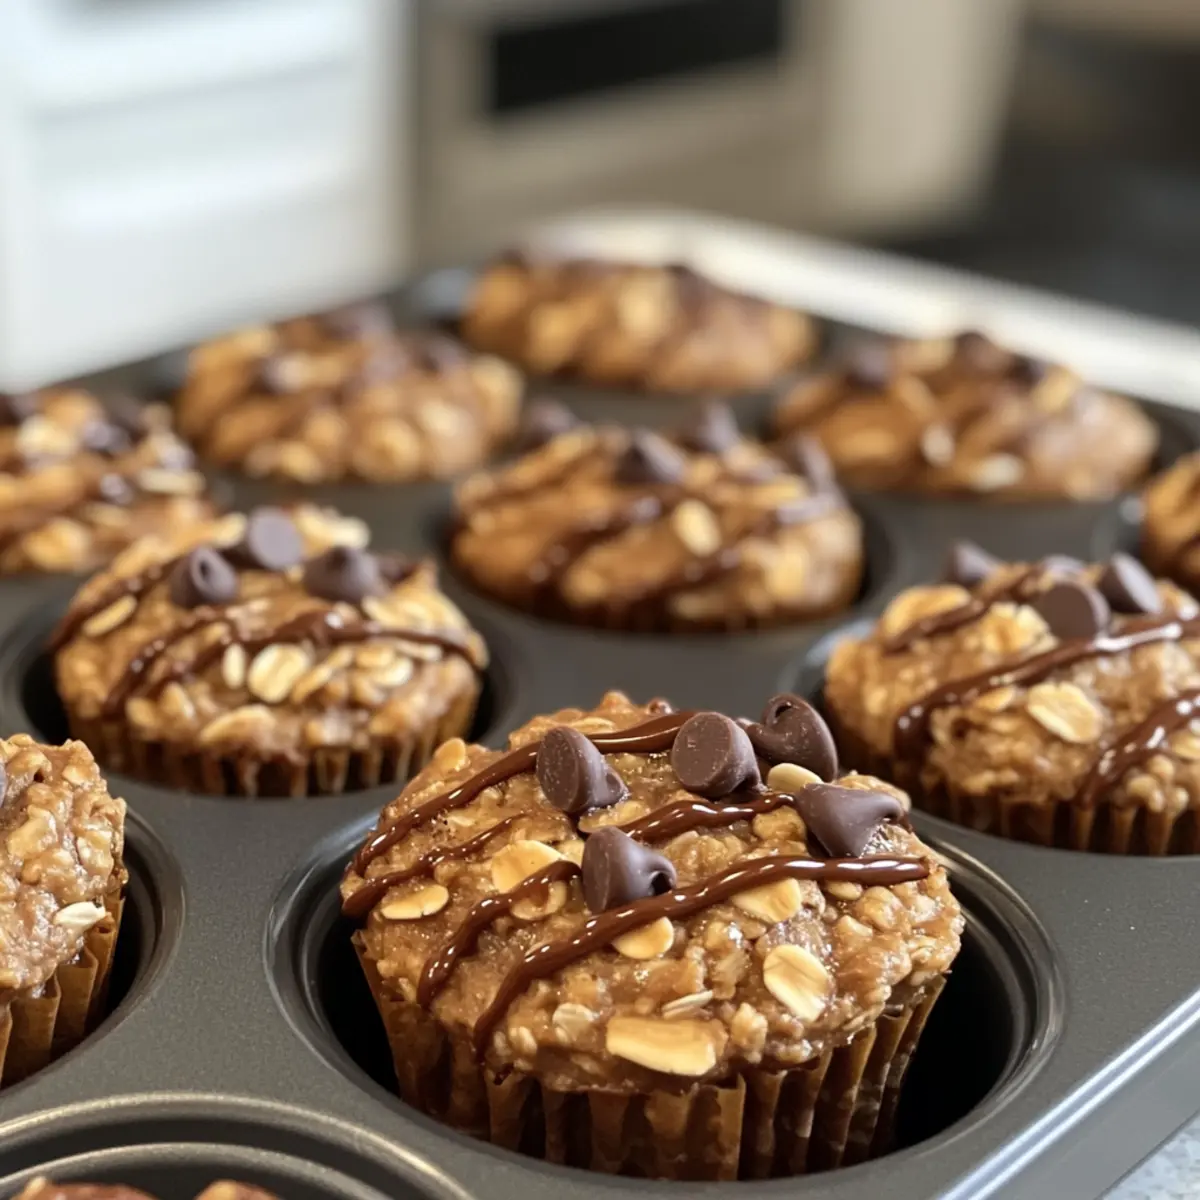
- Chocolate Chips – Add a lovely sweetness; consider nuts or dried fruit as alternatives for variety.
Optional Toppings
- Extra Peanut Butter – Drizzle on top for an extra nutty flavor boost.
- Sliced Bananas – Fresh banana slices make a delicious and eye-catching topping.
Dive into the world of homemade goodness with these Banana Peanut Butter Baked Oatmeal Cups for a delightful breakfast or healthy snack!
Step‑by‑Step Instructions for Banana Peanut Butter Baked Oatmeal Cups
Step 1: Preheat the Oven
Begin by preheating your oven to 350°F (175°C). While the oven heats up, prepare a muffin pan by greasing it lightly or using muffin liners to prevent sticking. This ensures that your Banana Peanut Butter Baked Oatmeal Cups will come out effortlessly and maintain their shape.
Step 2: Mix the Wet Ingredients
In a large mixing bowl, combine the mashed bananas, natural peanut butter, and milk. Use a fork or a whisk to blend these ingredients until smooth and creamy, ensuring there are no lumps. The mixture should have a rich, cohesive texture, infusing your oatmeal cups with delightful flavor from the very start.
Step 3: Combine Dry Ingredients
Next, add old-fashioned rolled oats and baking powder to the wet mixture. Stir these ingredients together until they are evenly distributed, creating a thick and hearty batter. You should see the oats begin to absorb some of the moisture while maintaining a sticky texture, perfect for forming your Banana Peanut Butter Baked Oatmeal Cups.
Step 4: Add Chocolate Chips
Now it’s time to fold in the chocolate chips to your mixture, adding a delightful sweetness to the cups. Gently stir until the chocolate chips are evenly incorporated throughout the batter. This step will give your Banana Peanut Butter Baked Oatmeal Cups an extra touch of indulgence that both kids and adults will love.
Step 5: Portion into Muffin Pan
Scoop the prepared batter into the muffin pan, filling each cup about 2/3 full. This allows room for the cups to rise as they bake. Use a spatula to smooth the tops slightly for an even bake. You’ll want to see those delicious oats peeking through the surface, promising a hearty bite when they’re done.
Step 6: Bake Until Golden
Place the muffin pan in the preheated oven and bake for 20-25 minutes. Keep an eye on them; you’ll know they are done when the tops are lightly golden and a toothpick inserted in the center comes out clean. The aroma of bananas and peanut butter filling your kitchen will be simply irresistible!
Step 7: Cool and Store
Once baked, remove the Banana Peanut Butter Baked Oatmeal Cups from the oven and allow them to cool in the pan for 5-10 minutes. This cooling period helps them set properly. Afterward, transfer the cups to a wire rack to cool completely before storing them in an airtight container for easy grab-and-go breakfasts or snacks throughout the week.
Expert Tips for Banana Peanut Butter Baked Oatmeal Cups
Cool Completely: Allow the oatmeal cups to cool thoroughly before storing to prevent sogginess and maintain their texture.
Use Ripe Bananas: Opt for very ripe bananas; their sweetness enhances the overall flavor of the Banana Peanut Butter Baked Oatmeal Cups.
Avoid Quick Oats: Stick with old-fashioned rolled oats instead of quick-cooking oats to keep the cups hearty and chewy.
Mix Gently: When combining the batter, mix just until combined to maintain a lovely texture; over-mixing can lead to dense cups.
Customize Freely: Feel free to experiment with add-ins like nuts or dried fruit for a unique twist on the basic recipe!
Storage Tips for Banana Peanut Butter Baked Oatmeal Cups
Room Temperature: These oatmeal cups can be kept at room temperature for up to 2 days in an airtight container, but be sure to consume them quickly for the best taste.
Fridge: Store in the fridge for up to 5 days. This keeps the Banana Peanut Butter Baked Oatmeal Cups fresh and moist for quick breakfasts or snacks.
Freezer: For longer storage, freeze the cooled cups in a single layer, then transfer to an airtight container or freezer bag for up to 2 months.
Reheating: To enjoy, thaw overnight in the refrigerator or heat briefly in the microwave for 20-30 seconds until warm. This ensures a delightful experience every time you indulge!
What to Serve with Banana Peanut Butter Baked Oatmeal Cups?
These scrumptious oatmeal cups not only brighten your breakfast table but also pair beautifully with other delightful sides that enhance your meal experience.
Fresh Fruit Salad: Juicy bites of seasonal fruits add brightness and freshness, balancing the richness of the oatmeal cups.
Greek Yogurt: A dollop of creamy yogurt provides tangy goodness, making it a perfect partner that elevates breakfast to a new level.
Honey Drizzle: A splash of honey brings extra sweetness and a lovely sheen, inviting each bite to burst with delightful flavor.
Nutty Granola: Crunchy granola sprinkled on top offers added texture, harmonizing with the soft goodness of the oatmeal cups.
Nut Butter Spread: A smear of almond or cashew butter enhances the nutty profile while adding a luscious, creamy finish.
Herbal Tea: Cozy herbal tea like chamomile or mint offers a soothing contrast to the heartiness of the oatmeal cups, perfect for a calm morning ritual.
Almond Milk: A glass of almond milk complements the nutty and sweet flavors, providing a light, dairy-free option to wash it down beautifully.
These delicious pairings will not only satisfy your cravings but create a beautiful, well-rounded meal that your family will love!
Banana Peanut Butter Baked Oatmeal Cups Variations
There’s so much joy in customizing your Banana Peanut Butter Baked Oatmeal Cups to create unique flavor combinations that excite your taste buds!
Nut Butter Swap: Replace peanut butter with almond or cashew butter for a delightful twist on flavor and richness.
Fruit Fusion: Add blueberries, raspberries, or chopped apples to the batter for a burst of fruity freshness in each bite.
Spice It Up: Incorporate cinnamon or nutmeg into the mix for a warm, cozy flavor that will make your kitchen smell heavenly.
Cocoa Kick: Use unsweetened cocoa powder in place of some of the oats for a chocolatey version that’s sure to satisfy any chocolate lovers!
Dairy-Free: Substitute regular milk with almond or oat milk for a totally dairy-free treat that maintains its yummy flavor.
Reduced Sugar: Omit the chocolate chips and add a drizzle of honey or maple syrup before serving for a naturally sweet option.
Savory Style: Swap the fruit for grated zucchini or carrots and add a pinch of salt for a savory granola-inspired version!
Feel free to explore these variations and tailor the recipe to your preferences. Whether you’re craving something fruity or a bit indulgent, these options will inspire delicious breakfasts and snacks. For more meal prep ideas, take a look at my Baked Bbq Chicken or a savory fit with my Garlic Butter Brazilian. Enjoy your culinary adventure!
Make Ahead Options
These Banana Peanut Butter Baked Oatmeal Cups are perfect for busy home cooks looking to save time! You can prepare the oatmeal cup batter up to 24 hours in advance—just mix the wet and dry ingredients as directed, but store them in an airtight container in the refrigerator. This helps you get ahead without compromising flavor or quality. When you’re ready to bake, simply portion the chilled batter into the muffin pan and bake as instructed. For longer storage, the baked oatmeal cups can be kept in an airtight container for up to 5 days in the fridge or frozen for up to 2 months. When it’s time to enjoy, reheat them in the microwave for a quick breakfast or snack that’s just as delicious as fresh!
Banana Peanut Butter Baked Oatmeal Cups Recipe FAQs
How do I choose ripe bananas for the oatmeal cups?
Absolutely! Look for bananas with a few brown spots on the skin but not overly bruised. Ripe bananas are sweeter and provide the moisture needed in the recipe. If they’re too firm or green, they won’t have the same lovely sweetness!
What is the best way to store leftover oatmeal cups?
I often recommend storing them in an airtight container in the fridge for up to 5 days. This keeps them fresh and moist. If you prefer to enjoy them later, freeze the cooled oatmeal cups in a single layer for a few hours before transferring them into a freezer bag. They can last up to 2 months in the freezer!
Can I freeze the oatmeal cups? If so, how?
Yes, you can! Once they have cooled completely, place the oatmeal cups in a single layer on a baking sheet. Freeze for about 1-2 hours until firm. Then, transfer the cups to an airtight container or zip-top freezer bag, separating layers with parchment paper. They should stay fresh for up to 2 months!
What should I do if my oatmeal cups are too dry?
If you find your oatmeal cups turn out dry, it could be that the bananas weren’t ripe enough, or the oats absorbed too much moisture during baking. To fix this, make sure to mash very ripe bananas well to add more moisture. You can also try adding a bit more milk to the batter next time for a softer texture!
Are these oatmeal cups suitable for kids with nut allergies?
Certainly! If you’re cooking for someone with nut allergies, I recommend substituting the peanut butter with a sunbutter or a seed butter. Just ensure that your ingredients are certified nut-free to avoid any cross-contamination. This way, everyone can enjoy these delicious Banana Peanut Butter Baked Oatmeal Cups!
Hearty Banana Peanut Butter Baked Oatmeal Cups Made Easy
Ingredients
Equipment
Method
- Preheat your oven to 350°F (175°C) and prepare a muffin pan by greasing it or using muffin liners.
- In a large mixing bowl, combine the mashed bananas, natural peanut butter, and milk until smooth and creamy.
- Add old-fashioned rolled oats and baking powder to the wet mixture, stirring until evenly distributed.
- Fold in the chocolate chips until evenly incorporated throughout the batter.
- Scoop the prepared batter into the muffin pan, filling each cup about 2/3 full.
- Bake in the preheated oven for 20-25 minutes until tops are lightly golden and a toothpick comes out clean.
- Allow to cool in the pan for 5-10 minutes before transferring to a wire rack to cool completely.