Imagine coming home after a long day, the aroma of freshly baked bread wafting through the air, welcoming you like a warm hug. That’s the magic of No-Knead Artisan Bread. It’s a game-changer for busy moms and professionals who crave homemade goodness without the fuss. This recipe is as easy as pie—no kneading required! Just mix, let it rise, and bake. It’s perfect for those hectic days when time is scarce, yet you want to impress your loved ones with a crusty, flavorful loaf. Trust me, this bread will become your new best friend in the kitchen.
Why You’ll Love This No-Knead Artisan Bread
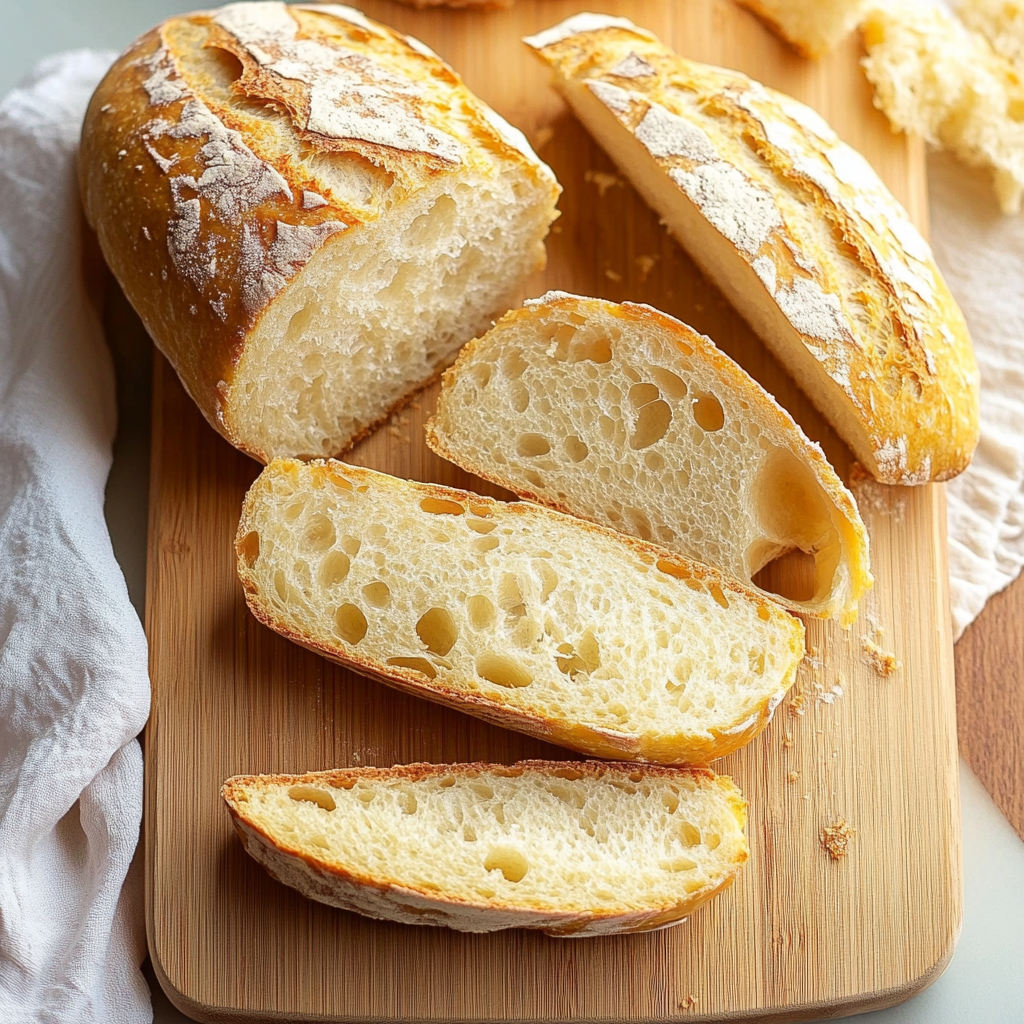
This No-Knead Artisan Bread is a lifesaver for those of us juggling a million things. It’s as simple as mix, wait, and bake—no elbow grease required! The result? A golden, crusty loaf with a soft, airy interior that tastes like it came from a fancy bakery. Plus, the satisfaction of homemade bread is unbeatable. It’s the perfect blend of ease and deliciousness!
Ingredients No-Knead Artisan Bread
Creating this delightful No-Knead Artisan Bread requires just a handful of pantry staples. First, you’ll need all-purpose flour, which forms the backbone of our bread, providing structure and texture. Salt is essential for enhancing flavor, while instant yeast is our secret weapon for a quick rise without the need for kneading. Warm water brings everything together, activating the yeast and creating a sticky dough that’s easy to work with.
For those looking to add a personal touch, consider mixing in herbs like rosemary or thyme for an aromatic twist. A sprinkle of garlic powder or a handful of shredded cheese can elevate the flavor profile, making each slice a delightful surprise. Remember, the exact quantities for these ingredients are listed at the bottom of the article, ready for you to print and use in your kitchen adventures.
How to Make No-Knead Artisan Bread
Mixing the Ingredients
Start by grabbing a large mixing bowl. Combine the all-purpose flour, salt, and instant yeast. Stir them together until they’re well mixed. This is the foundation of your No-Knead Artisan Bread. Next, slowly pour in the warm water. As you do, mix the ingredients until a shaggy dough forms. Don’t worry if it’s sticky and wet—that’s exactly what you want!
Letting the Dough Rise
Once your dough is mixed, cover the bowl with plastic wrap or a clean kitchen towel. Let it sit at room temperature for 12 to 18 hours. This is where the magic happens! The dough will double in size and become bubbly. It’s like watching a culinary miracle unfold right in your kitchen. Patience is key here, so let time do its thing.
Shaping the Dough
After the dough has risen, lightly flour a clean surface. Turn the dough out onto it, and with floured hands, gently shape it into a ball. This step is all about being gentle. You don’t want to deflate all those lovely bubbles. Place the dough seam-side down on a piece of parchment paper. Cover it with a kitchen towel and let it rest for about an hour.
Baking the Bread
About 30 minutes before the dough is ready, preheat your oven to 450°F. Place a Dutch oven inside to heat up. Once hot, carefully remove it and place the dough inside using the parchment paper. Cover with the lid and bake for 30 minutes. Then, remove the lid and bake for another 15 to 20 minutes until the bread is golden brown. Let it cool on a wire rack before slicing. Enjoy the fruits of your labor!
Tips for Success
Use a kitchen scale for precise measurements, ensuring consistent results every time.
For a more flavorful loaf, let the dough rise for the full 18 hours.
Ensure your water is warm, not hot, to activate the yeast without killing it.
Preheat your Dutch oven for a crispier crust.
Let the bread cool completely before slicing to maintain its structure.
Equipment Needed
Large mixing bowl – any sturdy bowl will do.
Plastic wrap or a clean kitchen towel – for covering the dough.
Dutch oven – a heavy pot with a lid; a cast-iron skillet with foil can substitute.
Parchment paper – helps transfer the dough easily.
Wire rack – for cooling the bread evenly.
Variations
Whole Wheat Twist: Swap half of the all-purpose flour with whole wheat flour for a heartier loaf.
Herb Infusion: Add a tablespoon of dried herbs like rosemary or thyme for an aromatic touch.
Cheesy Delight: Mix in a cup of shredded cheddar or parmesan for a cheesy surprise.
Garlic Lover’s Bread: Stir in a teaspoon of garlic powder for a savory kick.
Gluten-Free Option: Use a gluten-free flour blend to accommodate dietary needs.
Serving Suggestions
Pair with a hearty bowl of soup for a comforting meal.
Serve alongside a fresh garden salad for a light lunch.
Enjoy with a spread of butter and jam for a delightful breakfast.
Complement with a glass of red wine for a cozy dinner.
Use as a base for bruschetta, topped with tomatoes and basil.
FAQs about No-Knead Artisan Bread
Can I use active dry yeast instead of instant yeast?
Absolutely! If you have active dry yeast on hand, just dissolve it in the warm water first and let it sit for about 5 minutes until it becomes frothy. Then, proceed with mixing it into the dry ingredients. This small adjustment ensures your No-Knead Artisan Bread rises beautifully.
What if I don’t have a Dutch oven?
No worries! You can use any heavy pot with a lid, like a cast-iron skillet covered with foil. The key is to trap steam, which helps create that signature crusty exterior. If you prefer, a pizza stone can also work wonders for a crustier loaf.
How do I store leftover bread?
To keep your homemade bread fresh, wrap it in a clean kitchen towel or store it in a paper bag at room temperature. Avoid plastic bags, as they can make the crust soggy. If you have leftovers after a couple of days, slice and freeze them for future enjoyment.
Can I add seeds or nuts to the dough?
Definitely! Adding seeds like sunflower or pumpkin, or even nuts like walnuts, can add a delightful crunch and flavor. Just mix them into the dough before the first rise. It’s a simple way to customize your No-Knead Artisan Bread to your taste.
Why is my bread dense and not airy?
If your bread turns out dense, it might be due to insufficient rising time or water that’s too hot, which can kill the yeast. Ensure your dough rises in a warm spot for the full duration, and use water that’s warm to the touch, not hot. These tweaks will help achieve that airy, bakery-style loaf.
Final Thoughts
Baking No-Knead Artisan Bread is like crafting a masterpiece with minimal effort. The joy of pulling a golden, crusty loaf from the oven is unmatched, filling your home with warmth and the irresistible scent of fresh bread. It’s a simple pleasure that brings a sense of accomplishment and delight. Whether you’re sharing it with family or savoring a slice alone, this bread is a testament to the magic of homemade goodness. So, embrace the simplicity, enjoy the process, and let this recipe become a cherished part of your culinary repertoire. Happy baking!
This No-Knead Artisan Bread is an effortless and delicious recipe that requires minimal ingredients and no kneading, resulting in a crusty and flavorful loaf.
Ingredients
Scale
3 cups all-purpose flour
1 ½ teaspoons salt
½ teaspoon instant yeast
1 ½ cups warm water (about 110°F)
Instructions
In a large mixing bowl, combine the flour, salt, and instant yeast. Stir until well mixed.
Gradually add the warm water to the dry ingredients, mixing until a shaggy dough forms. The dough will be sticky and wet.
Cover the bowl with plastic wrap or a clean kitchen towel and let it sit at room temperature for 12 to 18 hours, or until the surface is bubbly and the dough has doubled in size.
After the resting period, lightly flour a clean surface and turn the dough out onto it. With floured hands, gently shape the dough into a ball.
Place the dough seam-side down on a piece of parchment paper. Cover it with a kitchen towel and let it rest for about 1 hour.
About 30 minutes before the dough is ready, preheat your oven to 450°F. Place a Dutch oven (with the lid) inside the oven to heat up.
Once the oven is hot, carefully remove the Dutch oven. Lift the parchment paper with the dough and place it into the hot pot. Cover with the lid.
Bake for 30 minutes covered, then remove the lid and bake for an additional 15 to 20 minutes, or until the bread is golden brown.
Carefully remove the bread from the pot and let it cool on a wire rack for at least 30 minutes before slicing.
Notes
For added flavor, mix in herbs, garlic powder, or cheese into the dough before the first rise.
If you prefer a crustier bread, bake the bread on a pizza stone instead of in a Dutch oven. Preheat the stone in the oven for 30 minutes before adding the dough.