

As I flipped through my grandmother’s cherished recipe book, the rustic charm of her handwritten notes tugged at my heartstrings. Among her beloved fall recipes, this Silky Apple Butter Pie caught my eye, whispering promises of autumn warmth with every creamy layer. Easy to make and a delightful twist on traditional fall flavors, this pie features a luscious custard infused with bold apple essence, nestled within a wholesome spelt crust. It’s the perfect dessert for gatherings, offering a refreshing alternative to the usual pumpkin pie while capturing the spirit of the season. Imagine serving a slice to loved ones, topped with fluffy Maple Whipped Cream, as laughter fills the room. So, are you ready to embrace the charm of homemade comfort and elevate your dessert game this fall?
Why is Apple Butter Pie a Must-Try?
Comforting, this pie envelops you in the essence of autumn, with each creamy bite echoing the flavors of freshly picked apples. Wholesome crust, made from spelt flour, adds a nutty depth that pairs beautifully with the filling. Effortlessly prepared, you can whip up this dessert with minimal fuss, making it perfect for casual gatherings. Unique flavor profile sets it apart from traditional pies, ensuring your dessert table shines. Versatile variations allow you to explore options like adding orange zest or using different crusts, so you can customize it to your taste. Don’t miss the chance to delight your guests with this striking centerpiece, perhaps alongside a warm cup of spiced cider or a slice of Raspberry Cream Pie.
Apple Butter Pie Ingredients
• Create magic in your kitchen with this delightful Apple Butter Pie!
For the Filling
- Apple Butter – A rich flavor foundation that brings a deep apple essence; you can use homemade or store-bought for convenience.
- Eggs – Essential for binding the filling and adding richness; make sure they’re at room temperature for optimal blending.
- Heavy Cream – Provides a silky texture that enhances creaminess; feel free to swap in half-and-half for a lighter touch.
- Sugar – Balances the filling’s flavor; experiment with brown sugar for a deeper sweetness that complements the apples.
- Spices (Cinnamon, Nutmeg, Salt) – Infuse warmth and complexity into the pie; adjust these to suit your personal taste preferences.
For the Crust
- Spelt Flour – Offers a hearty yet slightly sweet foundation; for a different texture, you can substitute with all-purpose flour.
- Butter – Delivers richness and a flaky texture to the crust; using unsalted butter helps to control the overall saltiness.
Feel inspired and ready to create a delectable Apple Butter Pie that your family will love!
Step‑by‑Step Instructions for Apple Butter Pie
Step 1: Prepare the Crust
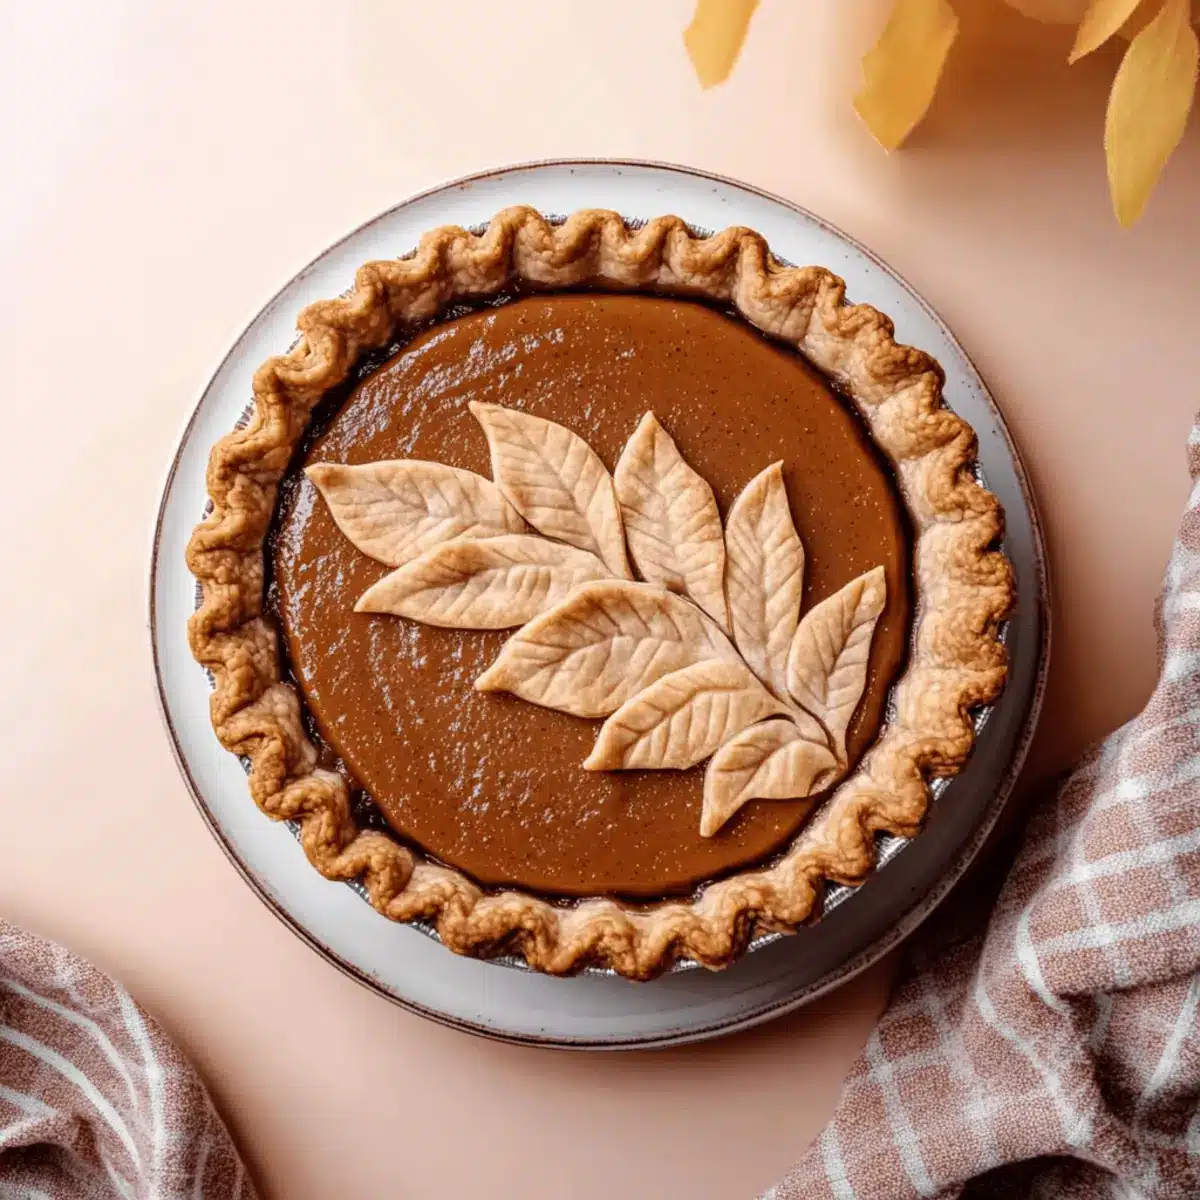
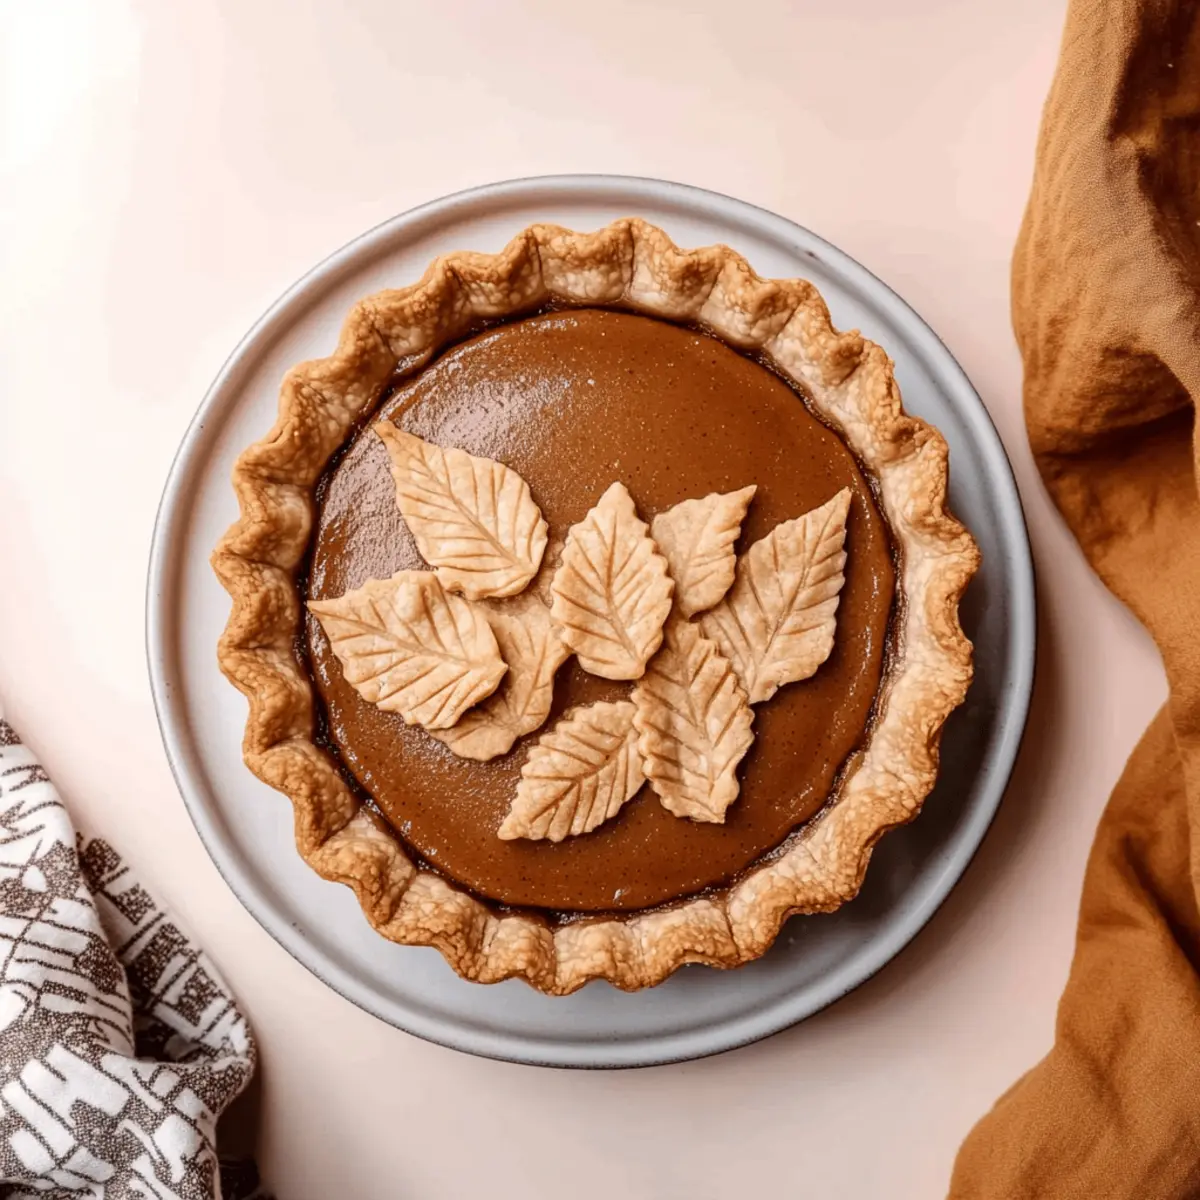
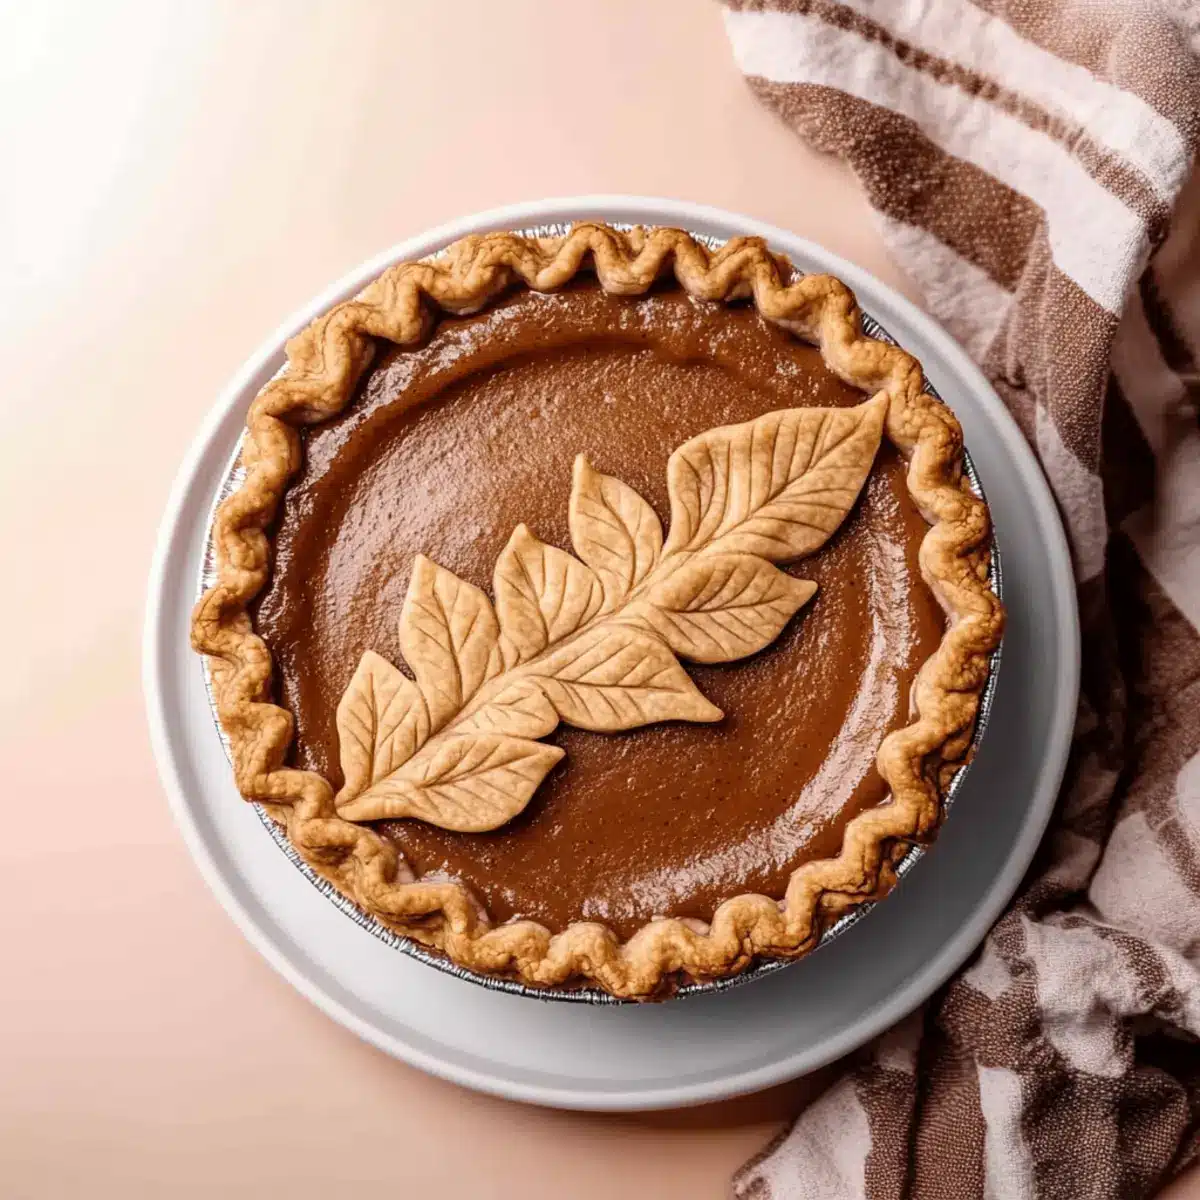
Begin by preheating your oven to 375°F. In a mixing bowl, combine spelt flour and cold, cubed unsalted butter, using a pastry cutter or your fingers until the mixture resembles coarse crumbs. Gradually add ice water until the dough comes together. Roll out the dough and place it in a pie pan, then blind bake for 15–20 minutes until lightly golden. Remove from oven and set aside to cool.
Step 2: Mix the Filling
In a large mixing bowl, whisk together the apple butter, eggs, heavy cream, sugar, cinnamon, nutmeg, and salt until you achieve a smooth, consistent filling. This rich mixture should be well-blended, with no lumps remaining. Take a moment to enjoy the fragrant aroma of fall as the spices meld with the apple essence, setting the stage for your delicious Apple Butter Pie.
Step 3: Fill the Crust
Once your pie crust has cooled, gently pour the apple butter filling into the crust, using a spatula to spread it evenly. Make sure the filling fills the crust to the brim, creating a lovely, rounded top. Visualize the creamy blend awaiting its transformation in the oven—it’ll soon turn into a luscious custard pie that captures the essence of autumn.
Step 4: Bake
Place your filled pie in the oven and lower the temperature to 325°F. Bake for 40–50 minutes, until the edges are set but the center has a slight wobble. Keep a close eye on it as it bakes, ensuring the surface doesn’t brown too quickly. The Apple Butter Pie is perfectly done when you see the filling gently quivering like a silky custard, promising delightful flavors in every bite.
Step 5: Cool
After baking, remove the pie from the oven and let it cool at room temperature for about 1 hour. Once it reaches room temperature, transfer it to the refrigerator to chill for at least 6 hours or overnight. This cooling time allows the pie to set beautifully, enhancing the texture and flavors that make this Apple Butter Pie a memorable treat.
Step 6: Serve
When you’re ready to serve, slice the pie into wedges and consider topping each slice with a dollop of Maple Whipped Cream for an extra touch of sweetness. The contrasts of creamy custard and spiced apple notes will surely make it a favorite among family and friends. Enjoy the delightful labor of love in every bite of your homemade Apple Butter Pie!

What to Serve with Silky Apple Butter Pie?
Imagine a cozy autumn gathering where the aroma of spices dances through the air, and a delicious pie awaits on the table, ready to delight your loved ones.
- Maple Whipped Cream: Adds a sweet, fluffy topping that enhances the pie’s creamy texture and complements the apple flavor beautifully.
- Spiced Cider: Serve warm for a comforting drink that pairs perfectly with the pie’s autumnal essence, filling your home with nostalgia.
- Candied Pecans: Their crunchy sweetness contrasts with the silky filling, providing an enjoyable textural change that elevates each bite.
- Vanilla Ice Cream: A classic choice, the cold creaminess melts into the warm pie, creating a luscious combination that’s simply irresistible.
- Ginger Snap Cookies: Their spicy crunch enhances the autumn vibes, making it a delightful accompaniment to balance the pie’s richness.
- Charcuterie Board: Create a beautiful display of seasonal fruits, cheeses, and nuts to serve alongside your pie, inviting guests to mix and match flavors.
Each pairing brings a unique element to enhance your autumn experience, making your table a centerpiece of warmth and comfort.
Apple Butter Pie Variations & Substitutions
Feel free to play with this recipe, making it your own with delightful twists and turns!
- Citrusy Twist: Add a teaspoon of orange zest to the filling for a refreshing citrus flavor that brightens the apple butter’s richness.
- Graham Cracker Crust: Switch out the spelt flour crust for a sweet graham cracker crust for an easy, no-bake option that adds a crunchy texture.
- Gluten-Free: Use a gluten-free flour blend instead of spelt flour, making the pie accessible for those with dietary restrictions without sacrificing flavor.
- Spice it Up: Increase the warming spices—add a pinch of ginger or a dash of cloves to elevate the warm, cozy notes of fall.
- Maple Sweetener: Substitute sugar with maple syrup in the filling for a deeper, earthy sweetness that complements the apples beautifully.
- Nutty Flavors: For a nutty flavor, consider incorporating almond extract in the filling or topping your pie with chopped pecans for an added crunch.
- Chilled Treat: Serve the pie chilled with a scoop of vanilla ice cream or alongside a slice of Rhubarb Cinnamon Pie for a delightful dessert spread.
- Berry Boost: Fold in some fresh or frozen berries like raspberries or cranberries into the filling for a tangy contrast to the apple butter’s sweetness.
These variations can help you explore different dimensions of flavor while keeping the comfort of the traditional recipe intact. Enjoy experimenting!
How to Store and Freeze Apple Butter Pie
Fridge: Store the Apple Butter Pie covered in the refrigerator for up to 4 days, which allows the flavors to deepen beautifully.
Freezer: To freeze, wrap the pie tightly in plastic wrap and aluminum foil. It can be frozen for up to 3 months; ensure it’s completely cooled before wrapping.
Reheating: Thaw in the refrigerator overnight, then warm in the oven at 350°F for about 15–20 minutes for a fresh taste before serving.
Make-Ahead: This pie can be assembled in advance and stored in the refrigerator overnight before baking, offering a time-saving option for busy days.
Make Ahead Options
Preparing this enchanting Apple Butter Pie ahead of time is a game-changer for busy home cooks! You can make the spelt crust up to 24 hours in advance, simply blind bake it and store it covered at room temperature until you’re ready to fill it. Additionally, the apple butter filling can be mixed and refrigerated for up to 3 days; just remember to give it a good stir before pouring it into the crust. When you’re ready to serve, pour the filling into the crust and bake as directed. This way, you can enjoy the comforting flavors of your Apple Butter Pie with minimal effort and maximum delight!
Expert Tips for the Best Apple Butter Pie
- Baking Time: Monitor closely; aim for a custard that is just set to avoid a rubbery texture, ensuring your Apple Butter Pie is perfectly creamy.
- Egg Temperature: Use room temperature eggs for better incorporation into the filling, helping to achieve that silky smooth texture.
- Flavor Balance: If using homemade apple butter, taste it first and adjust spices according to its strength to maintain a well-balanced flavor profile.
- Over-Baking Prevention: Keep an eye on the pie as it bakes; establish a slight wobble before removing it to prevent a sponge-like texture.
- Chilling is Key: Allow the pie to chill for at least 6 hours, or overnight, to let the flavors deepen and set properly for an unforgettable finish.
Apple Butter Pie Recipe FAQs
What type of apple butter is best to use for this pie?
You’ll want to choose a high-quality apple butter for the best flavor! While homemade apple butter can offer a rich, nuanced flavor, store-bought varieties also work wonderfully. Just make sure to check the ingredients for any added sugars or preservatives that might alter the taste.
How do I store leftover Apple Butter Pie?
Absolutely! Store the Apple Butter Pie covered in the refrigerator for up to 4 days. Keeping it covered helps maintain its creamy texture and depth of flavor. If you plan to keep it longer, consider freezing it to avoid spoilage.
Can I freeze Apple Butter Pie, and if so, how?
Yes, you can freeze this delicious pie! Once it’s fully cooled, wrap it tightly in plastic wrap followed by aluminum foil to protect it from freezer burn. It can safely be stored in the freezer for up to 3 months. When you’re ready to enjoy it again, thaw the pie in the refrigerator overnight, then warm it in the oven at 350°F for about 15-20 minutes before serving for a freshly baked taste.
What should I do if my pie filling is too runny?
If your filling turns out too runny, it might be due to undercooking or the apple butter being too liquid. The key is to ensure the pie is baked until it has a slight wobble but is not jiggly. You can also thicken the apple butter mixture by adding a touch of cornstarch before pouring it into the crust—about 1 to 2 tablespoons should do the trick!
Is this pie safe for my pet to have a taste?
It’s best to keep this pie away from pets. While apples themselves are generally safe for dogs, the sugar and spices in this pie, especially nutmeg, can be harmful to them. Always consult your veterinarian before sharing homemade treats with your furry friends.
How can I adjust the recipe for dietary restrictions?
If you need to cater to certain dietary restrictions, you have a few options. Substitute the spelt flour for gluten-free flour blends if gluten is a concern. For dairy-free needs, consider using coconut cream in place of heavy cream, and just ensure your apple butter is dairy-free as well. Additionally, adjust the sugar based on personal preference or dietary needs, such as using a sugar alternative.
Decadent Apple Butter Pie with Wholesome Spelt Crust
Ingredients
Equipment
Method
- Preheat your oven to 375°F. In a mixing bowl, combine spelt flour and cold, cubed unsalted butter until resembling coarse crumbs. Gradually add ice water until the dough comes together. Roll out the dough and place it in a pie pan, then blind bake for 15–20 minutes until lightly golden. Remove and cool.
- In a large mixing bowl, whisk together the apple butter, eggs, heavy cream, sugar, cinnamon, nutmeg, and salt until smooth and consistent. Enjoy the aroma of fall as the spices meld.
- Once your pie crust has cooled, pour the filling into the crust, ensuring it fills to the brim, creating a rounded top.
- Place the filled pie in the oven and lower the temperature to 325°F. Bake for 40–50 minutes until edges set but center has a slight wobble.
- After baking, cool the pie at room temperature for about 1 hour, then refrigerate for at least 6 hours or overnight.
- Slice and serve topped with Maple Whipped Cream for added sweetness. Enjoy!