

Introduction to Cake Pops Delight
There’s something magical about Cake Pops Delight that brings back memories of childhood birthday parties. Those little spheres of joy, coated in chocolate and adorned with sprinkles, are not just treats; they’re a celebration on a stick! Whether you’re looking for a quick solution for a busy day or a fun project to impress your loved ones, these cake pops are the answer. They’re easy to make, and the best part? You can customize them to fit any occasion. Let’s dive into this delightful recipe that’s sure to sweeten your day!
Why You’ll Love This Cake Pops Delight
These Cake Pops Delight are a game-changer for anyone craving a sweet treat without the fuss. They come together in no time, making them perfect for busy weeknights or last-minute gatherings. The taste? Absolutely divine! Each bite is a burst of cake and frosting, wrapped in a luscious chocolate coating. Plus, they’re a hit with kids and adults alike, ensuring smiles all around. What’s not to love?
Ingredients for Cake Pops Delight
Creating these delightful Cake Pops requires just a handful of ingredients, each playing a crucial role in delivering that sweet, satisfying experience. Here’s what you’ll need:
- Crumble Cake: Any flavor you love works here! Chocolate, vanilla, or even red velvet can be used to create a unique taste.
- Frosting: Your favorite frosting is essential for binding the cake together. Cream cheese, buttercream, or even store-bought options are great choices.
- Chocolate or Candy Melts: This is the magic coating that transforms your cake balls into decadent treats. Choose dark, milk, or white chocolate based on your preference.
- Lollipop Sticks: These are what make your cake pops easy to hold and eat. You can find them at craft stores or online.
- Decorative Sprinkles: Optional but highly recommended! Sprinkles add a fun touch and can match any theme or occasion.
Feel free to experiment with different cake and frosting flavors to create your own signature Cake Pops Delight. For exact measurements, check the bottom of the article where you can find everything available for printing!
How to Make Cake Pops Delight
Making Cake Pops Delight is a fun and straightforward process. Follow these simple steps, and you’ll have a batch of sweet treats ready to impress in no time!
Step 1: Mix Cake and Frosting
Start by combining your crumbled cake and frosting in a large bowl. Use your hands or a spatula to mix until the two are fully integrated. You want a cohesive mixture that holds together well. If it feels too dry, add a bit more frosting. This step is crucial for achieving that perfect cake pop texture!
Step 2: Roll into Balls
Once your mixture is ready, take a tablespoon of it and roll it into a smooth ball. Aim for a size that fits comfortably in your palm. The smoother the ball, the better it will look once coated. Don’t rush this step; a little care goes a long way in making your Cake Pops Delight visually appealing!
Step 3: Prepare for Freezing
Next, arrange your cake balls on a parchment-lined tray. Make sure they’re spaced out to avoid sticking together. Now, insert a lollipop stick into each ball, pushing it in halfway. This will make it easier to dip them later. It’s like giving each pop a little handle!
Step 4: Freeze the Cake Pops
Now comes the waiting game. Place the tray in the freezer for about 30 minutes. Freezing is essential because it helps the cake pops hold their shape when you dip them in chocolate. Trust me, this step is worth it!
Step 5: Melt the Chocolate
While your cake pops are chilling, it’s time to melt the chocolate or candy melts. Use a microwave-safe bowl and heat in short bursts, stirring in between until smooth. Be careful not to overheat; burnt chocolate is a sad fate for any sweet treat!
Step 6: Coat the Cake Pops
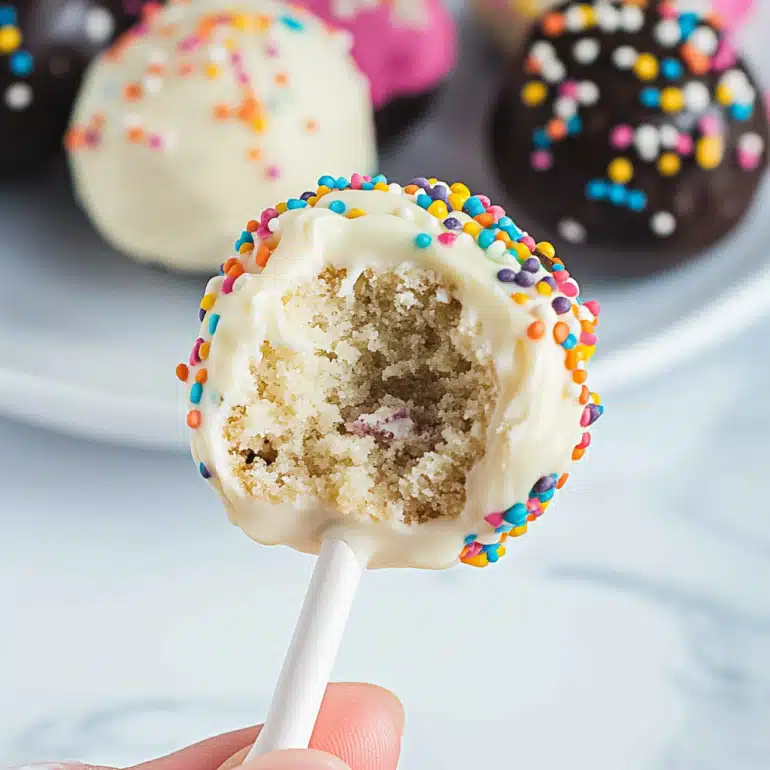
Once your cake pops are frozen, dip each one into the melted chocolate. Make sure to coat it evenly, letting any excess chocolate drip off. This is where the magic happens! The chocolate coating transforms your cake balls into decadent Cake Pops Delight.
Step 7: Add Decorations
While the chocolate is still wet, sprinkle on your decorative toppings. This is your chance to get creative! Use colorful sprinkles, crushed nuts, or even a drizzle of contrasting chocolate. The options are endless, and it’s all about what makes you smile!
Step 8: Let Them Set
Finally, return the coated cake pops to the tray and let them sit at room temperature or refrigerate until the chocolate hardens. This usually takes about 15-20 minutes. Once set, your Cake Pops Delight are ready to be enjoyed!
Tips for Success
- Use room temperature ingredients for easier mixing.
- Don’t skip the freezing step; it’s crucial for shape retention.
- Experiment with different chocolate types for unique flavors.
- Keep your hands slightly damp when rolling to prevent sticking.
- Have fun with decorations—let your creativity shine!
Equipment Needed
- Mixing Bowl: A large bowl for combining ingredients. Any size will do!
- Spatula or Hands: For mixing the cake and frosting together.
- Parchment Paper: To line your tray; wax paper works too.
- Microwave-Safe Bowl: For melting chocolate; a double boiler is a great alternative.
- Lollipop Sticks: Essential for holding your cake pops; skewers can work in a pinch.
Variations
- Flavor Combinations: Try using lemon cake with cream cheese frosting for a refreshing twist.
- Gluten-Free Option: Substitute regular cake with gluten-free cake mix for a delicious alternative.
- Vegan Delight: Use vegan cake and frosting to create a plant-based version of these treats.
- Chocolate Lovers: Mix cocoa powder into the cake mixture for an extra chocolatey flavor.
- Seasonal Themes: Incorporate seasonal flavors like pumpkin spice in the fall or peppermint in winter.
Serving Suggestions
- Pair with Milk: A classic choice! Serve your Cake Pops Delight with a cold glass of milk for a nostalgic treat.
- Display on a Cake Stand: Elevate your presentation by showcasing them on a decorative cake stand.
- Perfect for Parties: These pops make great party favors or dessert table additions.
- Accompany with Coffee: Enjoy the

FAQs about Cake Pops Delight
As you embark on your journey to create these delightful treats, you might have a few questions. Here are some common queries about Cake Pops Delight that can help you along the way:
Can I use store-bought cake for Cake Pops Delight?
Absolutely! Using store-bought cake can save you time and still yield delicious results. Just crumble it up and mix with frosting as usual.
How long do Cake Pops last?
When stored in an airtight container, Cake Pops Delight can last up to a week at room temperature. For longer freshness, keep them in the fridge for up to two weeks.
Can I freeze Cake Pops?
Yes! You can freeze uncoated cake balls for up to a month. Just make sure to wrap them well to prevent freezer burn. When you’re ready, dip them in chocolate after thawing.
What can I use instead of lollipop sticks?
If you don’t have lollipop sticks, you can use pretzel sticks or even sturdy straws. Just ensure they’re strong enough to hold the cake pops!
How can I make my Cake Pops Delight more festive?
Get creative with decorations! Use themed sprinkles, edible glitter, or even drizzle colored chocolate on top. The sky’s the limit when it comes to making them festive!
Final Thoughts
Creating Cake Pops Delight is more than just baking; it’s about crafting sweet memories. Each bite transports you back to carefree days filled with laughter and joy. These little treats are perfect for any occasion, whether it’s a birthday party, a cozy family gathering, or just a well-deserved treat after a long day. The best part? You can customize them to reflect your personality and taste. So roll up your sleeves, gather your loved ones, and dive into this delightful adventure. Trust me, the smiles and satisfaction will be worth every moment spent in the kitchen!
Cake Pops Delight: Indulge in Sweet Treats Today!
Ingredients
Method
- Mix the crumbled cake and frosting in a large bowl until cohesive.
- Roll a tablespoon of the mixture into a smooth ball.
- Arrange the balls on a parchment-lined tray.
- Insert a lollipop stick into each ball halfway.
- Freeze the tray for about 30 minutes.
- Melt the chocolate or candy melts in a microwave-safe bowl until smooth.
- Dip each chilled cake pop into the melted chocolate, letting excess drip off.
- Sprinkle toppings on the wet chocolate if desired.
- Return the coated pops to the tray and let them sit at room temperature or refrigerate until chocolate hardens.
Nutrition
Notes
- Experiment with different cake and frosting flavors.
- Add a drizzle of contrasting chocolate for decoration.