

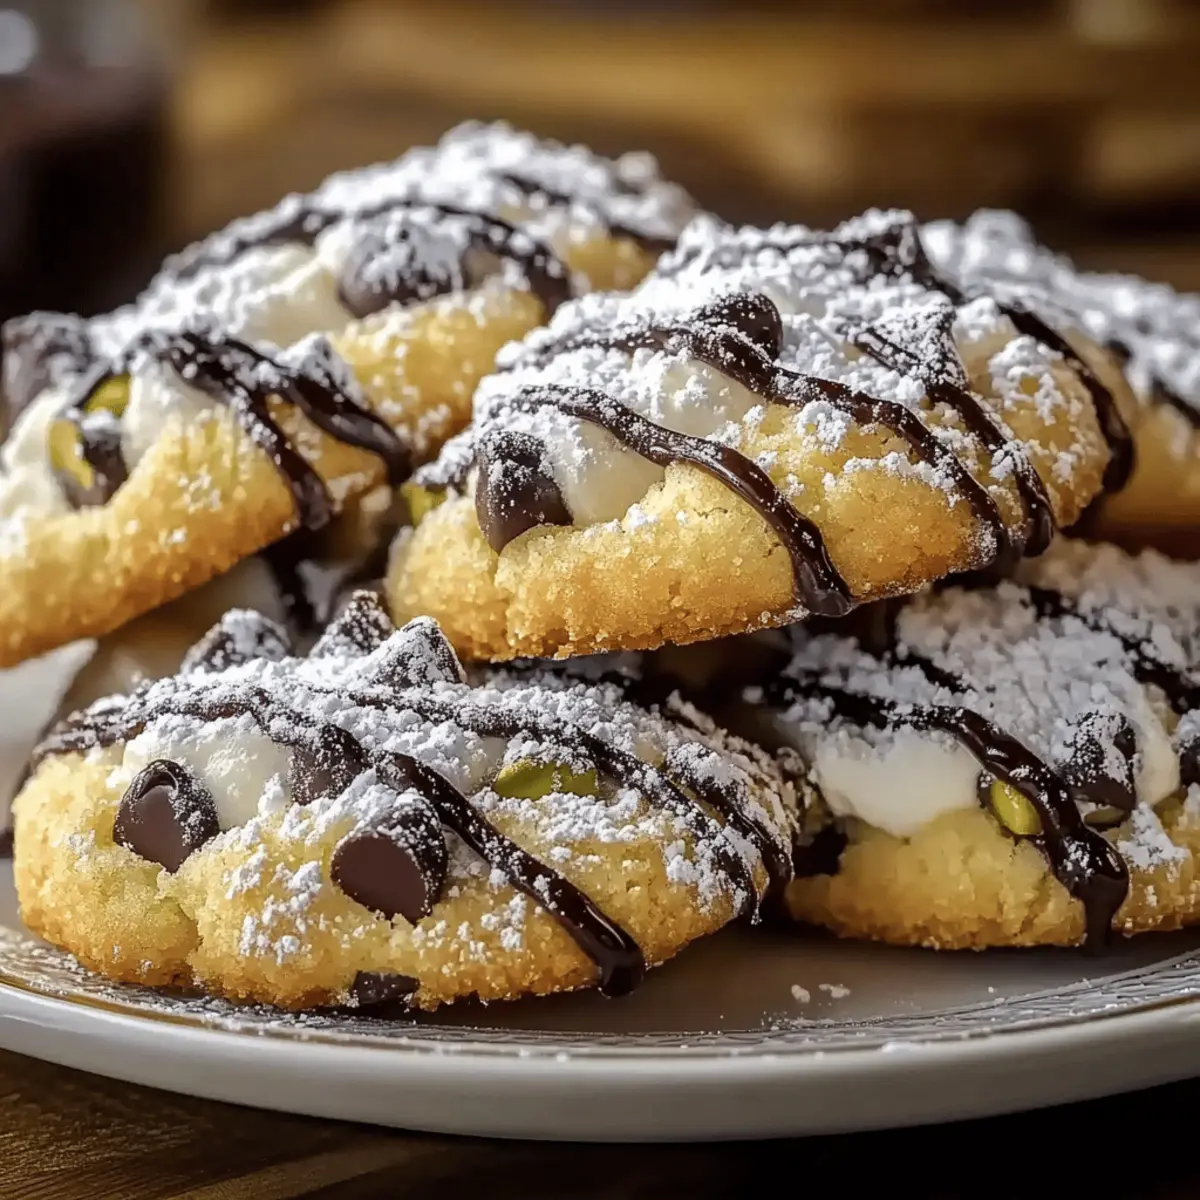
As I stood in my kitchen, I couldn’t help but be transported back to my Italian grandmother’s home, where the sweet aroma of baked treats always seemed to linger. Today, I’m sharing a twist on a classic indulgence with my Cannoli Cookies. These delightful confections bring together the beloved flavors of traditional cannoli into a fun, easy-to-make cookie. Perfect for impressing guests or satisfying your mid-afternoon sweet tooth, these cookies are not only a crowd-pleaser but also allow for delightful variations—think mascarpone instead of ricotta for a creamy upgrade or almond flour for a gluten-free option! With just six simple steps, you’ll fill your home with warmth and nostalgia, paving the way for sweet memories to be made. Curious about how to make them? Let’s dive in!
Why are Cannoli Cookies a must-try?
Unique Fusion: These Cannoli Cookies blend the best of both worlds, combining the classic flavors of a traditional cannoli into a convenient cookie form.
Easy Preparation: No complicated processes here! Just six simple steps make these cookies accessible for bakers of all skill levels.
Versatile Options: You can easily customize the recipe with variations like swapping ricotta for mascarpone or making them gluten-free with almond flour, ensuring everyone can enjoy them.
Crowd-Pleasing Delight: Whether at a family gathering or a casual coffee date, these cookies are sure to impress your guests, as they deliver both texture and flavor in a delightful way.
Nostalgic Aroma: Baking these cookies fills your home with a nostalgic aroma that transports you to family kitchens, creating cherished memories and warm connections.
By the time you take them out of the oven, you’ll be counting the minutes until you’re able to share or savor their deliciousness yourself!
Cannoli Cookies Ingredients
For the Cookie Shell
• All-purpose flour – Provides structure and texture; sift twice for lighter cookies.
• Granulated sugar – Adds sweetness and helps cookies to brown beautifully.
• Large egg – Binds ingredients for a cohesive and tender dough.
• Vanilla extract – Enhances the overall flavor profile of your Cannoli Cookies.
• Lemon zest – Infuses bright citrus notes that balance the sweetness perfectly.
For the Filling
• Ricotta cheese – Contributes creaminess and a slight tang; can substitute with mascarpone for a richer filling.
• Mini chocolate chips – Adds delightful sweetness and richness to the filling.
• Chopped pistachios – Provides a crunchy texture and nutty flavor that complements the filling.
For the Topping
• Powdered sugar – For dusting, adds sweetness and enhances the visual appeal of your cookies.
With these simple yet essential ingredients, you’ll create Cannoli Cookies that not only wow your taste buds but also fill your kitchen with mouthwatering aromas!
Step‑by‑Step Instructions for Cannoli Cookies
Step 1: Preheat and Prepare
Begin by preheating your oven to 350°F (175°C). While the oven warms, gather a large mixing bowl along with a whisk. This will help you efficiently whisk together the all-purpose flour and granulated sugar, ensuring they are well combined and free from lumps, which is essential for your Cannoli Cookies to achieve a light texture.
Step 2: Mix Wet Ingredients
In a separate bowl, blend the ricotta cheese, large egg, vanilla extract, and lemon zest until the mixture is smooth and creamy. It’s important to ensure that the ricotta is well-drained to prevent a soggy filling. This step not only combines flavors but also creates that luscious filling reminiscent of traditional cannoli, setting the stage for your cookies.
Step 3: Combine Mixtures
Gradually add the wet mixture to the flour and sugar blend. Using a spatula or your hands, mix until a soft dough forms. Be cautious not to overmix, as this can lead to tough cookies. The dough should be pliable and slightly sticky, signifying that it’s ready for the next step in creating your Cannoli Cookies.
Step 4: Rest the Dough
Cover the dough with plastic wrap and let it rest for 30 minutes at room temperature. This resting period allows the gluten to relax, resulting in tender cookies. While the dough rests, you can clean up your workspace or prepare your filling ingredients to maximize efficiency.
Step 5: Roll and Cut the Dough
Once the resting time is over, flour your surface lightly and roll out the dough to about ¼ inch thickness. Use a sharp knife or a dough cutter to cut the dough into rectangles measuring approximately 2×3 inches. These shapes will be perfect for folding around the creamy filling, giving your Cannoli Cookies that classic look.
Step 6: Prepare the Filling
In a medium bowl, combine the remaining ricotta, mini chocolate chips, and chopped pistachios to create your delightful filling. Stir gently to distribute the chocolate and nuts evenly throughout the ricotta mixture, ensuring that every bite of your Cannoli Cookies is packed with flavor and texture.
Step 7: Fill the Cookies
Place about a tablespoon of filling in the center of each dough rectangle. Carefully fold the dough over the filling, pinching the edges tightly to seal the cookies shut. This ensures a beautiful presentation and prevents any filling from leaking out as they bake, keeping your Cannoli Cookies intact and delectable.
Step 8: Bake to Perfection
Line a baking sheet with parchment paper and arrange the filled cookies, leaving space between each. Bake in your preheated oven for 15 to 18 minutes, or until they turn a beautiful golden brown. Keep a close eye on them, as the perfect Cannoli Cookies should have a crispy exterior and a soft filling, ready to be enjoyed.
Step 9: Cool and Dust
Remove the cookies from the oven and let them cool on a wire rack for a few minutes. Once they’re cool enough to handle, dust them with powdered sugar for a sweet finish. This adds a lovely touch to your Cannoli Cookies, enhancing both their flavor and presentation, making them irresistible to all who see them.
What to Serve with Cannoli Cookies
These delightful Cannoli Cookies are the perfect sweet addition to any gathering and can be paired beautifully with a variety of accompaniments.
- Rich Coffee: The bold flavors of a freshly brewed cup of coffee perfectly complement the creamy, sweet filling of the cookies, enhancing their indulgence.
- Sweet Dessert Wine: A glass of dessert wine, like Moscato, brings a fruity sweetness that elevates the cookies’ tangy notes and pairs beautifully.
- Vanilla Ice Cream: Serve the cookies warm with a scoop of vanilla ice cream, creating a delightful contrast between the cold and the warm, crispy cookie.
- Chocolate Sauce Drizzle: A drizzle of rich chocolate sauce adds a luxurious touch that echoes the mini chocolate chips in the filling.
- Fresh Berries: A side of mixed fresh berries provides a tart and juicy contrast to the sweetness of the cookies, refreshing your palate.
- Pistachio Crumbles: Scatter some extra chopped pistachios for a crunchy, nutty element that compliments the filling while adding visual appeal.
- Lemon Zest Garnish: A sprinkle of lemon zest brightens the plate with a vibrant touch, enhancing the overall flavor profile and presentation.
- Whipped Cream: Homemade whipped cream adds a light and airy touch that balances out the dense texture of the cookies.
- Homemade Hot Chocolate: Cozy up with a cup of rich hot chocolate to create a warm, comforting experience that melds beautifully with the Cannoli Cookies.
- Fruit-Infused Sparkling Water: For a refreshing non-alcoholic option, serve these cookies with a splash of fruit-infused sparkling water, cleansing your palate between bites.
Expert Tips for Cannoli Cookies
• Drain Ricotta Well: Make sure to let the ricotta drain for at least 30 minutes before using. This prevents a soggy filling, keeping your Cannoli Cookies perfectly delicious.
• Precise Measurements: Use a kitchen scale for accurate measurements, especially for flour and sugar. This ensures consistent texture and flavor every time you bake.
• Avoid Overmixing: When combining wet and dry ingredients, mix just until a soft dough forms. Overmixing can lead to tough cookies, which we definitely don’t want!
• Perfect Baking Time: Watch closely as these cookies bake. Remove them when they’re golden brown at the edges—about 15 to 18 minutes—to keep a tender texture.
• Seal Edges Carefully: Pinch the edges of the dough securely around the filling while folding. This step helps prevent filling leakage during baking, ensuring each bite is delightful.
Cannoli Cookies: Variations & Substitutions
Feel free to let your creativity shine as you experiment with these delightful Cannoli Cookies! Every variation brings its unique twist and flavor to this scrumptious treat.
- Gluten-Free: Substitute almond flour for a light and nutty gluten-free version without sacrificing flavor.
- Creamy Upgrade: Swap ricotta for rich mascarpone to intensify the creaminess of the filling, making every bite even more indulgent.
- Flavor Kick: Add a pinch of cinnamon or nutmeg to the dough for a warm, aromatic flavor that dances on your taste buds.
- Chocolate Twist: Use dark chocolate chips in place of mini chocolate chips for a deeper, more sophisticated chocolate experience.
- Nutty Variation: Experiment with chopped hazelnuts or walnuts instead of pistachios for a different nuttiness that complements the creaminess brilliantly.
- Zesty Addition: Incorporate a splash of orange zest for a vibrant citrusy lift that enhances the overall flavor profile.
- Spicy Surprise: For an unexpected twist, try adding a dash of cayenne pepper to the filling for a hint of heat that contrasts beautifully with the sweetness.
- Dairy-Free: Utilize coconut cream or a vegan ricotta alternative to create a dairy-free delight that everyone can enjoy.
With these thoughtful variations, you’re sure to cater to diverse tastes! And if you’re looking for a perfect pairing, consider enjoying these cookies alongside a rich espresso or maybe even a refreshing glass of dessert wine. Happy baking!
Storage Tips for Cannoli Cookies
Room Temperature: Store your Cannoli Cookies in an airtight container at room temperature for up to 3 days. This keeps them fresh and delicious without compromising their crispy texture.
Freezer: To freeze, wrap the cookies tightly in plastic wrap or aluminum foil to prevent freezer burn. They will remain good for up to 1 month.
Thawing: When you’re ready to enjoy your frozen Cannoli Cookies, simply thaw them at room temperature for about 30 minutes before serving to retain their delightful flavors and textures.
Reheating: If desired, you can pop them in a preheated oven at 300°F (150°C) for 5 minutes to refresh their crispness before serving!
Make Ahead Options
These Cannoli Cookies are perfect for busy home cooks who want to streamline their meal prep! You can prepare the dough up to 24 hours in advance; simply wrap it tightly in plastic wrap and refrigerate to maintain its moisture and prevent drying out. The filling can also be made ahead of time and stored in an airtight container in the fridge for up to 3 days; just give it a stir before using to ensure it’s creamy. When you’re ready to bake, roll out the dough, fill it with your prepared mixture, and follow the baking instructions. With these make-ahead tips, you can enjoy the deliciousness of Cannoli Cookies with minimal effort and maximum flavor!
Cannoli Cookies Recipe FAQs
Can I use different types of cheese for the filling?
Absolutely! While traditional recipes call for ricotta, you can substitute it with mascarpone cheese for a creamier and richer filling. This switch not only enhances the flavor but also adds a luxurious texture to your Cannoli Cookies.
How should I store my Cannoli Cookies?
Store your Cannoli Cookies in an airtight container at room temperature for up to 3 days. This keeps them fresh and maintains their lovely crispy texture. For longer storage, wrap them tightly in plastic wrap and freeze for up to 1 month. When ready to enjoy, thaw them at room temperature for about 30 minutes.
What should I do if my cookie dough is too sticky?
If your cookie dough is too sticky, don’t fret! Start by lightly flouring your work surface when rolling out the dough. If stickiness persists, you can incorporate a small amount of additional flour, a tablespoon at a time, until you achieve a manageable consistency. Just be careful not to add too much, as this can alter the texture of your Cannoli Cookies.
Can I make these cookies gluten-free?
Very! To make Cannoli Cookies gluten-free, simply substitute the all-purpose flour with almond flour. This will ensure that your cookies are still delicious and maintain a satisfying texture. Plus, it opens up a world of possibilities for those following a gluten-free diet!
How can I prevent filling from leaking out while baking?
To prevent filling leakage, ensure you pinch the edges of the dough tightly after folding over the filling. Also, make sure to not overfill each rectangle—about a tablespoon of filling is perfect. This keeps your lovely Cannoli Cookies intact, allowing every bite to be a delightful surprise.
Can I add extra flavors to the cookie?
Of course! Feel free to add a pinch of cinnamon or nutmeg to the dough, which can elevate the flavor profile of your Cannoli Cookies with a hint of warmth. You could also swap the mini chocolate chips for dark chocolate chips for an even richer taste.
Irresistible Cannoli Cookies That'll Wow Your Taste Buds
Ingredients
Equipment
Method
- Preheat your oven to 350°F (175°C) and whisk together flour and granulated sugar in a large mixing bowl.
- Blend ricotta cheese, egg, vanilla extract, and lemon zest until smooth in a separate bowl.
- Gradually add the wet mixture to the flour and sugar blend until a soft dough forms.
- Cover the dough with plastic wrap and let it rest for 30 minutes.
- Roll out the dough to about ¼ inch thickness and cut into rectangles measuring 2x3 inches.
- Combine the remaining ricotta, chocolate chips, and pistachios to create the filling.
- Place about a tablespoon of filling in the center of each dough rectangle and seal the edges.
- Bake for 15 to 18 minutes until golden brown, then cool on a wire rack.
- Dust with powdered sugar before serving.