

Introduction to Chocolate Peanut Butter Protein Bars
Life can get hectic, and finding a quick, nutritious snack often feels like searching for a needle in a haystack. That’s where these Chocolate Peanut Butter Protein Bars come in. They’re not just delicious; they’re a game-changer for busy days or post-workout cravings. I remember the days when I’d reach for sugary snacks, only to crash an hour later. With these bars, I get a satisfying treat that fuels my body and keeps me energized. Trust me, once you try them, they’ll become your go-to snack for any occasion!
Why You’ll Love This Chocolate Peanut Butter Protein Bars
These Chocolate Peanut Butter Protein Bars are a delightful blend of taste and convenience. They come together in just 15 minutes, making them perfect for those busy mornings or post-gym snacks. The rich chocolate and creamy peanut butter create a flavor explosion that satisfies your sweet tooth without the guilt. Plus, they’re packed with protein, giving you the energy boost you need to tackle your day!
Ingredients for Chocolate Peanut Butter Protein Bars
Gathering the right ingredients is the first step to creating these delicious Chocolate Peanut Butter Protein Bars. Here’s what you’ll need:
- Rolled oats: These provide a hearty base, adding fiber and texture.
- Natural peanut butter: Creamy and rich, it’s the star ingredient that brings flavor and healthy fats.
- Honey or maple syrup: A touch of sweetness that binds everything together while keeping it natural.
- Protein powder: Choose vanilla or chocolate to boost the protein content and enhance the flavor.
- Unsweetened cocoa powder: This adds a deep chocolate flavor without extra sugar.
- Salt: Just a pinch to balance the sweetness and enhance the overall taste.
- Vanilla extract: A splash of this elevates the flavor profile, making it even more delicious.
- Chocolate chips (optional): For those who want an extra chocolatey treat, these are a delightful addition.
If you’re looking for alternatives, you can swap peanut butter for sunflower seed butter for a nut-free version. Feel free to toss in some dried fruits like cranberries or raisins for added texture and flavor. For exact measurements, check the bottom of the article where you can find them available for printing!
How to Make Chocolate Peanut Butter Protein Bars
Making these Chocolate Peanut Butter Protein Bars is as easy as pie—well, maybe easier! Follow these simple steps, and you’ll have a delicious snack ready in no time. Let’s dive in!
Step 1: Combine Dry Ingredients
Start by grabbing a large mixing bowl. Toss in the rolled oats, protein powder, cocoa powder, and salt. Mix them together well. This step is crucial because it ensures that the flavors blend evenly throughout the bars. Plus, it’s a great way to get your hands a little messy!
Step 2: Mix Wet Ingredients
In a separate bowl, combine the natural peanut butter, honey (or maple syrup), and vanilla extract. Stir until the mixture is smooth and creamy. This is where the magic happens! The peanut butter adds richness, while the honey brings just the right amount of sweetness.
Step 3: Combine Mixtures
Now, pour the wet ingredients into the dry ingredients. Stir everything together until fully combined. If you’re feeling adventurous, fold in those optional chocolate chips at this stage. They’ll melt slightly and create little pockets of chocolatey goodness!
Step 4: Prepare Baking Dish
Line an 8×8-inch baking dish with parchment paper. Leave some overhang on the sides for easy removal later. This little trick saves you from the dreaded cleanup and makes lifting the bars out a breeze!
Step 5: Press Mixture into Dish
Transfer the mixture into the prepared baking dish. Use your hands or a spatula to press it down firmly into an even layer. The firmer you press, the better the bars will hold together once set. Think of it as giving your bars a solid foundation!
Step 6: Refrigerate to Set
Pop the baking dish into the refrigerator for at least one hour. This step is essential for the bars to firm up. While you wait, you can clean up your kitchen or even sneak a taste of the leftover mixture—no judgment here!
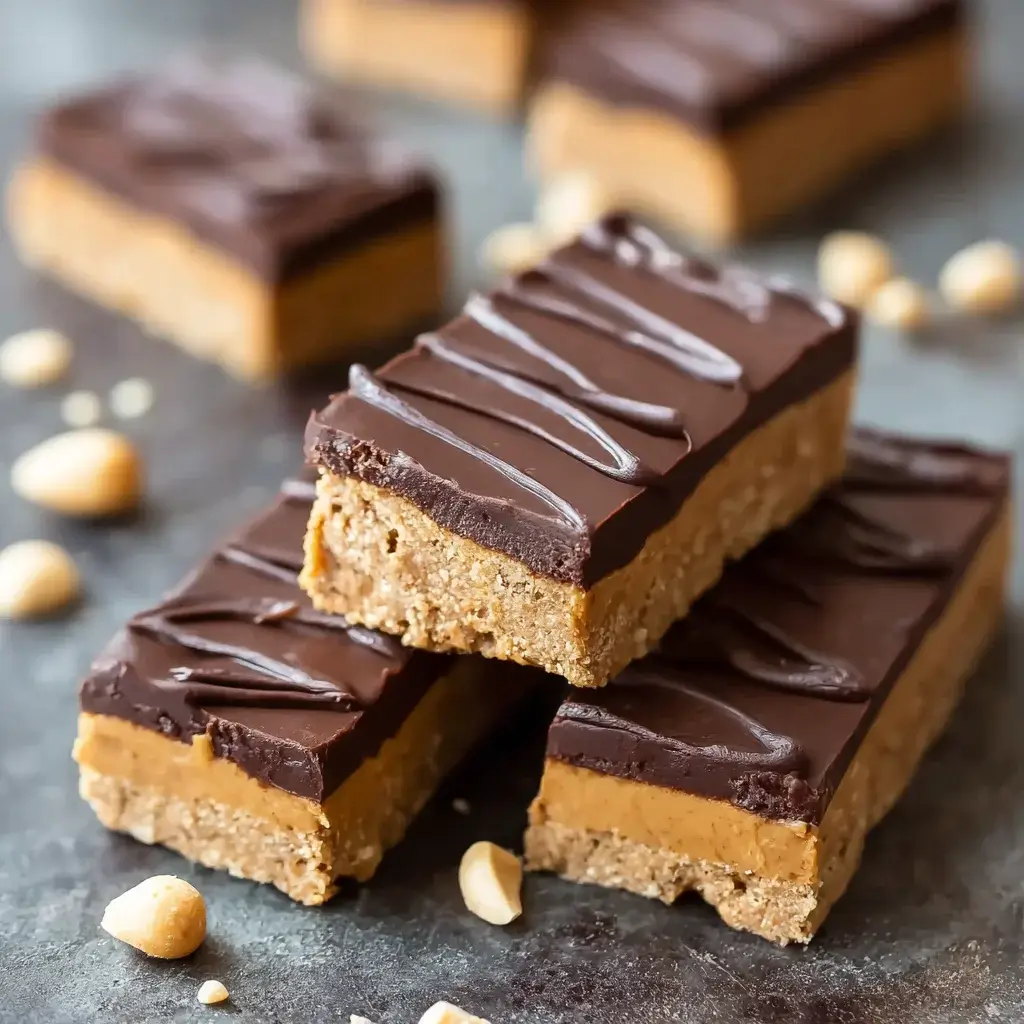
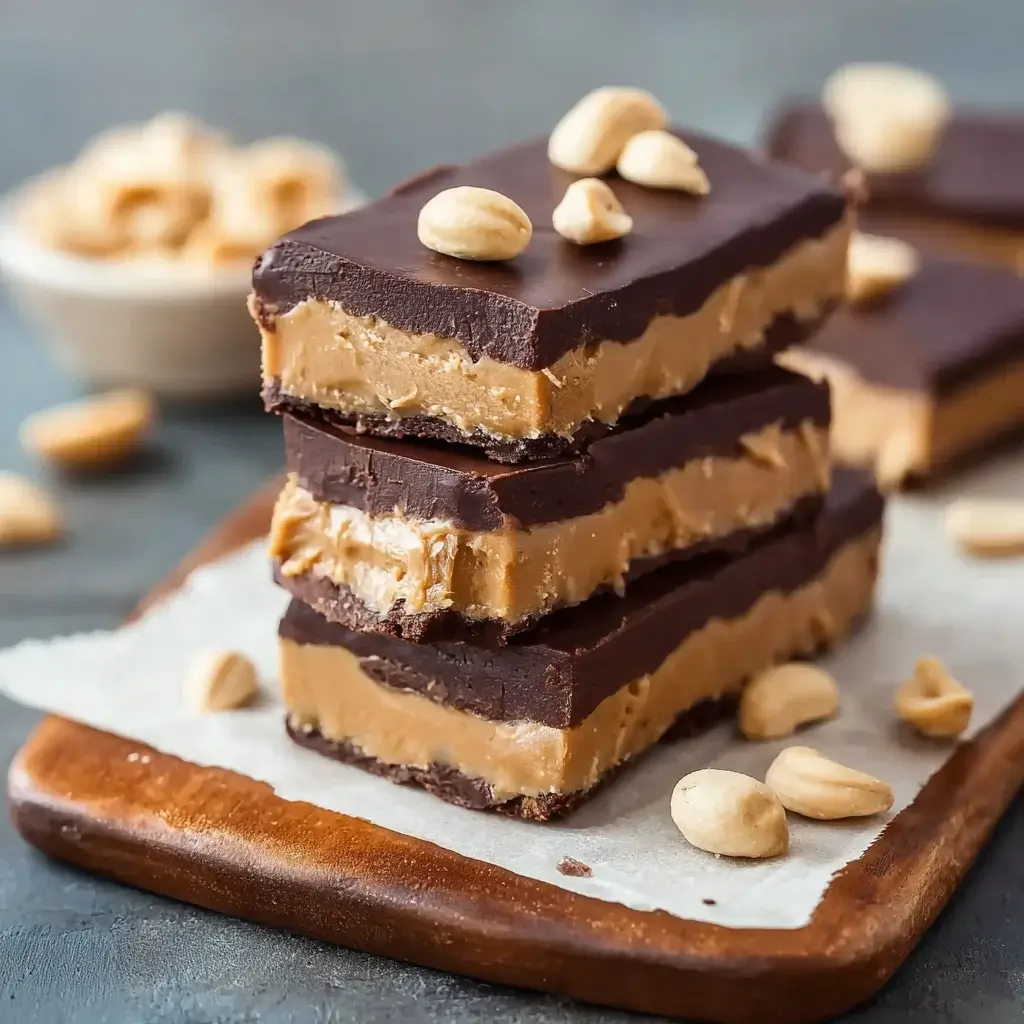
Step 7: Cut and Serve
Once the bars are set, lift them out of the dish using the parchment paper. Place them on a cutting board and slice them into squares or rectangles. Now, they’re ready to be enjoyed! Store any leftovers in an airtight container in the fridge for a quick grab-and-go snack.
Tips for Success
- Use fresh ingredients for the best flavor and texture.
- Don’t skip the refrigeration step; it’s key for firm bars.
- Press the mixture down firmly to ensure they hold together.
- Experiment with different protein powders for unique flavors.
- Store bars in an airtight container to keep them fresh longer.
Equipment Needed
- Mixing bowls: A large bowl for combining ingredients; any size will do.
- Spatula: Perfect for mixing and pressing the mixture into the dish.
- Baking dish: An 8×8-inch dish works best; a similar-sized container is fine.
- Parchment paper: Essential for easy removal; aluminum foil can be a substitute.
Variations
- Nut-Free Version: Swap out peanut butter for sunflower seed butter to make these bars nut-free.
- Protein Boost: Add a scoop of chia seeds or flaxseeds for an extra protein and fiber kick.
- Flavor Infusion: Mix in a teaspoon of cinnamon or a pinch of sea salt for a unique flavor twist.
- Fruit Additions: Toss in dried fruits like cranberries, raisins, or chopped dates for added sweetness and texture.
- Vegan Option: Use maple syrup instead of honey and ensure your protein powder is plant-based.
Serving Suggestions
- Pair these bars with a glass of almond milk or your favorite protein shake for a complete snack.
- Serve alongside fresh fruit like bananas or berries for a refreshing contrast.
- For a fun presentation, stack the bars on a colorful plate and drizzle with melted dark chocolate.
FAQs about Chocolate Peanut Butter Protein Bars
Got questions about these delicious Chocolate Peanut Butter Protein Bars? You’re not alone! Here are some common queries that might help you out:
Can I use a different type of protein powder?
Absolutely! You can use any flavor of protein powder you like. Vanilla or chocolate works best, but feel free to experiment with others.
How long do these bars last?
When stored in an airtight container in the fridge, these bars can last up to a week. They also freeze well for longer storage!
Can I make these bars vegan?
Yes! Simply substitute honey with maple syrup and ensure your protein powder is plant-based. You’ll still get all the deliciousness!
What can I add for extra flavor?
Consider adding spices like cinnamon or nutmeg, or even a splash of espresso powder for a coffee kick. Dried fruits or nuts can also enhance the texture and taste.
Are these bars suitable for meal prep?
Definitely! These bars are perfect for meal prep. Make a batch at the beginning of the week, and you’ll have a healthy snack ready to go!
Final Thoughts
Creating these Chocolate Peanut Butter Protein Bars is more than just whipping up a snack; it’s about embracing a healthier lifestyle without sacrificing flavor. Each bite is a delightful reminder that nutritious can also mean delicious. Whether you’re fueling up for a workout or simply satisfying a sweet craving, these bars deliver on all fronts. Plus, the joy of making them yourself adds a personal touch that store-bought snacks just can’t match. So, roll up your sleeves, gather your ingredients, and enjoy the satisfaction of crafting a treat that’s both good for you and utterly delicious!
Chocolate Peanut Butter Protein Bars: Your New Favorite Snack!
Ingredients
Method
- In a large mixing bowl, combine the rolled oats, protein powder, cocoa powder, and salt. Mix well.
- In a separate bowl, mix together the peanut butter, honey (or maple syrup), and vanilla extract until smooth.
- Pour the wet ingredients into the dry ingredients and stir until fully combined. If using, fold in the chocolate chips.
- Line an 8x8-inch baking dish with parchment paper, leaving some overhang for easy removal.
- Transfer the mixture to the prepared baking dish and press it down firmly into an even layer.
- Refrigerate for at least 1 hour to set.
- Once set, lift the bars out of the dish using the parchment paper and cut into squares or rectangles.
Nutrition
Notes
- For a nut-free version, substitute peanut butter with sunflower seed butter.
- Add in dried fruits, such as cranberries or raisins, for added texture and flavor.