

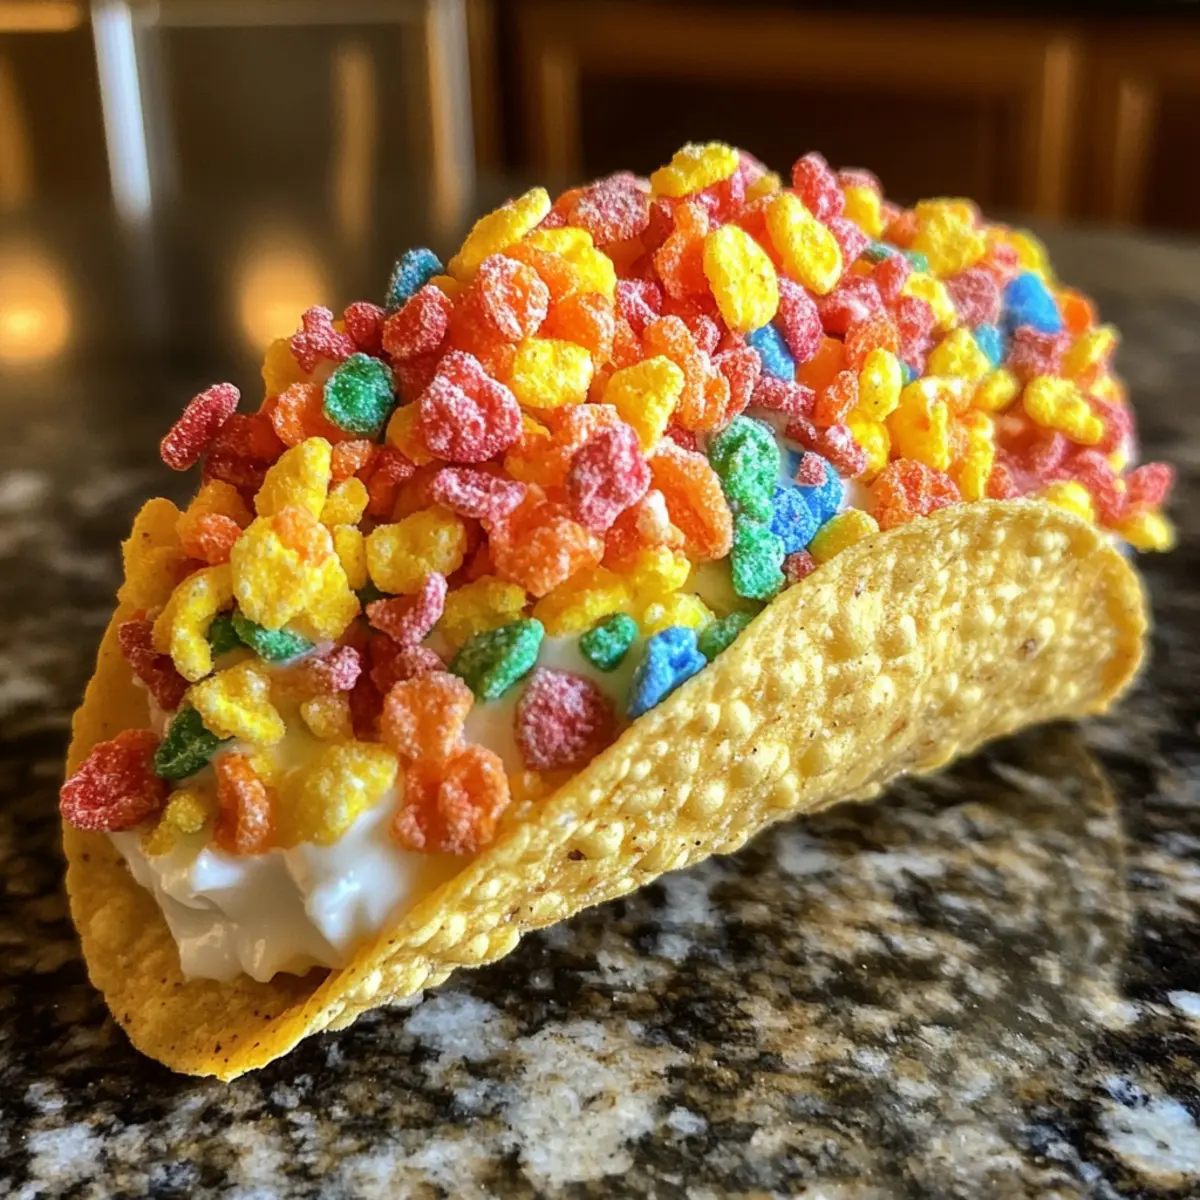
As I stood in my kitchen, the vibrant colors of Fruity Pebbles caught my eye, reminding me of those carefree childhood mornings. It inspired me to create something special—Crispy Fruity Pebbles Cheesecake Tacos. This no-bake dessert not only brings a nostalgic crunch to the table, but it’s also a dazzling centerpiece for any gathering. With just a handful of ingredients and minimal prep time, you’ll whip up this visually captivating treat that promises to wow kids and adults alike. Picture a creamy cheesecake filling nestled in crispy taco shells, with a shower of colorful cereal bringing them to life. Whether you’re preparing for a birthday party or a casual family dessert night, these tacos are designed to delight and impress. Ready to see how easy it is to create this new favorite? Let’s dive in!
Why Are These Tacos So Irresistible?
Easy to Make: With just a few simple ingredients, you can whip these up in no time, making them perfect for a spontaneous dessert.
Kid-Friendly Fun: The vibrant colors and playful presentation will excite kids, turning dessert into a delightful adventure!
No-Bake Delight: Enjoy the joy of making a delicious dessert without turning on the oven, saving you time and energy.
Perfect for Any Occasion: Whether it’s a birthday party or a family get-together, these tacos add a festive touch that everyone will love.
Versatile Options: Feel free to switch up the fruity cereals or add toppings like chocolate drizzle for a unique twist – the possibilities are endless!
Dive into the fun with these Crispy Fruity Pebbles Cheesecake Tacos, and if you’re looking for more delightful ideas, check out Breakfast Tacos Scrambled or discover a sweet treat like Oreo Cheesecake Indulge!
Crispy Fruity Pebbles Cheesecake Tacos Ingredients
For the Cheesecake Filling
- Cream Cheese – Adds richness and provides the creamy texture; ensure it’s softened for easy mixing.
- Sugar – Sweetens the filling; powdered sugar can be used for a smoother blend.
- Vanilla Extract – Enhances the cheesecake flavor; opt for pure vanilla extract for the best taste.
- Heavy Whipping Cream – Gives the filling a light and airy texture; substitute with whipped topping for a lighter version.
For the Taco Shells
- Taco Shells – Sturdy shells maintain the integrity of the filling; high-quality shells are recommended to prevent leaks.
- Fruity Pebbles Cereal – Provides the vibrant, crunchy texture; can be replaced with any fruity cereal for a similar effect.
These ingredients combine to create spectacular Crispy Fruity Pebbles Cheesecake Tacos that are sure to amaze your family and friends!
Step‑by‑Step Instructions for Crispy Fruity Pebbles Cheesecake Tacos
Step 1: Prepare the Cream Cheese Mixture
In a mixing bowl, beat 8 ounces of softened cream cheese with ½ cup of sugar and 1 teaspoon of vanilla extract until the mixture is smooth and creamy, about 2-3 minutes. You’ll know it’s ready when there are no lumps and it has a luscious texture. This creamy base is the heart of your Crispy Fruity Pebbles Cheesecake Tacos, so make sure it’s well combined.
Step 2: Whip the Heavy Cream
In a separate bowl, pour in 1 cup of heavy whipping cream and use an electric mixer to whip it until stiff peaks form, which should take about 3-5 minutes. The whipped cream should appear thick and fluffy, almost like clouds. This airy texture will lighten the cheesecake mixture, making each bite of your tacos delightful and creamy.
Step 3: Combine the Mixtures
Gently fold the whipped cream into the cream cheese mixture using a spatula, being careful not to deflate the airy texture you’ve just created. This process should take about 1-2 minutes until you see an even, velvety filling without streaks. The resulting mixture will be a rich and creamy beige, perfect for filling your taco shells.
Step 4: Prepare the Taco Shells
Take your sturdy taco shells and place them upright on a serving platter. If you prefer, you can toast them lightly in the oven at 325°F (165°C) for 5-7 minutes to achieve extra crispiness. This step enhances the texture and prevents sogginess when filling with the cheesecake mixture.
Step 5: Fill the Taco Shells
Spoon the cheesecake filling generously into each taco shell, using a piping bag or a simple spoon for precision. Ensure each shell is filled well, allowing the filling to mound slightly above the top of the shell. This visual height makes your Crispy Fruity Pebbles Cheesecake Tacos look inviting and tasty.
Step 6: Add Fruity Pebbles Topping
Sprinkle a generous amount of Fruity Pebbles cereal on top of the filled taco shells. This step should be done right before serving to maintain the crunchiness of the cereal. The bright colors of the Fruity Pebbles will not only add a fun visual element but also a delightful crunch that contrasts beautifully with the creamy cheesecake.
Step 7: Chill or Serve Immediately
Serve your Crispy Fruity Pebbles Cheesecake Tacos immediately, or if you prefer, refrigerate them for up to 30 minutes to firm up the filling a bit more. Just keep in mind that the shells may soften slightly if left too long. For the best texture, enjoy them fresh and watch everyone dive in!
Make Ahead Options
These Crispy Fruity Pebbles Cheesecake Tacos are perfect for meal prep and can save you time during busy weeknights! You can prepare the creamy cheesecake filling up to 24 hours in advance and store it in an airtight container in the refrigerator. Additionally, you can fill the taco shells and refrigerate them for up to 30 minutes before serving, but keep in mind that the shells may lose their crispiness if left longer. To maintain that delightful crunch, it’s best to add the Fruity Pebbles just before serving. When you’re ready to impress your guests, simply fill each shell, top with a sprinkle of Fruity Pebbles, and enjoy a delightful treat!
Crispy Fruity Pebbles Cheesecake Tacos Variations
Feel free to get creative with your dessert and explore these delightful twists!
Different Cereals: Swap out Fruity Pebbles for any colorful fruity cereal to give a new flavor and look. Think of the fun combinations you can create with Cap’n Crunch or Trix!
Fruit Toppings: Top with sliced strawberries, blueberries, or bananas for a fresh fruit twist that complements the creamy filling wonderfully. This not only adds flavor but also a burst of color to your tacos.
Chocolate Drizzle: Drizzle melted chocolate or caramel sauce over the filled tacos for an indulgent touch. It creates a decadent treat that amplifies the sweetness of the cheesecake.
Nutty Crunch: For some extra texture, sprinkle crushed nuts or granola on top of the filling. This adds a nutty flavor that pairs beautifully with the cheesecake.
Dairy-Free: Substitute cream cheese with a dairy-free alternative and use coconut cream instead of heavy whipping cream for a vegan-friendly option. Don’t forget to check your taco shells, as some may contain dairy!
Minty Freshness: Incorporate a teaspoon of peppermint extract into the cheesecake mixture for a refreshing mint twist. Pairing this with some crushed chocolate cookies as a crust can elevate your tacos to a whole new level.
Spicy Kick: Add a pinch of cayenne or chili powder to the filling for a surprising hint of heat that contrasts with the sweetness. This unexpected twist might just become your new favorite combination!
Rainbow Sprinkles: Finish your tacos with a sprinkle of rainbow sprinkles instead of, or in addition to, the Fruity Pebbles, making them even more festive for special occasions like birthdays or celebrations.
These variations will surely make your Crispy Fruity Pebbles Cheesecake Tacos even more exciting to share! For more dessert inspirations, check out Smashed Cheeseburger Tacos or maybe a slice of Rhubarb Streusel Cheesecake.
Expert Tips for Crispy Fruity Pebbles Cheesecake Tacos
Soften Cream Cheese: Ensure the cream cheese is at room temperature for easy mixing. Cold cream cheese can result in a lumpy filling.
Whip to Stiff Peaks: Whipping the heavy cream until stiff peaks form is crucial for a light filling. This step creates the airy texture that perfectly complements the Crispy Fruity Pebbles Cheesecake Tacos.
Fill Just Before Serving: To keep taco shells crispy, fill them right before serving. If they sit too long, they can become soggy from the cheesecake filling.
Experiment with Crunch: Feel free to alternate Fruity Pebbles with other colorful cereals for a fun twist. Just be sure they have a similar crunch for the best experience.
Chill for a Firm Texture: Refrigerating the filled tacos for up to 30 minutes will help the filling set. Just remember that the shells may soften a bit if left too long.
How to Store and Freeze Crispy Fruity Pebbles Cheesecake Tacos
Fridge: Store assembled tacos in an airtight container for up to 3 days. However, they are best enjoyed fresh to maintain the crispiness of the taco shells.
Make-Ahead: The cheesecake filling can be made a day in advance and refrigerated until you’re ready to fill the taco shells. This allows for easy assembly when serving.
Freezer: While it’s not ideal to freeze the assembled tacos, you can freeze the cheesecake filling separately for up to 2 months. Thaw in the fridge overnight before using.
Reheating: If you’ve toasted your taco shells, they can be reheated in the oven at 325°F (165°C) for about 5 minutes before filling, ensuring that they remain crisp and delightful!
What to Serve with Crispy Fruity Pebbles Cheesecake Tacos
When it comes to sleighing dessert tables, these vibrant tacos deserve a delicious ensemble!
- Ice Cream Sundae: A scoop of vanilla or fruity ice cream melted over the taut filling creates a heavenly contrast that is simply irresistible.
- Chocolate Drizzle: Add a luscious drizzle of warm chocolate sauce for a rich, decadent touch that harmonizes beautifully with the sweet cheesecake.
- Fresh Berries: Juicy strawberries, blueberries, or raspberries introduce a tartness that balances the sweetness, while also adding a splash of vibrant color.
- Whipped Cream: A dollop of freshly whipped cream adds a light and airy element, enhancing the creaminess of the cheesecake filling with its fluffy texture.
- Fun Fruit Skewers: Fresh, colorful fruit skewers not only provide a refreshing crunch but also turn your dessert into a playful, family-friendly affair.
- Sparkling Lemonade: Pair the dessert with a refreshing glass of sparkling lemonade for a zesty contrast that cuts through the richness and adds a pop of flavor.
- Chocolate-Covered Pretzels: Sweet and salty, these treats shine alongside the tacos, offering a crispy bite that will leave everyone wanting more.
- Rainbow Sprinkles: Just a sprinkle of these colorful toppings will boost the visual delight of your tacos, elevating the festive nature of your gathering.
With these delightful pairings, your Crispy Fruity Pebbles Cheesecake Tacos will shine like the star they are!

Crispy Fruity Pebbles Cheesecake Tacos Recipe FAQs
How do I choose the right ripeness for the cream cheese?
Absolutely! The cream cheese should be at room temperature, allowing it to soften and blend easily. Look for a creamy, spreadable texture without lumps for the best results. If you forget to take it out in advance, you can microwave it in 10-second intervals until softened.
What is the best way to store leftover tacos?
For sure! Store the assembled Crispy Fruity Pebbles Cheesecake Tacos in an airtight container in the refrigerator for up to 3 days. However, for optimal crispiness, it’s best to serve them fresh. If you have extra cheesecake filling, keep it in a separate container and fill the tacos just before serving.
Can I freeze the cheesecake filling, and how?
Very! You can freeze the cheesecake filling for up to 2 months. To freeze, place the filling in an airtight container or wrap it tightly in plastic wrap, ensuring no air is trapped inside. When ready to use, thaw it overnight in the refrigerator. Whip it again briefly to restore its fluffy texture before filling the taco shells.
What should I do if my filling is too runny?
Oh no! If your filling is too runny, it could be due to under-whipped cream or over-mixing. Here’s how to fix it: whip an additional ½ cup of heavy cream separately until stiff peaks form, then gently fold it into the cheesecake mixture. This will help thicken the filling and restore its creamy consistency.
Are there any allergens in this recipe I should be aware of?
Certainly! This recipe contains common allergens, including dairy (cream cheese and heavy cream) and gluten (in taco shells). Always check the packaging for specific allergens. For a gluten-free alternative, you can look for gluten-free taco shells, and if you’re lactose intolerant, consider using lactose-free cream cheese and whipped cream.
Crispy Fruity Pebbles Cheesecake Tacos for a Fun Dessert Treat
Ingredients
Equipment
Method
- In a mixing bowl, beat the cream cheese with sugar and vanilla extract until smooth and creamy, about 2-3 minutes.
- In a separate bowl, whip the heavy whipping cream until stiff peaks form, about 3-5 minutes.
- Gently fold the whipped cream into the cream cheese mixture until well combined.
- Place the taco shells upright on a serving platter. Optionally, toast in the oven at 325°F for 5-7 minutes.
- Spoon the cheesecake filling into each taco shell.
- Sprinkle Fruity Pebbles on top of the filled taco shells before serving.
- Serve immediately or chill for up to 30 minutes to firm up the filling.