

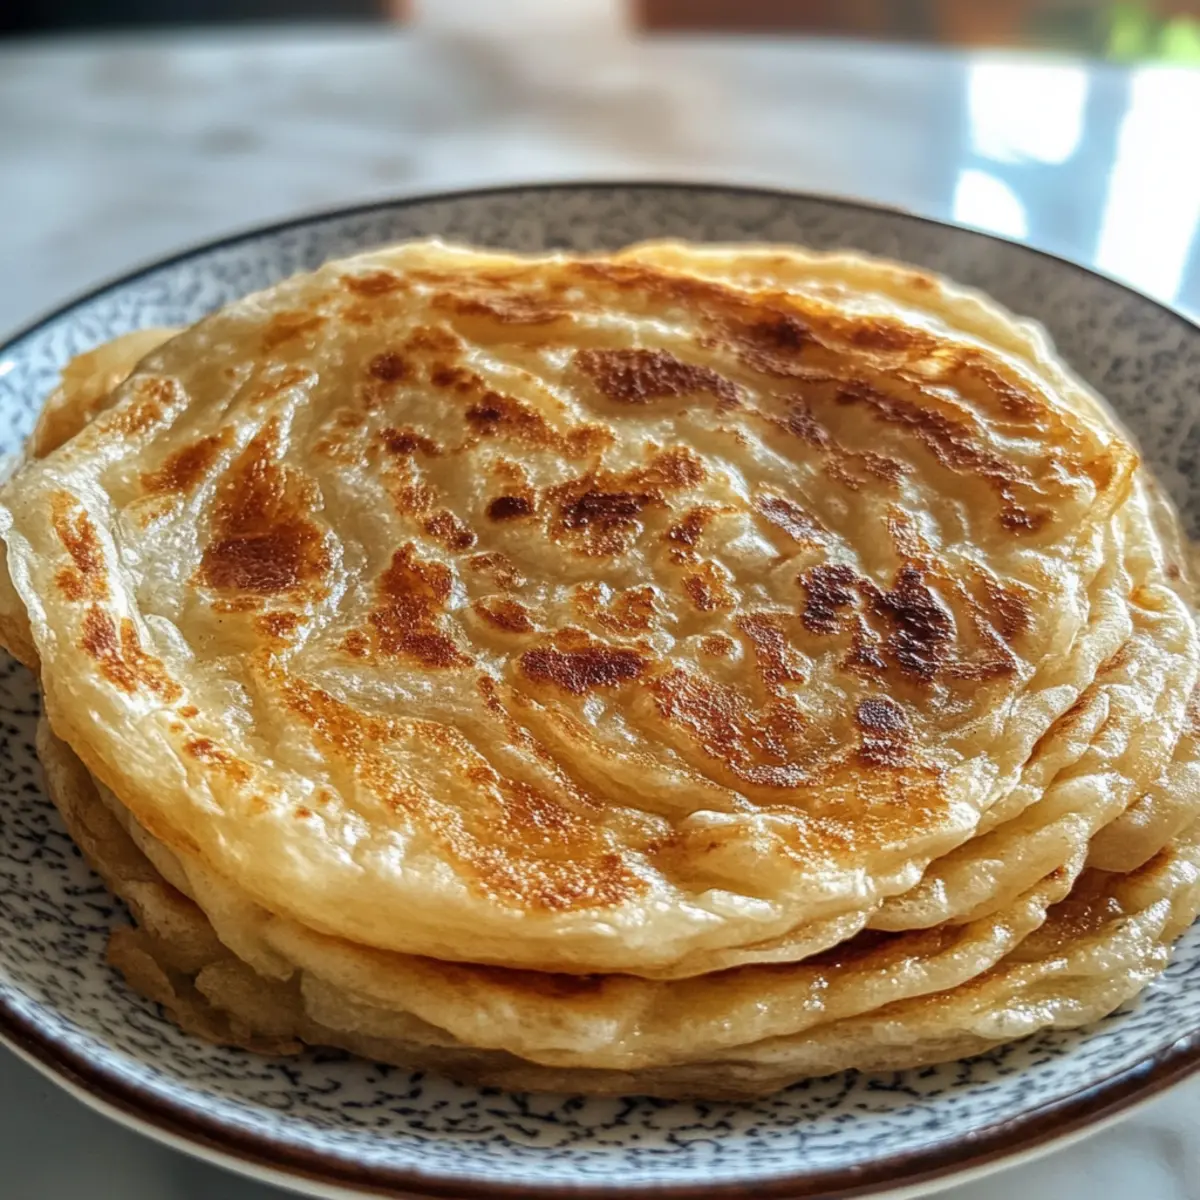
As I flipped through my favorite South Asian cookbooks, a delightful memory struck me—sinking my teeth into a perfectly flaky Roti Canai. This beloved flatbread, rich in texture yet deceptively simple to make, is a staple that resonates across Sri Lankan, Indian, and Malaysian kitchens. Today, I’m thrilled to guide you on your culinary journey with this Flaky Roti Canai recipe, revealing its effortless layers that are crisp on the outside and oh-so-tender within. This handmade bread isn’t just a crowd-pleaser; it’s a quick and versatile dish that pairs beautifully with everything from spicy curries to comforting stews. So, whether you’re gearing up for a family feast or want to impress your friends at a casual dinner, this roti will make your meal unforgettable. Ready to discover the layers of love in every bite? Let’s get cooking!
Why is Roti Canai a Must-Try?
Versatile Delicacy: This Flaky Roti Canai shines in its ability to complement any meal, from vibrant curries to hearty soups.
Crisp Yet Tender: The delightful contrast between the crispy exterior and tender inner layers is truly unforgettable.
Quick Cooking: With minimal prep and cook time, this recipe is perfect for busy weeknights, making it easy to whip up homemade goodness.
Experimenting Made Easy: Feel free to customize with fillings or toppings; create your version with sweet or savory variations.
Impressive Results: Your family and friends will be impressed by your culinary skills—they won’t believe you made this from scratch!
Flaky Roti Canai Ingredients
For the Dough
• All-Purpose Flour – The main structure of your Flaky Roti Canai; sifting it creates a lighter texture.
• Sea Salt – Elevates flavor; you can use kosher salt as a substitute if necessary.
• Boiling Water – Essential for partially cooking the flour, which enhances elasticity; always use hot water for the best dough consistency.
• Room Temperature Water – Adjusts the dough’s texture, adding as needed to form a cohesive and soft dough.
• Oil – Vital for coating and layering, giving you those luscious flaky layers; feel free to substitute with ghee or butter for added richness.
For Cooking
• Additional Oil – Use for cooking the roti; a light coating is key to prevent sticking and ensure even browning.
Optional Fillings/Toppings
• Egg – For an egg roti, crack a fresh egg on top after cooking; it adds protein and flavor.
• Vegetables or Meat – Incorporate your favorite spiced vegetables or cooked meats for a hearty filling.
• Sugar or Condensed Milk – For a sweet treat, add to the dough and serve it with a scoop of ice cream for dessert!
Step‑by‑Step Instructions for Flaky Roti Canai
Step 1: Prepare Dough
In a large mixing bowl, combine all-purpose flour and sea salt. Gradually pour in boiling water while stirring with a wooden spoon until clumps form. Once combined, add room temperature water a little at a time until the dough begins to hold together. The mixture should look scraggly at this point, preparing it for kneading.
Step 2: Rest Dough
Cover the bowl with a clean kitchen towel or plastic wrap and let the dough rest for 30 minutes to an hour. This resting period allows the gluten to relax, resulting in a smoother texture that’s easier to roll out later. Set a timer and take a moment to clean your work area and prepare for the next step.
Step 3: Knead Dough
After the resting time, turn the dough out onto a lightly floured surface. Knead the dough for about 2-3 minutes until it becomes smooth and pliable. Once ready, divide it into eight equal portions, shaping each piece into a ball. This will ensure uniform cooking and flakiness for the Flaky Roti Canai.
Step 4: Coat Balls
Take each dough ball and lightly roll it in oil, ensuring it’s coated evenly. Arrange the coated balls on a plate with enough space between them to breathe. Cover the plate with a kitchen towel and let them rest for 2 hours, or overnight if possible, to enhance texture and elasticity.
Step 5: Shape Roti
Once rested, lightly oil your work surface. Flatten each dough ball with your hands or a rolling pin until it reaches a paper-thin texture. Be gentle to avoid tearing. Before you fold or roll the dough, brush a thin layer of oil on top to promote flakiness in your Flaky Roti Canai.
Step 6: Form Layers
Starting from one end, coil the flattened dough into a spiral shape, tucking in the ends to prevent them from unraveling. Place the coiled dough seam-side down and cover again for another hour of rest. This step is essential for creating those beautiful flaky layers you’re aiming for in the final product.
Step 7: Cook Roti
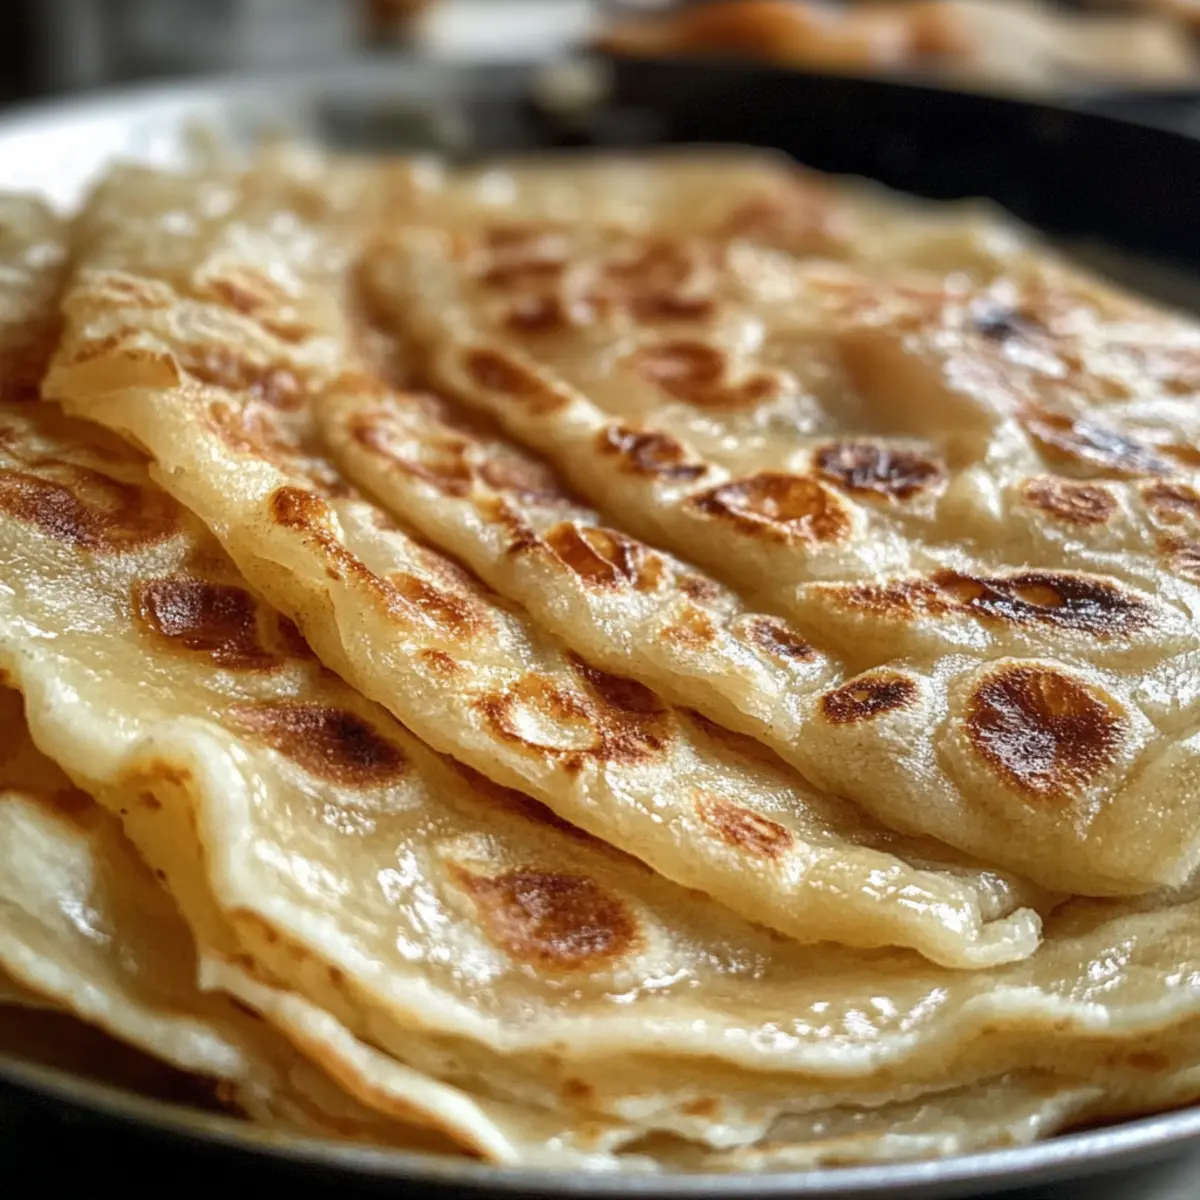
Heat a non-stick pan over medium heat. Take a coiled dough piece and flatten it gently with your hands until it reaches a 6-7 inch diameter. Once the pan is hot, carefully place the roti in and cook for about 2-3 minutes or until golden brown. Flip it as necessary to ensure even browning on both sides.
Step 8: Final Touch
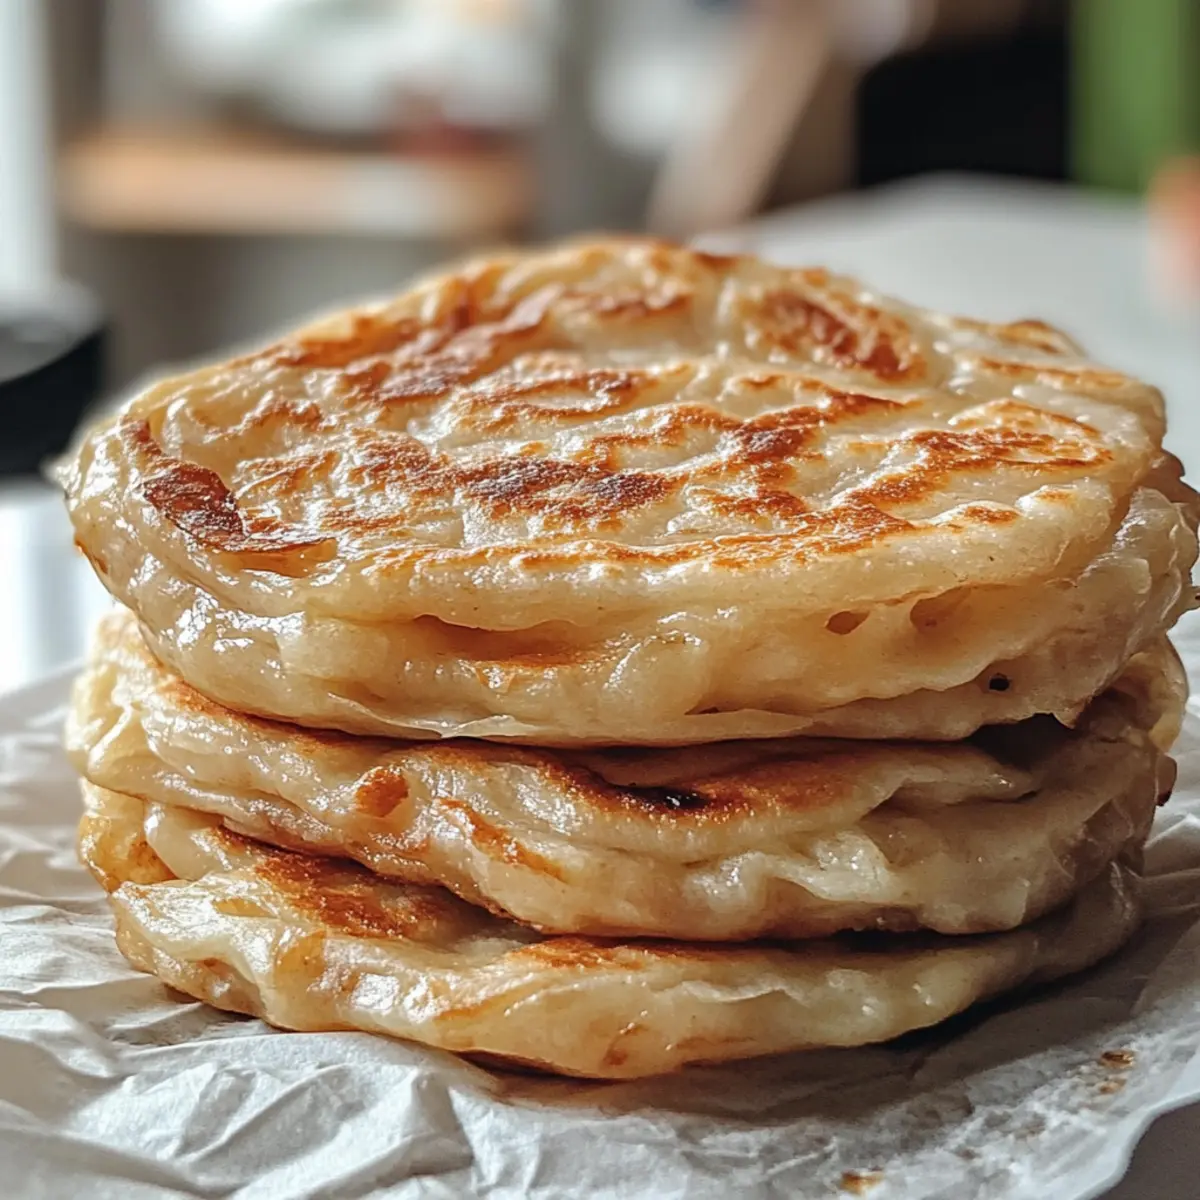
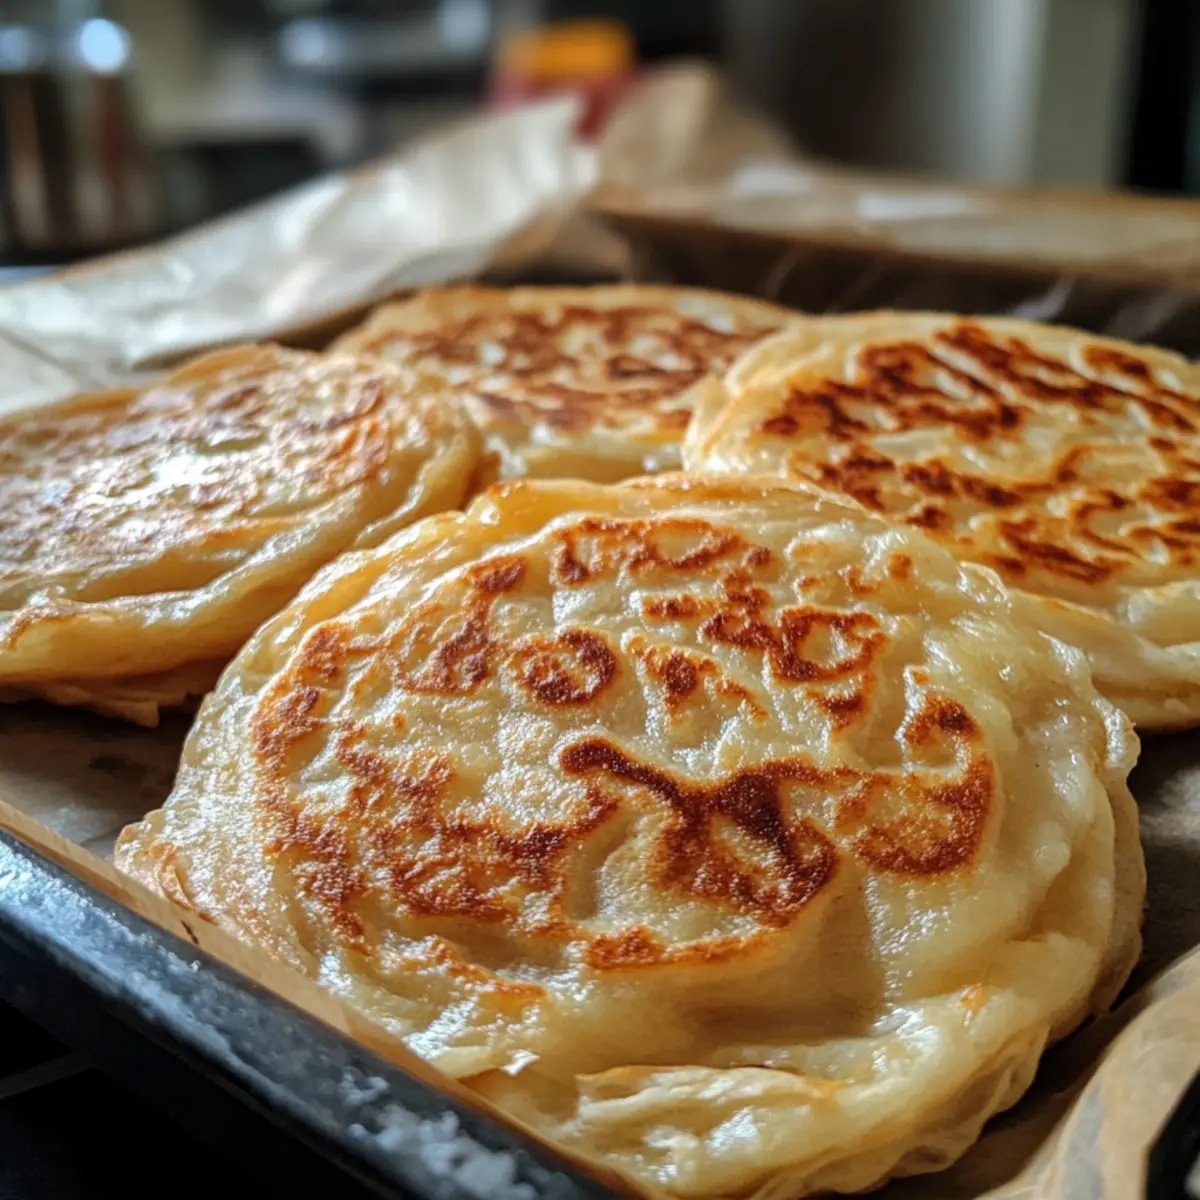
Once cooked, gently squash the hot roti with your hands to separate the layers, enhancing its flaky texture. Remove from the pan and serve warm with your favorite curry or dish. Enjoy the delicious satisfaction of your homemade Flaky Roti Canai as you dig into the layers of goodness!
What to Serve with Flaky Roti Canai
Experience the warmth of a cozy meal as you explore delightful pairings that elevate your homemade roti experience.
-
Savory Chicken Curry: The rich flavors of chicken curry meld beautifully with the flaky roti, soaking up the sauce and enhancing each bite.
-
Spicy Beef Rendang: This aromatic dish brings a depth of flavor that perfectly contrasts the tenderness of the roti, creating a satisfying balance.
-
Vegetable Korma: Creamy and spiced, this vegetarian option adds vibrant colors and textures, making every meal a feast for the senses.
-
Coconut Chutney: A refreshing side that cuts through the richness of the roti, its nutty sweetness elevates the overall experience.
-
Raita: This cooling yogurt-based dip soothes spicy dishes beautifully, providing a perfect contrast to the crispy exterior of the roti.
-
Mango Lassi: Sweet, creamy, and tangy, this drink complements the savory flavors and brings a lightness to your meal, making it even more enjoyable.
-
Gulab Jamun: Finish off your meal with this delightful dessert. The syrupy sweetness contrasts wonderfully with the savory roti, leaving a lingering sweetness on the palate.
Pairing these elements will lead to a truly memorable dining experience, inviting loved ones to gather around the table and enjoy the diverse flavors of your meal.
Make Ahead Options
These Flaky Roti Canai are a fantastic choice for meal prep, saving you time on busy weeknights! You can prepare the dough up to 24 hours in advance by following the initial steps, then covering the oiled dough balls and refrigerating them. Just remember to let them come to room temperature before shaping. Additionally, once cooked, the roti can be stored in an airtight container at room temperature for 1-2 days or frozen for up to 3 months. When you’re ready to serve, simply reheat the roti in a hot pan for a few minutes until warm and crispy again—ensuring they’re just as delicious as when they were freshly made!
Flaky Roti Canai Variations & Substitutions
Ready to explore exciting twists on this classic dish? Experimenting with flavors or ingredients can make your Flaky Roti Canai even more enjoyable!
-
Egg Roti: Top your cooked roti with a broken egg and allow it to set for a delightful breakfast twist. This addition complements the flaky layers wonderfully, adding protein and richness.
-
Vegetable Filling: Stuff your roti with a mix of spiced sautéed vegetables before coiling for a hearty, plant-based meal. Think flavorful combinations of carrots, peas, and potatoes for a colorful surprise in every bite!
-
Sweet Roti: For dessert, incorporate sugar or condensed milk into the dough. Serve it warm with a scoop of ice cream for indulgence that’s simply irresistible.
-
Spicy Roti: Add a pinch of chili powder to the dough for a fiery kick. This simple adjustment will surprise your taste buds and elevate your roti experience—perfect for those who love heat!
-
Herbed Roti: Mix fresh herbs like cilantro or mint into the dough for a fragrant addition. This creates a refreshing flavor that pairs beautifully with curries or sauces—definitely a crowd-pleaser!
-
Cheese Stuffing: Add a blend of your favorite cheeses in the filling before forming the coiled dough. As the roti cooks, the melted cheese will create a gooey, savory center.
These variations can make your Flaky Roti Canai distinctly yours! For some delightful pairings, consider serving your roti alongside a rich chicken curry or a vibrant vegetable korma to enhance your meal’s experience. Happy cooking!
Expert Tips for Flaky Roti Canai
-
Measure with Precision: Using weight measurements for flour ensures consistency. Too much flour can make the dough dense, ruining the flakiness of your Flaky Roti Canai.
-
Resting Time is Essential: Allow the dough to rest adequately to relax the gluten. This step makes rolling easier and prevents the dough from shrinking back as you work.
-
Aim for Paper-Thin Layers: Practice makes perfect! Don’t rush—take your time flattening the dough to avoid tearing, which is crucial for achieving the signature flakiness.
-
Keep Oil Light: Using excess oil can lead to slippery dough, making it difficult to roll out. Just a light coating is enough to ensure your layers separate beautifully.
-
Cook on Medium Heat: Cooking on too high a heat can burn the outside while leaving the inside uncooked. Monitor the temperature to achieve a perfect golden-brown finish for your Flaky Roti Canai.
How to Store and Freeze Flaky Roti Canai
Room Temperature: Keep your Flaky Roti Canai in an airtight container for up to 1-2 days. This preserves its tempting texture but will gradually lose its crispness.
Fridge: If you need to store it longer, place the roti in the fridge, wrapped in foil or stored in an airtight container, for up to 3 days. Reheat in a pan for best results.
Freezer: For long-term storage, freeze the cooked Roti Canai separated by parchment paper, wrapped tightly in plastic wrap, for up to 3 months. Simply reheat from frozen!
Reheating: To retain flakiness, reheat roti in a non-stick pan over medium heat until warm and slightly crisp. Enjoy them fresh out of the pan!
Flaky Roti Canai Recipe FAQs
What is the best way to select flour for making Roti Canai?
Absolutely! The best choice is all-purpose flour; make sure to sift it before measuring. This reduces clumping and creates a lighter texture in your Flaky Roti Canai. Look for flour with a higher protein content for better gluten development which leads to that wonderful elasticity you want.
How should I store leftover Roti Canai?
Very! You can store your Flaky Roti Canai at room temperature in an airtight container for 1-2 days. If you want to extend its life, wrap it tightly in foil and place it in the refrigerator where it will last up to 3 days. When ready to eat, reheat it gently in a pan to restore the flakiness.
Can I freeze Flaky Roti Canai and how do I do it?
Absolutely! To freeze your Flaky Roti Canai, first ensure they are completely cool. Then, place them in a single layer on a baking sheet and flash freeze them for about 30 minutes. This prevents them from sticking together. After flash freezing, wrap each roti in plastic wrap and store them in a freezer-safe bag for up to 3 months. When you’re ready to enjoy them, just reheat from frozen in a pan over medium heat, flipping as needed until warmed through.
Why is my Roti Canai not flaky enough?
If your roti isn’t achieving that desirable flakiness, it may be due to insufficient resting time. The dough needs to relax for at least 30 minutes before shaping. Additionally, ensure you’re rolling it thin enough; aim for a paper-thin layer. If it’s too thick, it may result in a denser texture rather than the desirable flaky finish.
Can I make Roti Canai for my pets?
While the ingredients in Flaky Roti Canai are generally safe, be cautious! The salt and any added oil might not be suitable for all pets, especially dogs. It’s best to stick to pet-friendly homemade treats to ensure their health and safety.
What if I have an allergy to gluten?
If you have a gluten allergy or intolerance, I recommend using a gluten-free all-purpose flour blend. However, keep in mind that the texture and flakiness may differ slightly from traditional Flaky Roti Canai. Ensure your blend contains xanthan gum for better binding!
Flaky Roti Canai You'll Love: Perfectly Crisp & Comforting
Ingredients
Equipment
Method
- In a large mixing bowl, combine all-purpose flour and sea salt. Gradually pour in boiling water while stirring with a wooden spoon until clumps form.
- Add room temperature water a little at a time until the dough begins to hold together. The mixture should look scraggly.
- Cover the bowl and let the dough rest for 30 minutes to 1 hour.
- Turn the dough out onto a lightly floured surface and knead for about 2-3 minutes until smooth. Divide into eight equal portions.
- Roll each dough ball in oil and arrange them on a plate, cover, and let rest for 2 hours or overnight.
- Lightly oil your work surface. Flatten each dough ball until paper-thin, brushing with oil on top.
- Coil the flattened dough into a spiral shape and place seam-side down. Let rest for another hour.
- Heat a non-stick pan over medium heat and flatten a coiled dough piece to a 6-7 inch diameter.
- Cook for about 2-3 minutes or until golden brown, flipping as necessary.
- Gently squash the hot roti with your hands to separate the layers and serve warm.