

As I was flipping through my favorite food magazine, a vibrant photo of a homemade chalupa caught my eye, the crisp shell practically calling my name. I just had to recreate this delightful Mexican treat in my kitchen, and let me tell you, there’s nothing quite like the aroma of sizzling dough and seasoned black beans wafting through the air! This homemade chalupa recipe is not only easy to make but also highly customizable, ensuring that even the pickiest eaters in your family will find their perfect fit. Whether you’re planning a casual family dinner or gearing up for game night, these golden, crispy pockets are sure to be a hit. So, why settle for fast food when you can whip up this flavor-packed meal at home? Ready to dive into the world of homemade chalupas? Let’s get started!
Why Make Homemade Chalupas?
Flavor Explosion: The seasoned black beans, fresh veggies, and creamy toppings create a mouthwatering combination everyone will love.
Customizable: Whether you’re craving something vegetarian or want to use leftover meat, simply adjust the fillings to please all palates.
Quick and Easy: This recipe comes together in under an hour, making it perfect for busy weeknights or spontaneous gatherings.
Perfect for Sharing: Serving up a platter of chalupas encourages family and friends to dig in together—just like enjoying a meal at your favorite Mexican restaurant! So, if you love homemade food, you’re going to adore how simple it is to make these delicious treats at home. Pair them with some Homemade Pancakes Elevates for a delightful culinary experience!
Homemade Chalupa Ingredients
For the Dough
- All-purpose flour – Provides structure for the chalupa; substitute with a gluten-free flour blend for a gluten-free option.
- Baking powder – Helps the chalupas become light and crispy; no substitution recommended.
- Salt – Enhances flavor; adjust to your preference.
- Melted butter – Adds richness to the dough; substitute with vegetable oil for a dairy-free option.
- Milk – Hydrates the dough; full-fat milk is preferred but almond or soy milk works for a dairy-free version.
For Frying
- Oil for frying – Essential for getting that crispy texture; use vegetable or canola oil for the best results.
For the Filling
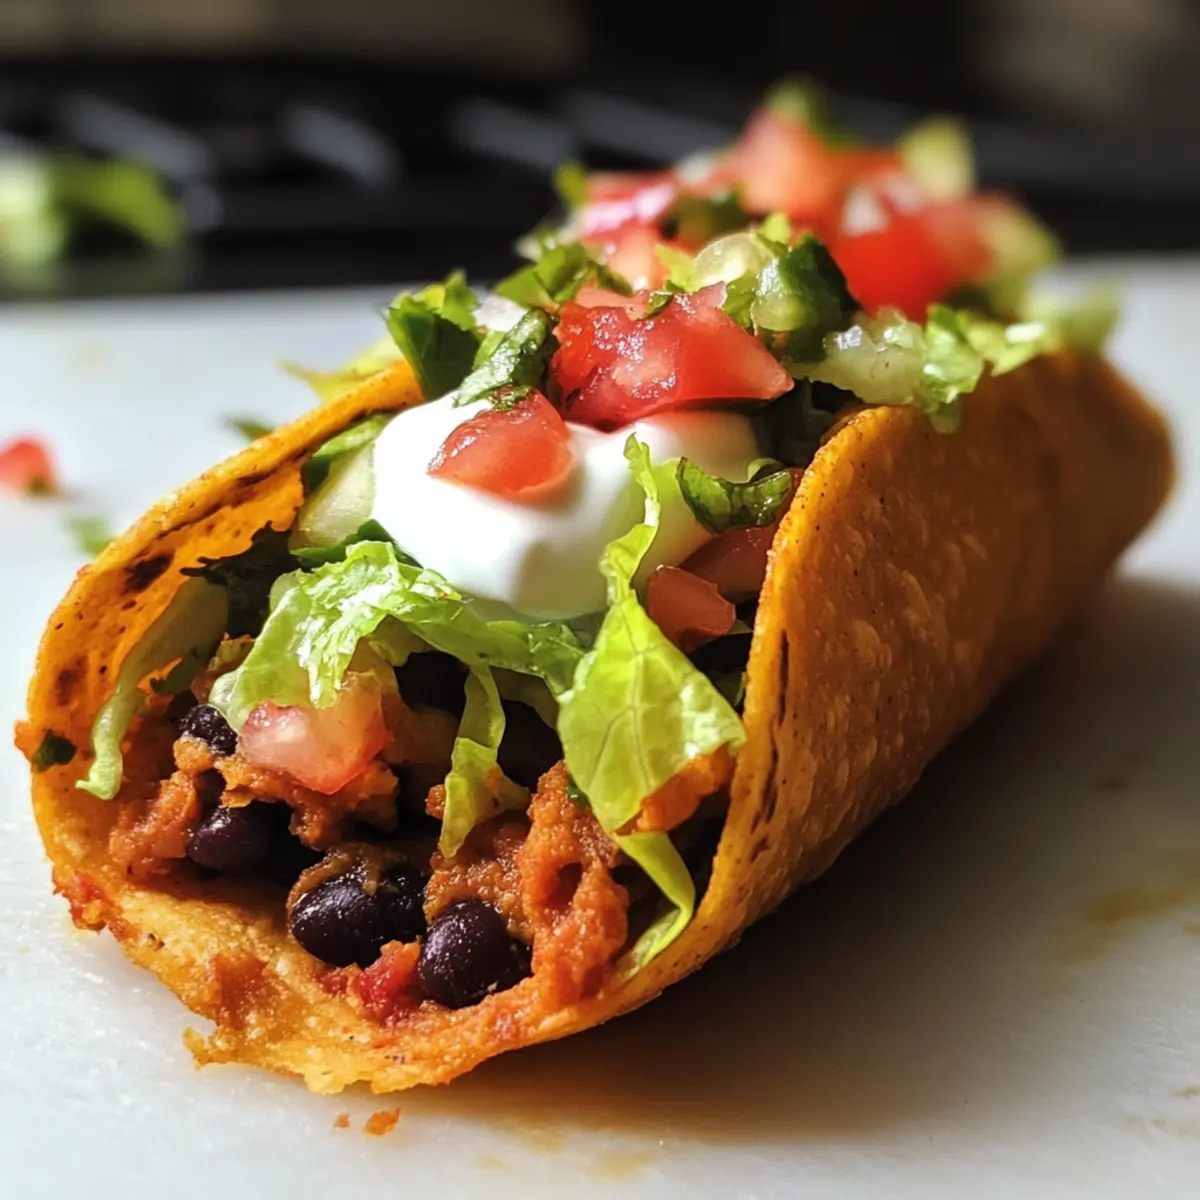
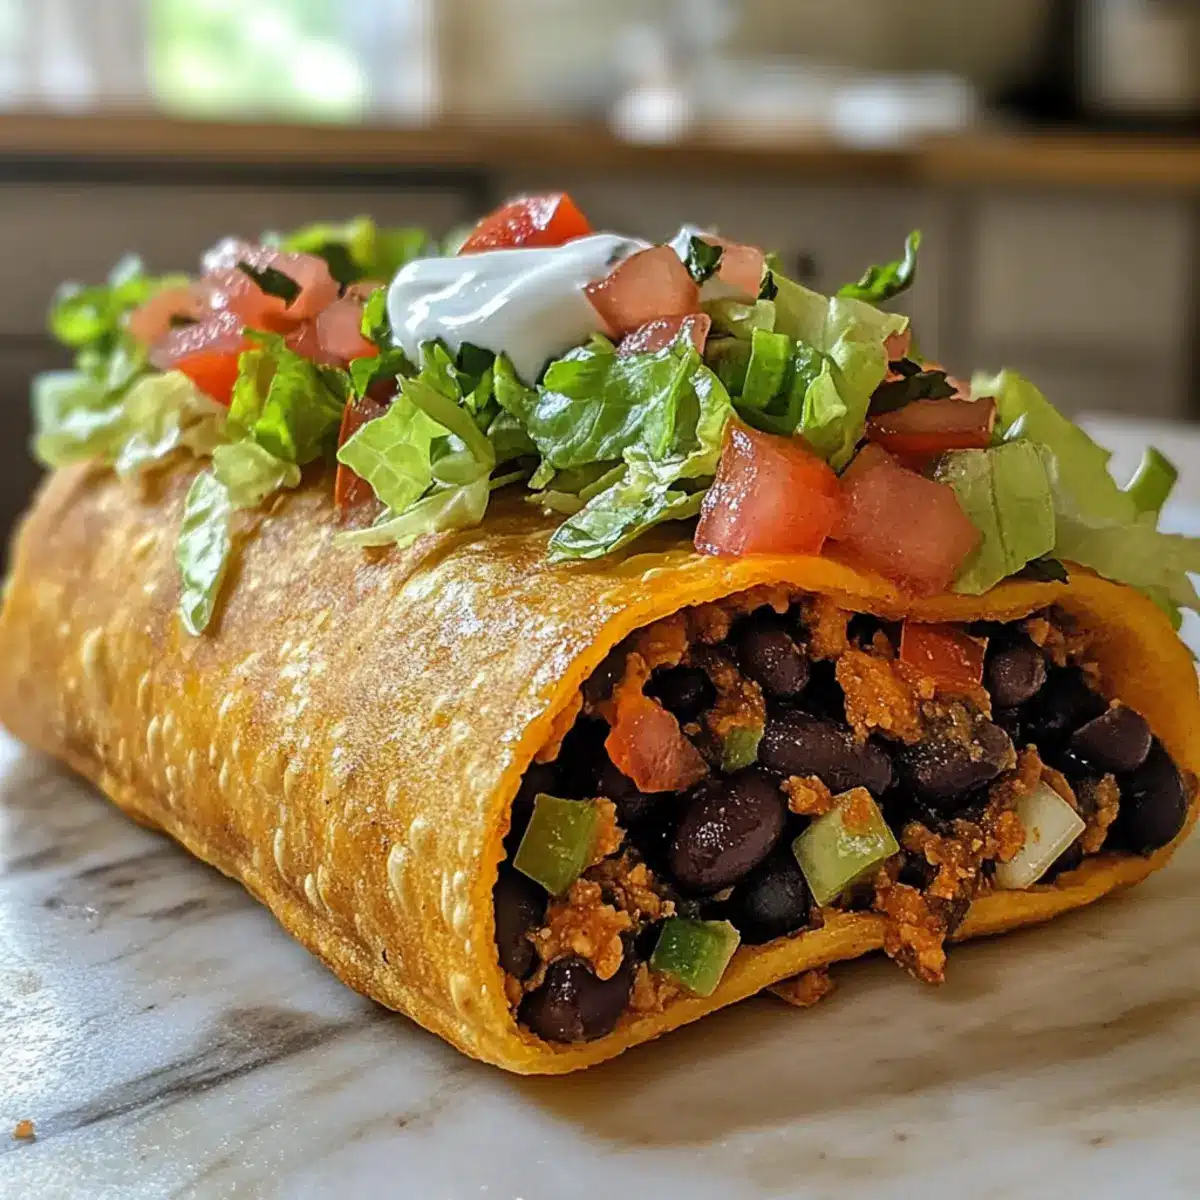
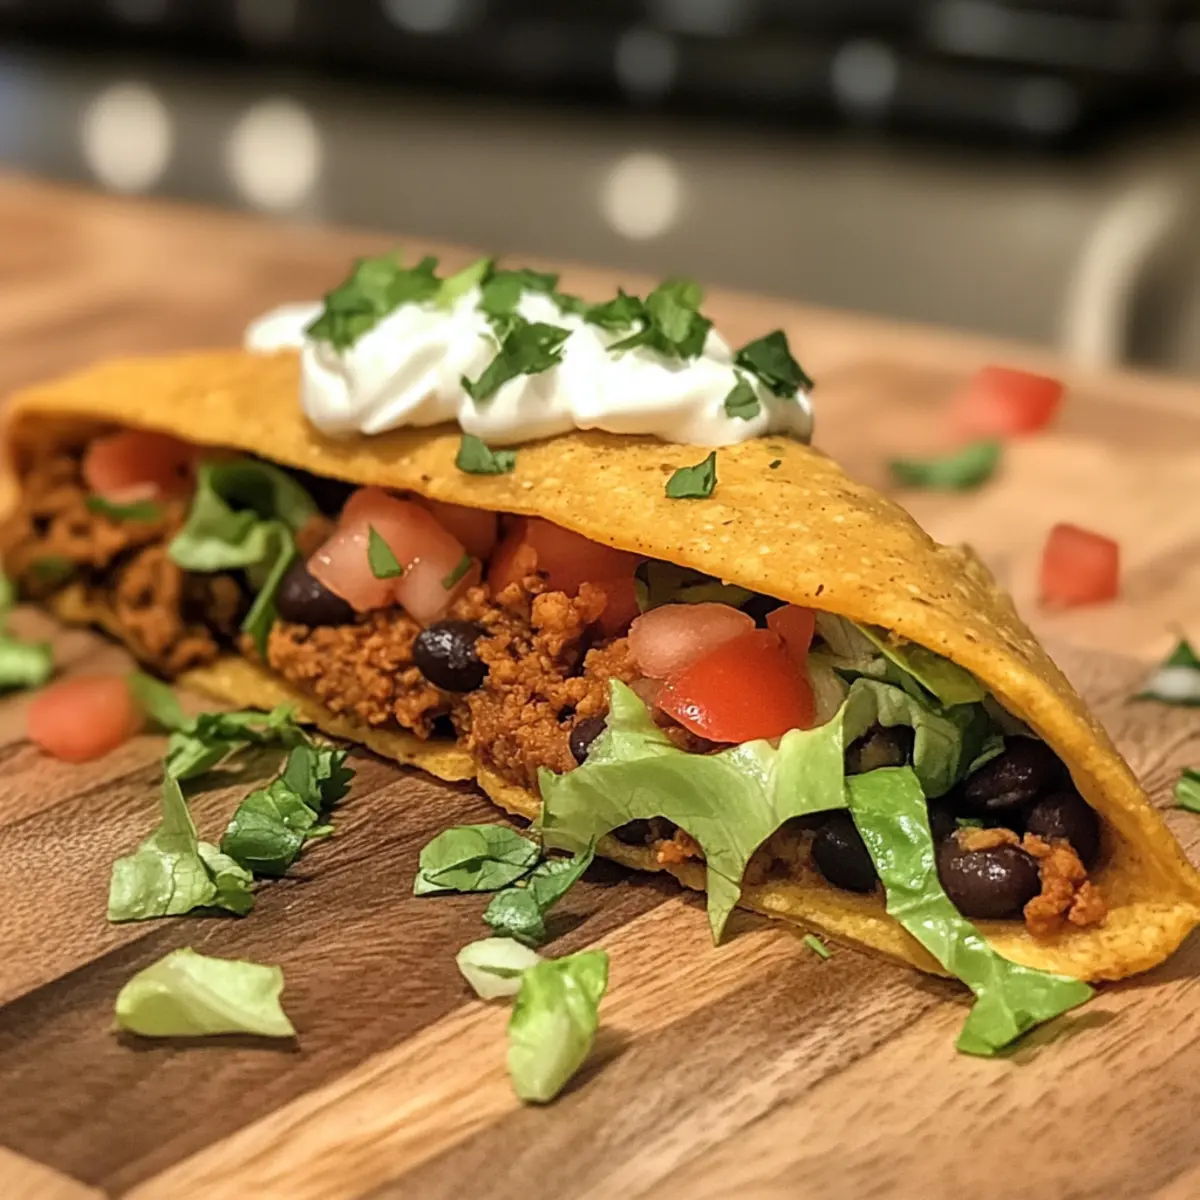
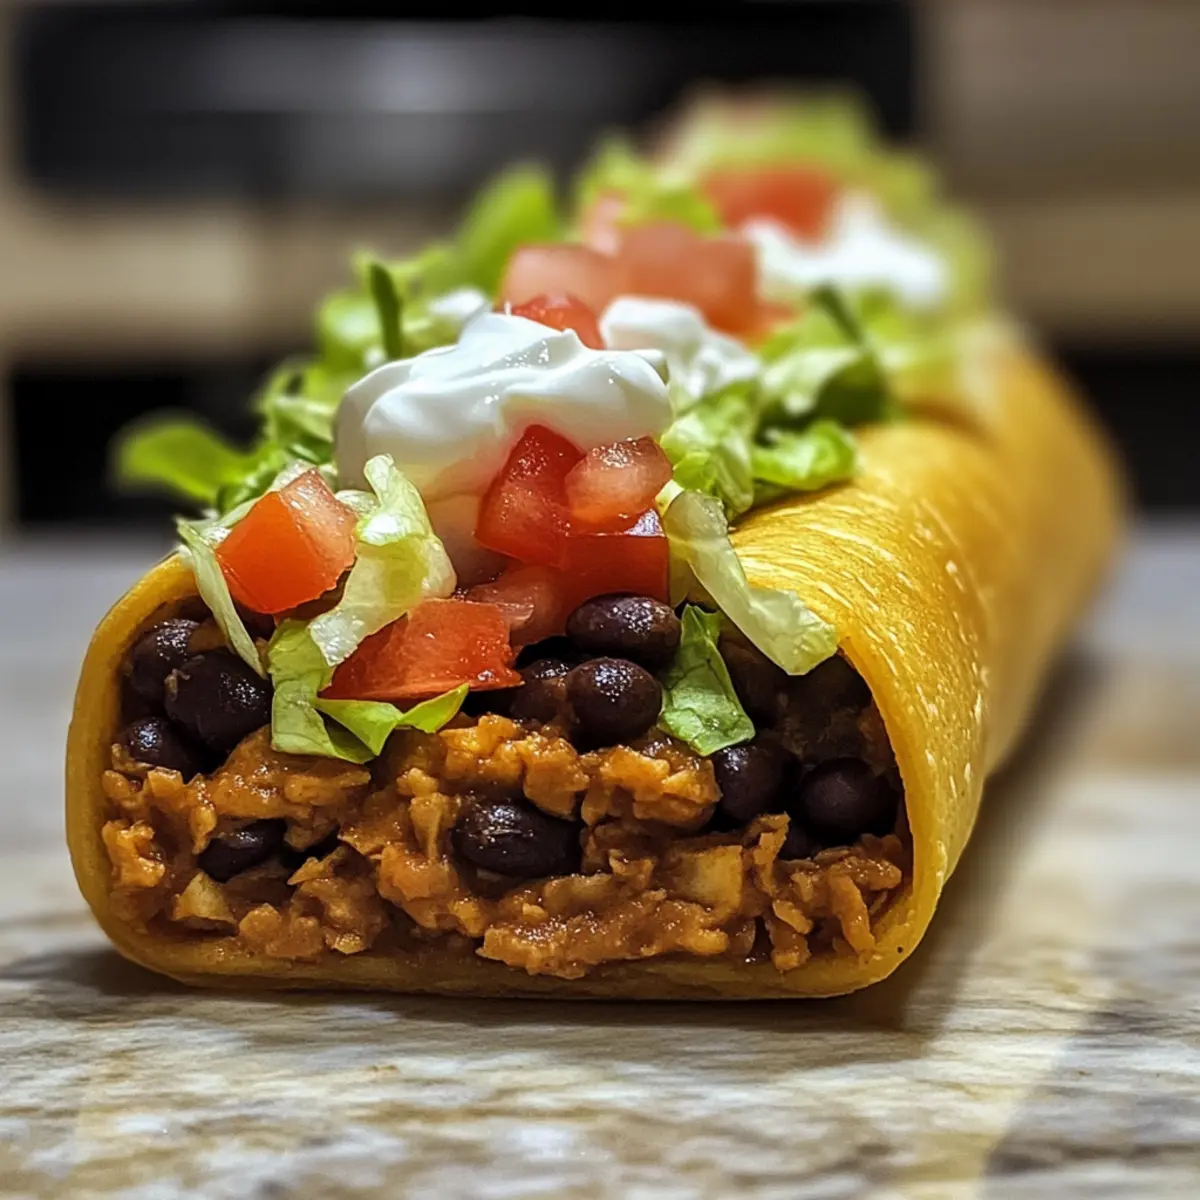
- Black beans – The main filling that adds fiber and protein; feel free to replace with refried beans or pinto beans for variety.
For Toppings
- Lettuce – Adds freshness and crunch; can substitute with spinach or kale for a twist.
- Tomatoes – Provides color and freshness; diced peppers can also be used for a different flavor profile.
- Sour cream – A creamy topping that balances the texture; substitute Greek yogurt for a tangy alternative.
- Queso sauce – Provides extra flavor; optional but highly recommended. Alternatively, use melted cheese or your favorite salsa.
- Cheese – Adds creaminess and taste; pepper jack is suggested, but any cheese will do!
Enjoy experimenting with these homemade chalupa ingredients to craft your family’s new favorite dish!
Step‑by‑Step Instructions for Homemade Chalupa
Step 1: Prepare the Dough
In a large bowl, combine 2 cups of all-purpose flour, 1 tsp baking powder, and 1/2 tsp salt. Pour in 1/4 cup of melted butter and mix until crumbly. Gradually add 3/4 cup of milk, stirring until the dough starts to come together. Once you achieve a soft dough, turn it out onto a floured surface to prepare for kneading.
Step 2: Knead the Dough
Knead the dough gently on the floured surface for about 5 minutes or until it becomes smooth and elastic. This is crucial as it develops the gluten, helping your homemade chalupas achieve that crispy texture! Don’t rush this step; enjoy the process of working the dough until it feels just right.
Step 3: Rest the Dough
Cover the kneaded dough with a clean kitchen towel and let it rest for 10 minutes. This resting period allows the gluten to relax, making it easier to roll out later. While the dough rests, you can gather your filling ingredients and toppings to streamline your cooking process.
Step 4: Shape the Chalupas
After resting, divide the dough into 8 equal pieces and shape each piece into a ball. On a floured surface, flatten each ball into a disk about 1/4 inch thick. Aim for uniform thickness to ensure even frying, allowing your homemade chalupas to cook perfectly until golden and crispy.
Step 5: Fry the Chalupas
In a deep skillet or frying pan, heat about 1 inch of vegetable oil over medium-high heat until it reaches 350°F (175°C). Carefully add the disks one at a time, frying each for about 3-4 minutes per side, or until they turn golden brown and crispy. Use tongs to flip them gently, being cautious to avoid splatters.
Step 6: Assemble the Chalupas
Remove the fried chalupas from the oil and drain them on paper towels to absorb excess oil. Now, it’s time to assemble your homemade chalupas! Start by filling each crispy shell with seasoned black beans, then layer on your choice of toppings, such as shredded lettuce, diced tomatoes, sour cream, queso sauce, and cheese for that perfect finishing touch.
Expert Tips for Homemade Chalupas
- Oil Temperature: Maintain the oil around 350°F for crispy chalupas; too low makes them greasy, while too high burns them.
- Draining Excess Oil: Allow fried chalupas to rest on paper towels to absorb oil; this keeps them crispy and prevents sogginess.
- Custom Filling: Don’t hesitate to experiment with fillings; leftovers like grilled chicken or sautéed veggies can add exciting flavors to your homemade chalupa.
- Thickness Matters: Roll your dough evenly; inconsistencies may lead to uneven frying, affecting texture and crispness.
- Don’t Overcrowd: Fry in batches to avoid crowding the pan, ensuring each chalupa has enough space to fry evenly.
What to Serve with Homemade Chalupa
There’s nothing quite like gathering around a table full of vibrant, delicious dishes to elevate your homemade chalupa experience.
Mexican Rice: A fragrant side that complements the dish’s hearty flavors, adding a comforting grain element to balance your meal.
Fresh Guacamole: Creamy and rich, this avocado spread adds coolness and a burst of flavor that enhances each bite of chalupa.
Pico de Gallo: The zingy freshness of diced tomatoes, onions, and cilantro brightens the meal, making every chalupa feel lively and vibrant.
Corn Salad: Sweet corn tossed with lime juice and black beans offers a refreshing crunch, providing texture and freshness alongside the crispy chalupa.
Refried Beans: For a comforting classic, serve warm refried beans on the side; their smooth texture makes for a perfect dip!
Grilled Vegetables: A medley of bell peppers and zucchini adds a smoky, charred flavor that pairs beautifully with the chalupas’ crispy exterior.
Chilled Agua Fresca: Refreshing and fruity beverages like hibiscus or watermelon agua fresca cleanse the palate and enhance the festive atmosphere.
Chocolate Flan: For dessert, this rich and creamy flan is the ultimate sweet ending, rounding out your meal with a touch of indulgence.
Make Ahead Options
These homemade chalupas are perfect for meal prep! You can prepare the dough up to 24 hours in advance by following the initial steps—just cover it with plastic wrap and refrigerate to keep it fresh. The fried chalupas can also be made ahead and stored in an airtight container in the fridge for up to 3 days. To maintain their crispy texture, reheat the chalupas in a hot oven for a few minutes before serving. When you’re ready to enjoy, simply fill them with warmed seasoned black beans and your favorite toppings for a quick, satisfying meal that feels just as delicious as when they were freshly made!
Homemade Chalupa Variations
Customize your homemade chalupa with fun twists and substitutions that excite your taste buds!
- Gluten-Free: Use a gluten-free flour blend instead of all-purpose flour for a delicious alternative that everyone can enjoy.
- Dairy-Free: Swap melted butter for vegetable oil, and opt for almond or soy milk instead of regular milk to keep it dairy-free.
- Veggie Delight: Replace black beans with sautéed vegetables like bell peppers and zucchini for a colorful vegetarian option bursting with flavor.
- Cheese Swap: Experiment with different cheeses like sharp cheddar or feta to find the perfect creamy complement to your chalupas.
- Spicy Kick: Add sliced jalapeños or a drizzle of sriracha to your toppings for an exciting heat that will have your taste buds dancing!
- Protein Boost: Instead of black beans, try filling your chalupas with seasoned ground turkey, shredded chicken, or even pulled pork for a hearty treat.
- Sauce Twist: Use a zesty avocado crema or a smoky chipotle sauce instead of sour cream for a fresh twist on your favorite toppings.
- Crunch Factor: Top with crispy fried onions or pickled jalapeños for an unexpected crunch that elevates each flavorful bite.
Your homemade chalupas can easily share the table with some delicious Homemade Pancakes Elevates for a delectable dining experience, so don’t hesitate to try out these variations!
How to Store and Freeze Homemade Chalupa
Fridge: Store any leftover homemade chalupas in an airtight container for up to 3 days. Reheat in a microwave or skillet to bring back their crispiness.
Freezer: For longer storage, freeze homemade chalupas in a freezer-safe bag for up to 2 months. To serve, reheat directly from frozen in the oven at 375°F (190°C) until heated through and crisp.
Room Temperature: Avoid keeping cooked chalupas at room temperature for more than 2 hours to prevent spoilage.
Reheating: When reheating, place chalupas in a hot skillet for a few minutes to regain that delightful crisp texture. Enjoy!
Homemade Chalupa Recipe FAQs
What type of flour should I use for homemade chalupa?
You can use all-purpose flour for the dough, but if you need a gluten-free option, a gluten-free flour blend works beautifully. Just be sure to check that your blend contains a binding agent like xanthan gum for added structure.
How should I store leftover homemade chalupas?
Store any leftover homemade chalupas in an airtight container in the refrigerator for up to 3 days. Make sure they’re completely cool before sealing to prevent moisture buildup, which can lead to sogginess.
Can I freeze chalupas, and what’s the best method?
Absolutely! To freeze homemade chalupas, allow them to cool fully, then place them in a single layer in a freezer-safe bag or container. They can be frozen for up to 2 months. For serving, reheat directly from frozen in the oven at 375°F (190°C) until heated through and crisp.
What should I do if my chalupas turn out greasy?
If your chalupas are greasy, it may be due to the oil temperature being too low when frying. Try heating the oil to 350°F (175°C) before adding the dough. You can also let them drain on paper towels right after frying to absorb excess oil and keep them crispy.
Can pets eat any of the ingredients used in homemade chalupas?
While some ingredients like plain black beans and lettuce are pet-friendly in moderation, be cautious with toppings like sour cream and cheese, which may upset their stomachs. Always consult your veterinarian regarding specific dietary needs for your pets before sharing any human food.
What are some dietary substitutions I can make in this recipe?
Feel free to customize based on dietary needs! Use vegetable oil instead of butter for a dairy-free version, almond or soy milk instead of regular milk, and replace black beans with refried beans or pinto beans for variety. For vegetarian options, consider filling with sautéed vegetables or grilled chicken.
Homemade Chalupa: Crisp, Flavorful Perfection for Everyone
Ingredients
Equipment
Method
- In a large bowl, combine 2 cups of all-purpose flour, 1 tsp baking powder, and 1/2 tsp salt. Pour in 1/4 cup of melted butter and mix until crumbly. Gradually add 3/4 cup of milk, stirring until the dough starts to come together.
- Knead the dough gently on the floured surface for about 5 minutes or until it becomes smooth and elastic.
- Cover the kneaded dough with a clean kitchen towel and let it rest for 10 minutes.
- After resting, divide the dough into 8 equal pieces and shape each piece into a ball. Flatten each ball into a disk about 1/4 inch thick.
- In a deep skillet, heat about 1 inch of vegetable oil over medium-high heat until it reaches 350°F. Carefully add the disks one at a time, frying each for about 3-4 minutes per side.
- Remove the fried chalupas from the oil and drain them on paper towels. Fill each crispy shell with black beans and layer on your choice of toppings.