

A delightful whiff of nostalgia sweeps through the kitchen as I melt chocolate and whip up egg whites—yes, it’s that magical time of year again! Homemade Marshmallow Easter Eggs have become a cherished fixture in my home, where each fluffy, sweet bite recalls joyous childhood moments. This recipe isn’t just a fun Easter project; it’s a promise of laughter and creativity, perfect for gathering the family together. With a simple preparation process and the joy of decorating, these eggs transform into colorful treats that are not only vegetarian but also irresistibly delightful. If you’re looking to elevate your Easter dessert game, get ready to craft some unforgettable memories. What creative flavors or shapes will you choose for your marshmallow masterpieces this year?
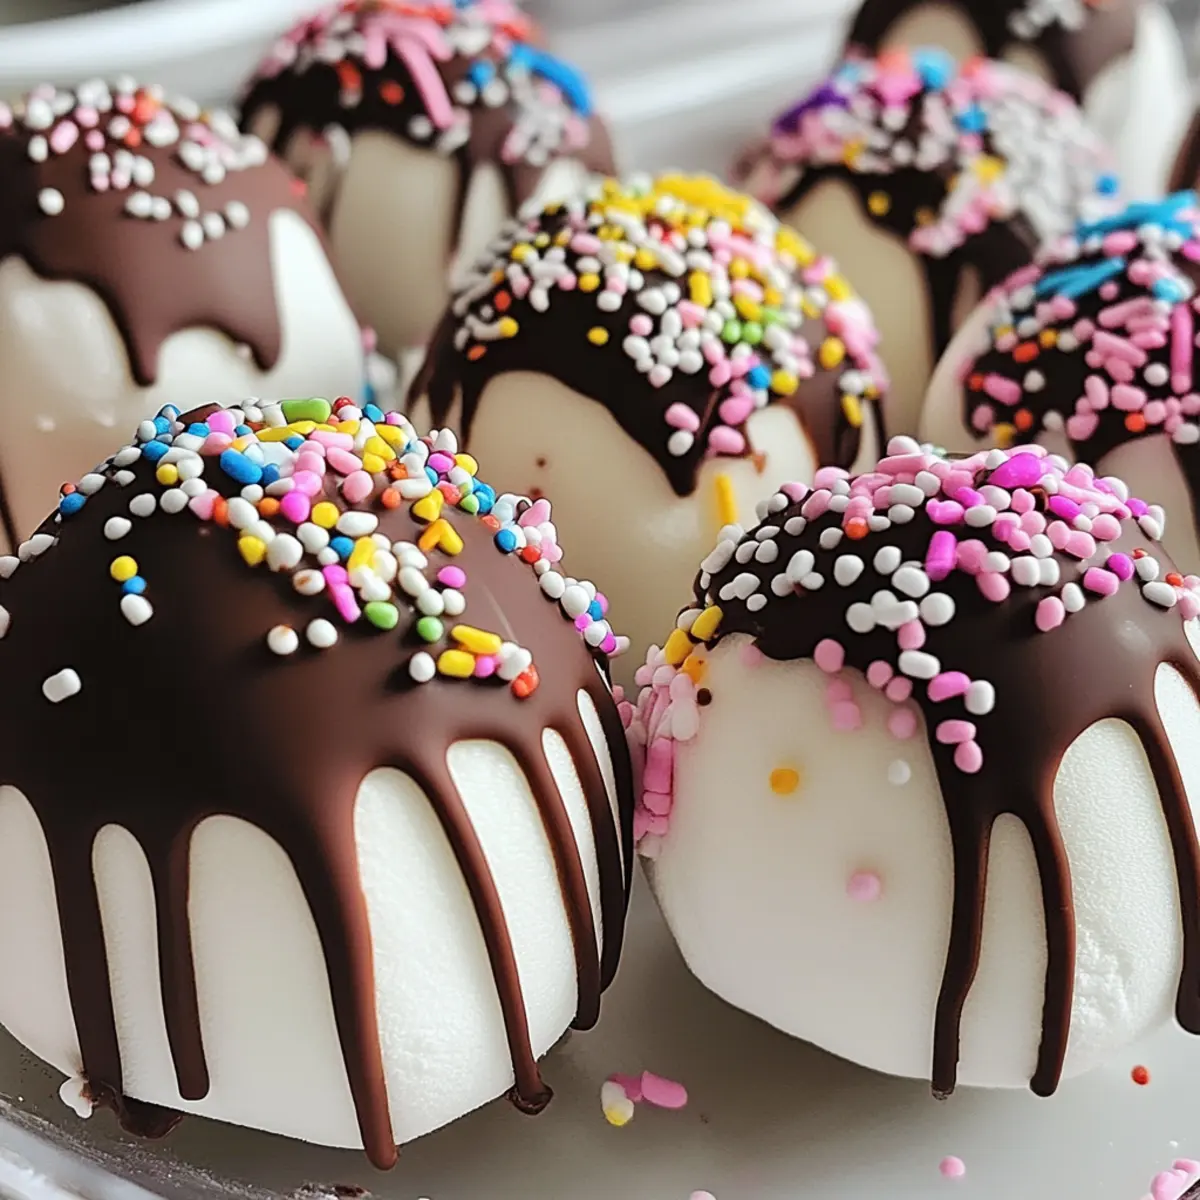
Why Choose Homemade Marshmallow Easter Eggs?
Nostalgic Flavor: Each bite of these Homemade Marshmallow Easter Eggs takes you back to your childhood, with a fluffy center and rich chocolate coating.
Easy and Fun: This recipe is a perfect spring project for the whole family, making it a wonderful excuse to gather together in the kitchen.
Customizable Options: Get creative by using different toppings or shapes! Try freeze-dried fruits for a twist, or make bunny-shaped marshmallows for added fun.
Perfect for Sharing: These colorful treats make a delightful addition to any Easter gathering, sure to impress friends and family alike.
Pair them with a warm cup of hot cocoa or serve alongside other sweet delights like Homemade Pancakes Elevates to create a special holiday spread.
Homemade Marshmallow Easter Eggs Ingredients
For the Marshmallow Center
- Granulated Sugar – Provides sweetness and structure; substitute with a sugar alternative for variations.
- Corn Syrup – Helps in creating a smooth marshmallow texture; can be replaced with honey for a more natural sweeter option.
- Water – Used to dissolve the sugar; no substitutions needed.
- Egg Whites – Provides aeration for the marshmallow; for a vegan alternative, substitute with aquafaba (chickpea brine).
- Vanilla Extract – Adds flavor; use almond extract for a different flavor profile.
- Powdered Sugar – Prevents sticking and gives a dusting finish; keep extra on hand for dusting your hands and work surface.
For the Chocolate Coating
- Chocolate Chips – For dipping; provides a rich, sweet chocolate coating and can be substituted with dark or white chocolate.
- Food Coloring – For decorating; use natural dyes for a healthier option.
Optional Toppings
- Sprinkles – Adds fun color and texture.
- Shredded Coconut – Provides a tropical twist.
- Chopped Nuts – Adds crunch and flavor diversity.
Get ready to create delightful Homemade Marshmallow Easter Eggs that will bring joy and sweetness to your Easter celebrations!
Step‑by‑Step Instructions for Homemade Marshmallow Easter Eggs
Step 1: Prepare Sugar Mixture
In a medium saucepan, combine granulated sugar, corn syrup, and water. Cook over medium heat while stirring gently until the sugar dissolves completely, which should take about 5 minutes. Once the mixture bubbles and reaches a light syrupy consistency, remove it from heat and set aside to cool slightly, ensuring the mixture is clear and smooth.
Step 2: Whip Egg Whites
In a bowl, use an electric mixer to whisk the egg whites until they form stiff peaks, which typically takes about 5-7 minutes. The egg whites should be glossy and hold their shape when the mixer is pulled out. This step is crucial for achieving the fluffy texture of your Homemade Marshmallow Easter Eggs, so make sure no grease is present in the bowl.
Step 3: Combine Ingredients
Slowly pour the hot sugar mixture into the whipped egg whites while continuing to whisk. Ensure you pour in a steady stream to maintain air incorporation. After all the syrup is added, mix in the vanilla extract and continue whisking for another 2-3 minutes until the mixture is fluffy and glossy. Let it cool for a few minutes to firm up slightly.
Step 4: Shape Marshmallows
Dust a clean work surface generously with powdered sugar. Scoop out a portion of the marshmallow mixture and form it into an egg shape with your hands. Make sure to dust your hands with powdered sugar as well to prevent sticking. Repeat this process until you’ve shaped all the marshmallow mixture into delightful eggs, dusting them again with powdered sugar for a nice finish.
Step 5: Melt Chocolate
In a microwave-safe bowl, melt the chocolate chips using short intervals of 30 seconds, stirring in between. This should take about 1.5 to 2 minutes total. The chocolate should be smooth and completely melted without any lumps, providing the perfect coating for your homemade marshmallow eggs. Keep the melted chocolate warm to ensure it remains easy to dip.
Step 6: Dip Marshmallows
Carefully dip each marshmallow egg into the melted chocolate, allowing any excess to drip off. Ensure the eggs are fully coated for a delightful chocolate layer. Place each coated egg on a parchment-lined baking sheet, creating a delicious lineup of your Homemade Marshmallow Easter Eggs ready for decorating.
Step 7: Decorate
Once the chocolate has set slightly, use food coloring to drizzle or splash across the eggs for a festive touch. Add your choice of toppings, such as sprinkles, shredded coconut, or chopped nuts, immediately while the chocolate is still soft to ensure they stick. This is where you can get creative, making each egg beautiful and unique.
Step 8: Set and Serve
Allow your Homemade Marshmallow Easter Eggs to set fully at room temperature for about 30 minutes or in the fridge for quicker results. Once set, they’re ready to be served. Arrange them beautifully on a platter or package them up as delightful gifts for friends and family during the Easter season.

Expert Tips for Homemade Marshmallow Easter Eggs
Stiff Peaks: Ensure your bowl is completely grease-free when whipping egg whites; even a little residue can prevent stiff peaks from forming properly.
Warm Chocolate: Keep your melted chocolate warm over a saucepan of simmering water instead of microwaving repeatedly, which can cause chocolate to seize or harden too quickly.
Dust for Ease: If the marshmallow mixture becomes too sticky while shaping, dust your hands with powdered sugar to make the process easier and more manageable.
Chill for Firmness: If you want a firmer marshmallow center, refrigerate the formed eggs for about 15 minutes before dipping them in chocolate.
Decorate While Soft: For best adherence, add sprinkles or toppings to your homemade marshmallow Easter eggs while the chocolate coating is still slightly wet.
Homemade Marshmallow Easter Eggs Variations
Feel free to let your creativity shine while crafting these delightful treats, adding your personal touch!
- Sugar-Free: Use a sugar alternative such as erythritol or stevia for a lower-calorie option, without sacrificing sweetness.
- Honey Swap: Replace corn syrup with honey for a more natural sweetness; it can also impart a lovely flavor.
- Vegan Delight: Substitute egg whites with aquafaba to make a delightful vegan version; the marshmallows will still be fluffy!
- Almond Twist: Swap vanilla extract for almond extract for a nutty flavor that adds warmth and depth to the marshmallow.
- Natural Dyes: Use beetroot powder or turmeric instead of food coloring for a healthier, all-natural approach to decorating.
- Fruit-Filled Eggs: Add a dollop of fruit preserves inside each marshmallow egg before coating to surprise your taste buds with fruity sweetness.
- Chocolate Variety: Try dipping in dark or white chocolate for a different flavor profile, satisfying all chocolate lovers.
- Shape Shift: Make bunny-shaped marshmallows or even mini chicks using cookie cutters for a playful touch that’s perfect for Easter festivities.
Pair your marshmallow creations with a cup of hot cocoa or surprise your family with these Tacos Scrambled Eggs for a delightful and festive brunch!
Make Ahead Options
These Homemade Marshmallow Easter Eggs are perfect for busy cooks who crave the joy of homemade treats without the last-minute rush! You can prepare the marshmallow mixture up to 24 hours in advance; simply whip the egg whites and combine them with the sugar mix as directed, then shape the eggs and dust them with powdered sugar. Once shaped, store the eggs in an airtight container at room temperature to prevent sticking. When you’re ready to enjoy, simply melt your chocolate and dip the marshmallows. This way, you can create a delightful Easter treat that is just as delicious and fresh, with all the flavors you love!
How to Store and Freeze Homemade Marshmallow Easter Eggs
- Room Temperature: Keep uneaten marshmallow eggs in an airtight container at room temperature for up to a week to maintain freshness and flavor.
- Fridge: If you prefer a firmer texture, store the eggs in the fridge, where they can last for up to 10 days. Just remember to separate layers with parchment paper to prevent sticking.
- Freezer: For longer storage, freeze the marshmallow eggs in an airtight container for up to 3 months. Thaw in the fridge before enjoying.
- Reheating: There’s no need to reheat these treats; simply enjoy them as they are, whether chilled or at room temperature!
What to Serve With Homemade Marshmallow Easter Eggs
Indulging in the sweet flavors of homemade treats brings everyone together, making your Easter celebration truly special.
Hot Cocoa: A warm cup of hot cocoa complements the fluffy marshmallow, creating a cozy dessert experience. Imagine sipping chocolatey goodness as you savor each bite of the eggs.
Carrot Cake: Its spiced flavor and moist texture shine alongside your festive eggs. The carrot cake enhances the sweetness, making for a delightful contrast that guests will love.
Fruit Salad: A fresh, vibrant fruit salad adds a refreshing touch, balancing the richness of the chocolate coating and giving a colorful pop to your dessert table.
Coffee: A rich brew invites a delightful pairing with the sweetness of the marshmallow eggs. The warmth of the coffee enhances the chocolate, creating a harmonious dessert experience.
Colorful Cupcakes: Add bright, cheerful cupcakes with fruity flavors to your spread. They bring fun and whimsy to the table, just like your marshmallow eggs!
Chocolate Bunnies: Serve chocolate bunnies alongside for added Easter charm and a nostalgic twist that children and adults alike will adore.
Nutty Trail Mix: A crunchy nutty trail mix offers a delightful contrast to the softness of the marshmallow eggs. It’s the perfect snacking companion as you gather with loved ones.
Ice Cream: Consider rich vanilla bean or coconut ice cream for a luscious treat that pairs beautifully with your homemade marshmallow Easter eggs, creating a dreamy dessert sensation.
This Easter, delight your family with various flavors and textures that make for an unforgettable celebration!

Homemade Marshmallow Easter Eggs Recipe FAQs
How do I select the right ingredients for homemade marshmallow eggs?
Absolutely! When choosing ingredients, opt for granulated sugar that’s fine and free from clumps for best results. Make sure the egg whites are fresh and at room temperature, as this helps them whip better. If using corn syrup, check the label for high fructose corn syrup versus pure corn syrup, as the latter provides a smoother texture. For flavor variations, consider using pure vanilla extract instead of imitation for a richer taste.
What is the best way to store homemade marshmallow Easter eggs?
For sure! Store your uneaten marshmallow eggs in an airtight container at room temperature for up to a week. If you want to keep them fresh longer, place parchment paper between layers to prevent sticking. Alternatively, you can refrigerate them for up to 10 days; just make sure they’re separated by parchment. This will help maintain their texture and flavor.
Can I freeze homemade marshmallow eggs?
Very! Freezing is a great option if you want to enjoy your homemade marshmallow Easter eggs later. To freeze them, wrap each egg individually in plastic wrap and place them in an airtight container. They can be frozen for up to 3 months. When you’re ready to enjoy them, simply transfer them to the fridge overnight to thaw. You can also let them sit at room temperature for a bit before serving.
What should I do if my marshmallow mixture is too sticky?
No worries! If your marshmallow mixture becomes too sticky when shaping, just dust your hands and the work surface with powdered sugar to help with shaping. It’s a game-changer! If the mixture is overly soft, chilling it in the fridge for about 15 minutes will also firm it up nicely, making it easier to handle.
Are there any dietary considerations I should keep in mind?
Absolutely! For those with egg allergies, using aquafaba instead of egg whites is a fantastic vegan alternative. Just use 3 tablespoons of aquafaba per egg white and whisk until frothy. If you’re mindful about ingredients, double-check your chocolate chips and toppings for allergens like nuts. Regarding pets, keep these sweet treats away from dogs and cats, as chocolate can be toxic to them.
How can I ensure my marshmallow eggs maintain their fluffiness?
Great question! Start with a completely clean and grease-free bowl when whipping egg whites; this step is crucial for creating stiff peaks. Make sure to gradually add the hot sugar mixture while whisking to avoid collapsing the egg whites. After shaping, you can chill the marshmallows briefly before dipping them in chocolate to help them hold their fluffy texture. Happy cooking!

Delightful Homemade Marshmallow Easter Eggs to Celebrate Spring
Ingredients
Equipment
Method
- In a medium saucepan, combine granulated sugar, corn syrup, and water. Cook over medium heat while stirring gently until the sugar dissolves completely, about 5 minutes.
- In a bowl, use an electric mixer to whisk the egg whites until they form stiff peaks, about 5-7 minutes.
- Slowly pour the hot sugar mixture into the whipped egg whites while continuing to whisk, then mix in vanilla extract and whisk for another 2-3 minutes until fluffy.
- Dust a clean work surface with powdered sugar, scoop out a portion of the marshmallow mixture, and form it into an egg shape.
- Melt the chocolate chips in a microwave-safe bowl using short intervals of 30 seconds, stirring in between, for about 1.5 to 2 minutes.
- Carefully dip each marshmallow egg into the melted chocolate, allowing excess to drip off. Place on a parchment-lined baking sheet.
- Once the chocolate has set slightly, decorate with food coloring and toppings while the chocolate is still soft.
- Allow the eggs to set completely at room temperature for about 30 minutes or in the fridge for quicker results.