

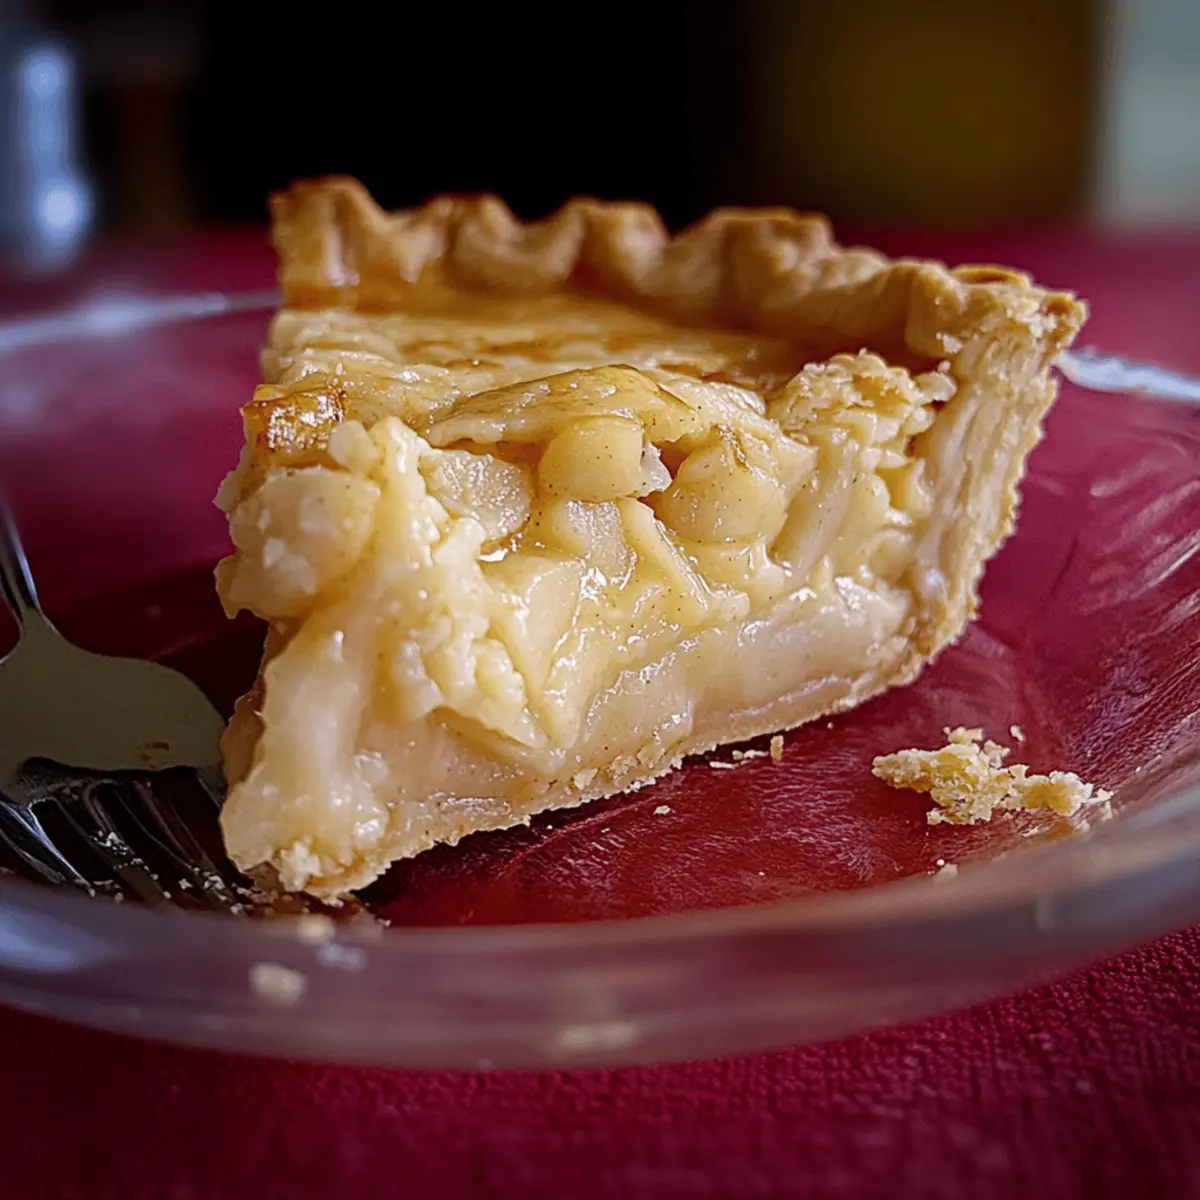
As I sift through the crumpled pages of my grandmother’s recipe book, a particular gem catches my eye: Marlborough Pie. This traditional dessert goes beyond a mere sweet treat; it holds a rich legacy that hails from the heart of Colonial New England. With its delightful blend of tart apples and creamy custard, seasoned just right with nutmeg and cinnamon, this pie offers an irresistible twist on your typical Thanksgiving dessert lineup. Not only is it a unique addition to any festive spread, but it also appeals to those looking for gluten-free options, making everyone at the table feel included. Ready to dive into a slice of history and flavor? Let’s uncover the magic of Marlborough Pie together!
Why Is Marlborough Pie So Special?
Tradition and Flavor: Marlborough Pie is a taste of history, being rooted in Colonial New England, infused with nostalgic flavors that make it a standout Thanksgiving dessert.
Versatile Options: It easily accommodates gluten-free needs, with substitutions that don’t sacrifice taste.
Irresistible Combination: The tartness of apples paired with rich custard creates an experience that’s both comforting and indulgent.
Easier Than You Think: This dessert involves simple steps, making it accessible for home cooks at any level.
Crowd-Pleaser: Its unique flavor profile will surely impress your guests and spark conversation around the table, much like my favorite Raspberry Cream Pie does.
Make-Ahead Convenience: Prepare it in advance and watch the flavors deepen in the fridge, adding to its appeal for holiday gatherings.
Marlborough Pie Ingredients
Experience the delight of homemade Marlborough Pie with these essential ingredients!
For the Crust
- Raw Pie Pastry – The essential structure of the pie; ensure you have a 9-inch crust to fit your pie dish.
For the Filling
- Apples (2 pounds) – The main flavor base; select tart varieties like Cortland or Granny Smith for the best results.
- Granulated Sugar (½ cup) – Sweetness to balance the tartness of the apples; feel free to adjust based on your apple choice.
- Freshly Squeezed Lemon Juice (2 tablespoons) – Enhances the flavor profile and adds brightness; freshly squeezed is always better.
- Dry Sherry (2 tablespoons) – Adds depth and complexity; feel free to substitute with Marsala or omit if you wish.
- Unsalted Butter (2 tablespoons) – Contributes richness to the filling; can be swapped with coconut oil for a dairy-free alternative.
- Large Eggs (3, lightly beaten) – Essential for binding the custard together; ensure they are properly whisked.
- Heavy Cream (1 cup) – Makes for a smooth, rich custard texture; consider half-and-half for a lighter option.
- Freshly Grated Nutmeg (1 pinch) – A flavor enhancer; ground nutmeg can work in a pinch if fresh isn’t available.
- Ground Cinnamon (1 pinch) – Adds warmth and depth to the custard; standard ground cinnamon will do just fine.
With these ingredients, you’ll be well on your way to creating a delightful Marlborough Pie that everyone will love!
Step‑by‑Step Instructions for Marlborough Pie
Step 1: Preheat and Prepare the Crust
Begin by preheating your oven to 400°F (200°C). On a lightly floured surface, roll the raw pie pastry into a 12-inch circle. Transfer this pastry into a 9-inch pie plate, pressing it gently into the edges. Trim excess dough and crimp the edges for a polished look, then prick the bottom with a fork to prevent bubbling.
Step 2: Pre-Bake the Crust
Place parchment paper over the crust and fill it with pie weights or dried beans. Bake the pie crust for 8 minutes, then carefully remove the weights and parchment. Return the crust to the oven and bake for an additional 5 minutes, or until it appears dry and pale. This step ensures a beautifully baked foundation for your Marlborough Pie.
Step 3: Prepare the Apples
While the crust is baking, coarsely grate the apples using a box grater. In a large mixing bowl, combine the grated apples with granulated sugar, freshly squeezed lemon juice, and dry sherry (if using). Toss the mixture thoroughly to coat the apples, allowing their natural juices to blend with the sweet and tangy components for the filling.
Step 4: Sauté the Apple Mixture
In a skillet, melt the unsalted butter over medium heat. Add the apple mixture and sauté for about 12-15 minutes, stirring occasionally until the apples are tender and most of the liquid has evaporated. Once done, transfer the skillet contents to a bowl and let it cool slightly before combining with the custard mixture.
Step 5: Whisk the Custard Ingredients
In a separate bowl, whisk together the lightly beaten eggs, heavy cream, freshly grated nutmeg, and ground cinnamon. Ensure the mixture is well combined and airy. Gradually fold in the cooled apple mixture, creating a harmonious blend that highlights the Marlborough Pie’s rich and creamy filling.
Step 6: Fill and Bake the Pie
Pour the apple-custard filling into the pre-baked pie crust, spreading it evenly. Reduce the oven temperature to 350°F (175°C) and bake the pie for approximately 35 minutes. Keep an eye on the pie; it should be set in the center but still slightly jiggly when you remove it. A golden hue will develop along the edges.
Step 7: Cool and Serve
Once baked, remove the pie from the oven and allow it to cool on a baking sheet at room temperature. This cooling process helps set the custard further. Serve your delightful Marlborough Pie either at room temperature or chilled, paired with a dollop of whipped cream or a scoop of vanilla ice cream for an extra special touch.
Make Ahead Options
Marlborough Pie is a fantastic recipe for meal prep, allowing busy cooks to save time on hectic days! You can prepare the apple mixture—grated apples sautéed with sugar, lemon juice, and sherry—up to 24 hours in advance; just refrigerate it in an airtight container to maintain its freshness and prevent browning. The custard mixture can also be whisked together and stored separately for up to 3 days before baking. When you’re ready to serve, simply pre-bake your crust and combine the two mixtures before pouring them into the crust and baking. This way, you’ll enjoy the same delightful flavors with minimal effort on the day of serving!
Marlborough Pie Variations & Substitutions
Feel free to play around with this recipe and make it your own with these exciting twists and alternatives!
- Gluten-Free Crust: Replace the traditional pie crust with a store-bought gluten-free pastry for a deliciously inclusive dessert.
- Dairy-Free Version: Substitute the unsalted butter with coconut oil and use almond or oat milk in place of heavy cream for a dairy-free delight.
- Extra Fruit: Mix in berries like blueberries or cranberries for a sweet-tart explosion that complements the apple-custard base beautifully.
- Spicy Kick: Add a pinch of ground ginger or cloves to the custard mixture for a warming spice that enhances the autumnal flavor profile.
- Crustless Delight: Bake the custard filling in ramekins for individual portions or skip the crust altogether for a lighter, gluten-free take that’s just as creamy.
- Sugar Swap: Use maple syrup or honey instead of granulated sugar for a natural sweetener that adds a unique flavor twist.
- Flavor Boost: Infuse the custard with a splash of vanilla extract or almond extract for a deeper, aromatic essence.
- Nut Topping: Sprinkle chopped pecans or walnuts over the filling before baking for added texture and an element of crunch that’s simply irresistible.
If you’re looking for more classic flavors, why not try pairing a slice of your Marlborough Pie with a refreshing scoop of vanilla ice cream, just like I serve with my beloved Rhubarb Cinnamon Pie? It makes for a delightful finish to any meal!
How to Store and Freeze Marlborough Pie
Fridge: Keep your Marlborough Pie refrigerated for up to 3 days. Cover it with plastic wrap or place it in an airtight container to maintain freshness and flavor.
Freezer: For longer storage, freeze the pie for up to 2 months. Wrap it tightly in plastic wrap and then in aluminum foil to prevent freezer burn. Thaw in the fridge overnight before serving.
Reheating: To reheat, warm individual slices in the microwave for about 30 seconds or place the whole pie in a preheated oven at 350°F for 10-15 minutes until heated through.
Flavor Improvement: Surprisingly, the flavors of the Marlborough Pie can deepen over time in the fridge, making it a delightful treat even after a couple of days!
What to Serve with Marlborough Pie
Enhance your dining experience with delightful pairings that bring the comforting flavors of this traditional dessert to life.
-
Fresh Whipped Cream: Light and airy, the cream adds a delightful richness that complements the pie’s creamy custard perfectly.
-
Vanilla Ice Cream: A classic pairing, this adds a delightful contrast of temperature and texture, enhancing the flavor of the warm pie.
-
Caramel Sauce: Drizzle over the pie for a touch of sweetness and a luxurious finish that elevates every bite.
-
Apple Cider: Warm spiced apple cider echoes the flavors of the pie, creating a cozy, autumnal experience to enjoy alongside.
-
Cinnamon Sugar Doughnuts: These fluffy, sugar-dusted treats provide a fun, festive element, balancing the pie’s creamy richness with their lightness.
-
Pecan Pie Bars: Serving these adds a nutty twist while still staying in the realm of comforting desserts, perfect for sharing.
-
Chocolate Espresso Martinis: For an adult indulgence, this drink’s bold flavors create a delightful contrast, making for a memorable pairing at gatherings.
-
Autumn Green Salad: A fresh salad with apples, nuts, and a tangy vinaigrette adds a crisp, refreshing element, balancing the pie’s richness with lightness.
-
Fruit Tart: A fresh fruit tart brings color and a burst of flavor, enhancing the overall dessert experience with its seasonal fruits and creamy filling.
Expert Tips for Making Marlborough Pie
-
Choose Tart Apples: Opt for varieties like Cortland or Granny Smith to achieve the perfect balance of sweetness and tartness in your Marlborough Pie. Avoid overly sweet apples like Red Delicious.
-
Watch the Custard: Ensure the custard is cooked until set but slightly jiggly in the center. This prevents overbaking, which can lead to a rubbery texture.
-
Pre-Bake Carefully: Don’t skip pre-baking the crust! It helps maintain a flaky texture and prevents sogginess from the custard.
-
Cool Properly: After baking, allow the pie to cool completely on a baking sheet. This step is crucial for setting the custard and achieving the perfect slice.
-
Make Ahead: Prepare your Marlborough Pie a day in advance and refrigerate. The flavors improve as they meld together, resulting in an even more delicious dessert for your gathering!
Marlborough Pie Recipe FAQs
What apples are best for Marlborough Pie?
Absolutely! For the best flavor in your Marlborough Pie, I recommend using tart apple varieties like Cortland, Granny Smith, or even heirloom apples like Black Twig. These apples provide a lovely balance to the rich custard. Avoid overly sweet apples like Red Delicious, as they can make the pie too cloying.
How should I store Marlborough Pie?
Keep your Marlborough Pie in the refrigerator for up to 3 days. I usually cover it with plastic wrap or place it in an airtight container to lock in freshness. This way, the flavors can deepen, and you’ll enjoy every last bite!
Can I freeze Marlborough Pie?
Yes, you can! To freeze your Marlborough Pie, wrap it tightly in plastic wrap and then in aluminum foil to prevent freezer burn. It can be kept in the freezer for up to 2 months. When you’re ready to enjoy it, simply thaw it in the fridge overnight before serving.
What should I do if the custard is too runny?
No problem! If you find that your custard is too runny, it may not have been cooked long enough or at the right temperature. Make sure to bake the pie until the custard is set but still slightly jiggly in the center. If it’s already baked and remains runny, allow it to cool completely and refrigerate for a few hours; the chilling can help it firm up.
Is Marlborough Pie gluten-free?
Very! You can easily make Marlborough Pie gluten-free by substituting the raw pie pastry with a store-bought gluten-free crust. Just be sure to check that it’s truly gluten-free to accommodate any dietary restrictions. Everyone can enjoy this delicious dessert!
How can I enhance the flavor of Marlborough Pie?
Absolutely! Adding spices like ginger or cloves can give your Marlborough Pie a unique twist. For even more flavor depth, try using a higher quality dry sherry or Marsala, or simply infuse a little vanilla into your custard. The more the merrier when it comes to flavor experimentation!

Marlborough Pie: Cozy Apple-Custard Bliss You’ll Love
Ingredients
Equipment
Method
- Preheat your oven to 400°F (200°C). Roll the raw pie pastry into a 12-inch circle and transfer it into a 9-inch pie plate.
- Place parchment paper over the crust and fill with pie weights or dried beans. Bake for 8 minutes, then remove weights and parchment.
- While the crust is baking, coarsely grate the apples and mix with sugar, lemon juice, and sherry. Toss to coat.
- Melt the butter in a skillet over medium heat. Add the apple mixture and sauté for 12-15 minutes until tender.
- In a separate bowl, whisk the eggs, cream, nutmeg, and cinnamon. Fold in the cooled apple mixture.
- Pour the apple-custard filling into the pre-baked pie crust and bake at 350°F (175°C) for approximately 35 minutes.
- Allow the pie to cool at room temperature before serving with whipped cream or vanilla ice cream.