

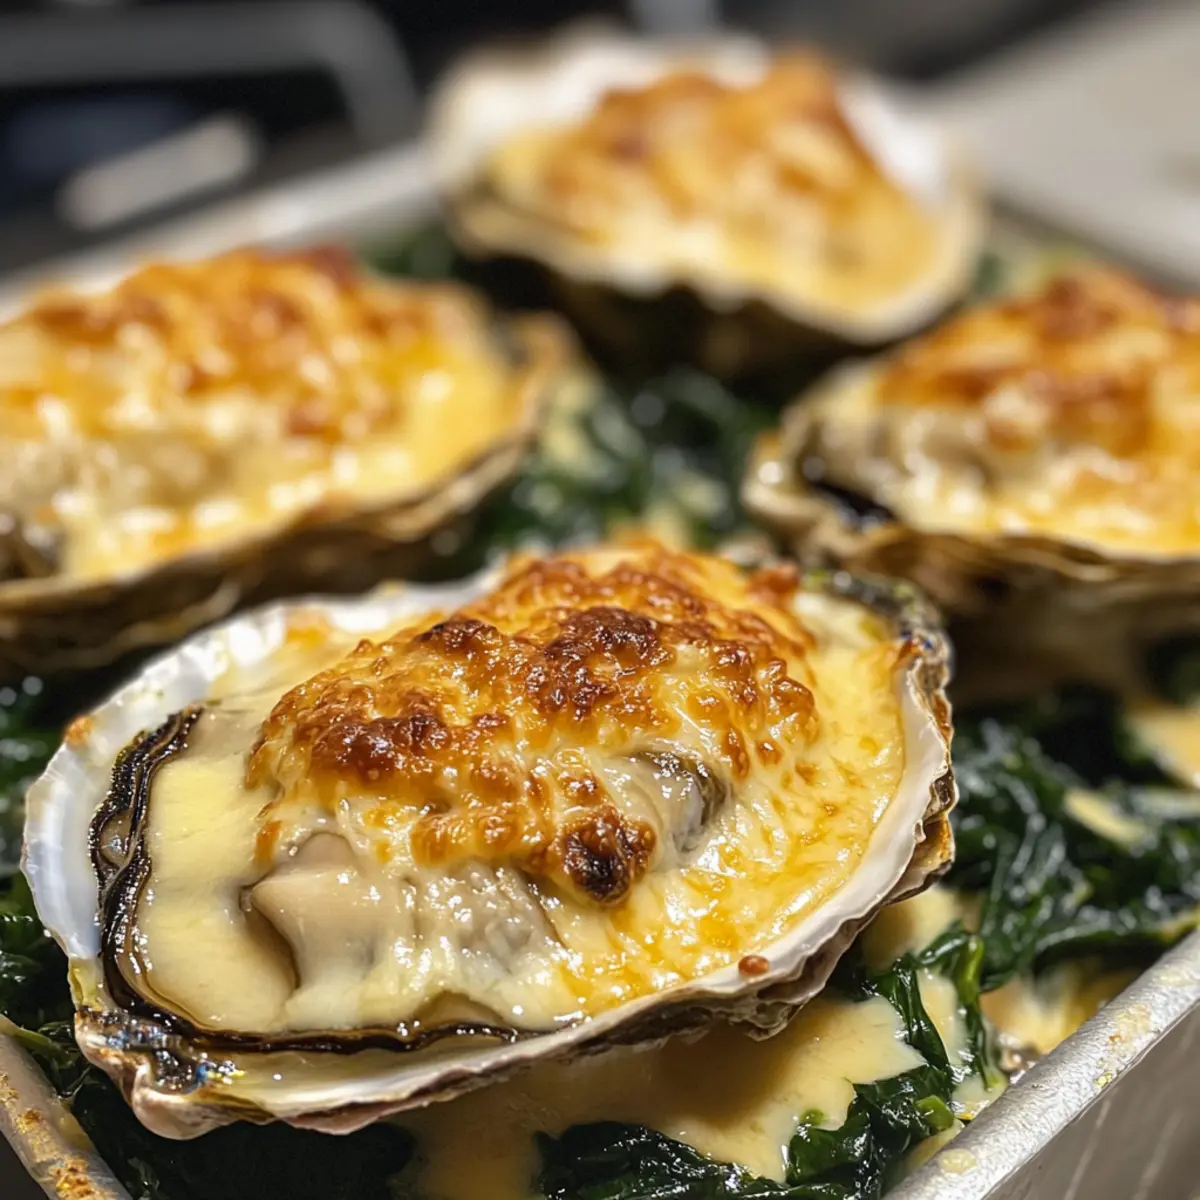
As I settled into a cozy evening, the allure of the ocean wafted through my kitchen, stirring an urge to celebrate the flavors of the sea. Enter Miso Baked Oysters—a quick and easy West Coast appetizer that brings the umami-rich essence of Japanese cuisine to your table. They are not just an impressive feast for the eyes; these creamy bites are packed with nutrition and ready in just ten minutes, so you spend less time cooking and more time savoring. Imagine the delightful contrast of tender oysters, zesty miso, and melted cheese bubbling to perfection. Ready to impress your guests or treat yourself? Let’s dive into this unique twist on a classic!
Why Choose Miso Baked Oysters?
Quick and Easy: With just ten minutes to prepare, these Miso Baked Oysters are perfect for any occasion, allowing you to enjoy gourmet flavors without the hassle.
Umami Explosion: The combination of miso paste and Japanese mayonnaise delivers a deep, savory flavor that enhances the natural brininess of the oysters, creating a dish that’s anything but ordinary.
Customizable: Feel free to experiment with different types of miso or cheese to make it your own. You can even add fresh spinach or swap in kale for a delightful twist—perfect for adapting to your pantry!
Crowd-Pleaser: Whether you’re serving these at a dinner party or a casual gathering, everyone will be impressed by the rich flavors and delightful presentation, making it an appetizer that wow’s your guests!
Pair these with a crisp salad or a hearty crusty bread for a meal that’s as elegant as it is satisfying. If you love easy seafood appetizers, you should also check out Mediterranean Pasta Salad or Canned Salmon Pasta!
Miso Baked Oysters Ingredients
• Here’s what you’ll need for delicious Miso Baked Oysters.
For the Oysters
- Oysters – Choose fresh, high-quality oysters for the best flavor; large oysters provide a more substantial bite.
For the Miso Mixture
- Japanese Mayonnaise – This adds creaminess and a tangy flavor; for a substitute, mix regular mayo with extra lemon juice.
- Miso Paste – Use light for a milder taste, or dark miso for a richer umami depth.
- Mirin – Provides sweetness that balances the other flavors beautifully.
- Hot Sauce – A splash adds heat and zest; feel free to choose your preferred type, like Tobasco.
- Fresh Lemon Juice – Enhances all the flavors while cutting through the richness.
For the Toppings
- Fresh Spinach – It adds earthiness and a lovely texture; consider substituting with arugula for a peppery bite.
- Cheddar/Mozzarella Cheese – Gives a bubbly and rich topping; for a dairy-free option, use plant-based cheese or simply omit.
Remember, these ingredients come together perfectly to create Miso Baked Oysters, a delightful and easy appetizer!
Step‑by‑Step Instructions for Miso Baked Oysters-A Quick And Easy West Coast Appetizer
Step 1: Preheat the Broiler
Begin by preheating your broiler or grill to high heat, around 500°F (260°C). This step is crucial for achieving that golden, bubbly topping you’ll want for your Miso Baked Oysters. Make sure the oven rack is positioned about 6 inches from the flame for optimal cooking results.
Step 2: Prepare the Baking Sheet
While the broiler is heating, arrange your cleaned oyster shells or heatproof ramekins on a baking sheet. If using shells, nestle them into a bed of rock salt to stabilize them. This preparation will ensure that when they cook, the shells stay upright, allowing the delicious flavors of your Miso Baked Oysters to mingle without spilling.
Step 3: Mix the Miso Sauce
In a medium bowl, combine Japanese mayonnaise, miso paste, mirin, hot sauce, and fresh lemon juice. Use a whisk to blend the mixture until smooth, forming a thick, creamy sauce. This delicious blend will elevate the flavors of your oysters, so make sure it’s well-mixed and set aside for later.
Step 4: Layer the Spinach and Oysters
Take your prepared oyster shells or ramekins and evenly distribute fresh spinach over the bottom of each. This layer not only adds an earthy flavor but also serves as a beautiful base for the oyster. Next, place shucked oysters atop the spinach, ensuring they fit snugly.
Step 5: Spoon Miso Mayo Mixture
Using a spoon, carefully dollop about 1 tablespoon of the miso mixture over each oyster. Drizzle generously, allowing it to cover the oysters while still showing a bit of the oyster meat. This flavorful layer will contribute to the creamy essence of your Miso Baked Oysters, begging your taste buds to experience the flavor.
Step 6: Add the Cheese
Sprinkle shredded cheddar or mozzarella cheese generously over the miso-covered oysters. This cheese will melt beautifully during broiling, forming that sought-after bubbling and golden crust. Adjust the amount based on your cheese preference, knowing that it adds a rich topping to your Miso Baked Oysters.
Step 7: Broil to Perfection
Transfer the baking sheet to the preheated broiler and cook for about 5-8 minutes, keeping a close eye on them. Watch for the cheese to melt and turn golden brown, signaling that your Miso Baked Oysters are ready to be taken out. Be cautious not to let them burn, as broiling can move quickly!
Step 8: Cool and Garnish
Once cooked to a perfect golden finish, remove the baking sheet from the broiler and allow the Miso Baked Oysters to cool for about 5 minutes. This brief cooling period makes them easier to handle. For an additional flavor boost, consider garnishing with fresh parsley, a sprinkle of paprika, or a wedge of lemon before serving.
What to Serve with Miso Baked Oysters?
Enhance your dining experience with delightful accompaniments that beautifully complement these oceanic gems.
-
Crispy French Bread: This warm, crusty delight is perfect for dipping into the rich miso sauce, elevating every bite.
-
Garlicky Spinach Salad: A fresh spinach salad drizzled with garlic vinaigrette offers a refreshing contrast to the creamy oysters, adding a crunch that enlivens your palate.
-
Chilled Sake: The subtle sweetness of chilled sake pairs flawlessly with the umami flavors of your Miso Baked Oysters, enhancing the overall dining experience.
-
Crunchy Asian Slaw: A vibrant slaw with a tangy sesame dressing brings textural contrast and brightness to your plate, balancing perfectly with the oysters’ richness.
-
Sesame Soy Noodles: Serve a side of chilled sesame soy noodles for a nod to Japanese flavors; their nutty taste complements the umami of the oysters beautifully.
-
Fruit-Infused Sparkling Water: A refreshing drink like watermelon or cucumber-infused sparkling water cleanses the palate after each savory bite, keeping your taste buds engaged.
Make your meal unforgettable by pairing Miso Baked Oysters with these tempting options!
Expert Tips for Miso Baked Oysters
Freshness First: Use only the freshest oysters for the best flavor and texture; check for a clean, briny smell and closed shells.
Broil Smartly: Keep a close eye while broiling to avoid burnt cheese; the cooking time can vary between ovens.
Mix It Up: Feel free to experiment with different types of miso paste—lighter means milder flavor, while darker adds richness in your Miso Baked Oysters.
Cooling Time: Allow your oysters to cool for a few minutes before serving; this helps prevent burns and enhances flavors.
Don’t Overload: Use about 1 tablespoon of miso mixture per oyster to ensure the flavors balance without overwhelming the dish.
Storage Tips for Miso Baked Oysters
Room Temperature: Serve the Miso Baked Oysters immediately after cooking for optimal flavor and safety, as they are best enjoyed fresh out of the oven.
Fridge: If you have any leftovers, store the Miso sauce in an airtight container in the refrigerator for up to 3 days. Unfortunately, cooked oysters don’t hold well, so it’s recommended to consume them fresh.
Freezer: Avoid freezing cooked oysters, as they can become rubbery once thawed. However, uncooked oysters can be frozen for up to 3 months; just be sure to thaw them in the refrigerator before cooking.
Reheating: Should you have any leftover Miso sauce, you can gently reheat it over low heat or in the microwave before using, stirring to maintain consistency.
Make Ahead Options
These Miso Baked Oysters are ideal for meal prep, saving you time on those busy weeknights! You can prepare the miso mayo mixture and layer the oysters with spinach up to 24 hours in advance. After assembling them in their shells or ramekins, cover them tightly with plastic wrap to prevent drying out and refrigerate. When you’re ready to enjoy, simply broil them straight from the fridge; just add a couple of extra minutes to the cooking time for even, bubbly perfection. This way, you’ll still have that delightful umami-packed flavor and golden cheese topping, making your Miso Baked Oysters just as delicious as if they were freshly made!
Miso Baked Oysters Variations & Substitutions
Feel free to play around with the recipe, letting your taste buds guide the way!
-
Greens Switch: Swap fresh spinach for kale or Swiss chard for a heartier flavor and extra nutrients.
-
Cheese Choices: Experiment with different cheeses like gouda or a dairy-free alternative for a unique twist in flavor and texture.
-
Herb Infusion: Add fresh herbs such as chives, dill, or basil to the miso mixture for an aromatic lift that brightens every bite.
-
Flavorful Liquor: Enhance the umami by adding a splash of oyster liquor into the miso mayo for an extra layer of briny goodness.
-
Heat Variability: Adjust the heat level by choosing a milder or spicier hot sauce—perhaps jalapeño or sriracha, depending on your taste preferences.
-
Seafood Medley: Add mini shrimp or crab meat atop the oysters for a delicious seafood medley that takes the dish to new heights.
-
Broil Variants: Cook in a cast iron skillet for a fun presentation and extra crispy edges that add textural contrast.
These Miso Baked Oysters can be enjoyed as a warm appetizer alongside a refreshing salad or crusty bread to soak up any remaining flavors. Enjoy your culinary adventure and don’t forget to check out other tasty dishes like Baked BBQ Chicken or Chicken Fajitas for more savory delights!
Miso Baked Oysters – A Quick & Easy West Coast Appetizer Recipe FAQs
How do I select fresh oysters?
Absolutely! When choosing fresh oysters, look for tightly closed shells or ones that close when tapped. A clean, briny smell indicates freshness. Discard any shells that are open and don’t close, as they may be dead and unfit for consumption.
How should I store leftover Miso sauce?
Very! If you have any leftover Miso sauce, store it in an airtight container in the refrigerator, where it will stay fresh for up to 3 days. This sauce can bring great flavor to other dishes or even work as a dip.
Can I freeze baked oysters?
Sadly, it’s not recommended to freeze cooked oysters, as they tend to become rubbery when thawed. However, you can freeze uncooked oysters for up to 3 months. Be sure to place them in a sealed freezer bag, and thaw them in the refrigerator before cooking.
What should I do if my Miso Baked Oysters burn while broiling?
Don’t worry, this can happen to the best of us! If you notice the cheese starting to brown too quickly, lower the oven rack or turn down the broiler heat slightly. It’s essential to keep an eye on them during the last couple of minutes, as broiling can change rapidly.
Are Miso Baked Oysters safe for those with shellfish allergies?
Definitely not! Shellfish allergies are common, so if you or your guests have this allergy, it’s best to avoid this recipe entirely. You can try using other seafood alternatives like shrimp or crab, baked with the same miso sauce for a unique twist without the shellfish.
How should I serve Miso Baked Oysters?
Absolutely serve them hot straight out of the oven! Pair your Miso Baked Oysters with a light salad or crusty bread for dipping. They can be enjoyed as a delicious appetizer or even as part of a seafood feast. Enjoy!
Miso Baked Oysters - A Quick & Easy West Coast Delight
Ingredients
Equipment
Method
- Preheat your broiler or grill to high heat, around 500°F (260°C).
- Arrange cleaned oyster shells or heatproof ramekins on a baking sheet, stabilizing them with rock salt if using shells.
- In a medium bowl, combine Japanese mayonnaise, miso paste, mirin, hot sauce, and fresh lemon juice. Whisk until smooth.
- Evenly distribute fresh spinach over the bottom of each prepared oyster shell or ramekin. Place shucked oysters atop the spinach.
- Carefully dollop about 1 tablespoon of the miso mixture over each oyster.
- Sprinkle shredded cheese generously over the miso-covered oysters.
- Transfer the baking sheet to the preheated broiler and cook for about 5-8 minutes.
- Once cooked to a golden finish, allow the Miso Baked Oysters to cool for about 5 minutes before serving.