

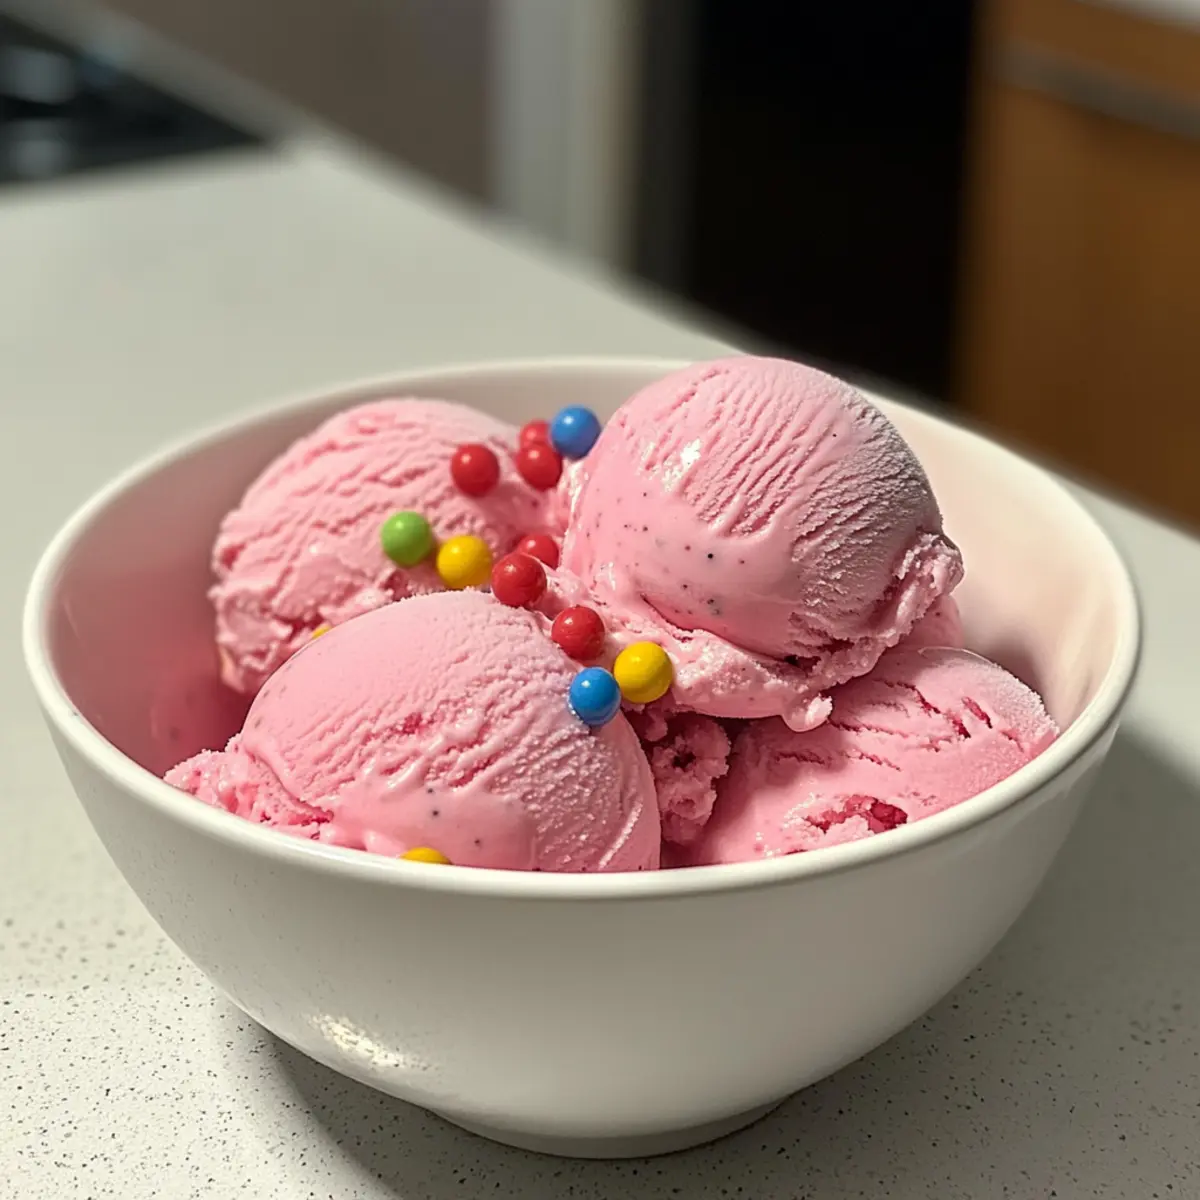
On a sweltering summer afternoon, I could almost hear the distant jingle of the ice cream truck, tempting my taste buds with sweet memories from childhood. As I reminisce about those carefree days, I’m thrilled to share my latest creation: Easy No Churn Bubblegum Ice Cream! This delightful take on a classic is not only a breeze to whip up with simple ingredients but also a fantastic way to relive those joyful moments. With just six elements and no ice cream maker required, you can serve this creamy, pink treat at summer parties or indulge as a nostalgic dessert any day of the week. Imagine everyone’s faces lighting up as they dig into their bowls of cheerful colors and chewy gumball surprises. Ready to make your own scoop of happiness? Let’s dive into this fun and easy recipe!

Why Will You Love This Ice Cream?
Nostalgic Flavor: The iconic bubblegum taste transports you back to childhood memories, making each scoop a delightful trip down memory lane.
No Ice Cream Maker Needed: Forget complicated machinery! This easy no-churn recipe allows you to create your own ice cream at home without any fuss or special equipment.
Quick and Simple: With just six basic ingredients and minimal prep time, you can whip up this summer treat in no time, transforming an ordinary afternoon into a special occasion.
Customizable: Add your favorite mix-ins, whether it’s chocolate chips or a burst of fruit flavor, for a personalized touch. You can even check out my recipes for Creamy Fruit Dip or White Chicken Enchiladas to complement your ice cream party!
Crowd-Pleaser: Perfect for summer gatherings and birthdays, it’s a colorful dessert that excites both kids and adults alike, ensuring everyone has a smile on their face.
No Churn Bubblegum Ice Cream Ingredients
Unleash your inner child with these fun components!
For the Ice Cream Base
• Heavy Cream – Acts as the base for a rich and creamy texture. Tip: Always use cold cream for better whipping results.
• Sweetened Condensed Milk – Adds sweetness and smoothness, removing the need for additional sugar. Substitutions: For a lighter option, use a low-fat condensed milk.
• Pure Vanilla Extract – Enhances the overall flavor with a classic touch. Optional: Adjust to taste for more pronounced vanilla flavor.
• Bubble Gum Extract – Provides the nostalgic bubblegum flavor that defines the ice cream. Note: Start with a small amount, as the flavor is potent.
• Pink Food Coloring – Optional ingredient for achieving the iconic pink color of bubblegum ice cream. Usage: Add one drop at a time to reach desired shade.
For the Fun Factor
• Mini Gumballs – Adds playful chewy texture and vibrant pops of color. Preparation: Cut larger gumballs into halves or quarters for better distribution.
Step‑by‑Step Instructions for No Churn Bubblegum Ice Cream
Step 1: Whip the Heavy Cream
Start by chilling a mixing bowl and your electric beaters in the freezer for about 15 minutes to ensure optimal whipping. Once ready, pour in the heavy cream and whip on medium speed for around 3 minutes, until stiff peaks form. This will create the luscious, airy base for your No Churn Bubblegum Ice Cream.
Step 2: Combine Ingredients
In a separate bowl, gently fold in the sweetened condensed milk into the whipped cream, ensuring you maintain the light texture. Next, stir in the pure vanilla extract and bubble gum extract, mixing until evenly combined. If using, add a few drops of pink food coloring, blending until you achieve your desired pastel hue, making your ice cream as vibrant as its flavor.
Step 3: Add Gumballs
Carefully mix in the mini gumballs, ensuring they are evenly distributed without deflating the whipped cream. This playful addition not only enhances the nostalgic flavor of your No Churn Bubblegum Ice Cream but also introduces a delightful chewy texture. Take a moment to admire the cheerful colors before transferring the mixture to an airtight container.
Step 4: Freeze
Transfer the ice cream mixture into an airtight container, smoothing the top with a spatula. To prevent ice crystals from forming, cover the surface with plastic wrap before sealing the container. Place it in the freezer for at least 3 hours or overnight. This step is essential for achieving that creamy, soft-serve-like texture.
Step 5: Serve
Before serving your No Churn Bubblegum Ice Cream, let it sit at room temperature for about 5 minutes to soften slightly, making scooping easier. Use an ice cream scoop to serve generous portions into bowls or cones. Feel free to get creative with your presentation, perhaps adding more gumballs or a drizzle of syrup to enhance the delightful nostalgia of this summery treat.
No Churn Bubblegum Ice Cream Variations
Get creative and make this ice cream uniquely yours with these fun twists and substitutions!
Fruit-Infused: Blend in pureed strawberries or raspberries for a fruity burst, balancing the sweetness of bubblegum and adding a fresh twist.
Feel free to experiment with different fruits; you may discover a delightful new favorite flavor combination.Chocolate Lovers: For a rich touch, swirl in chocolate fudge or add mini chocolate chips for extra indulgence.
The chocolate pairs beautifully with the bubblegum, creating an enticing contrast that will satisfy your sweet tooth.Festive Colors: Use pastel food coloring for holidays or parties! Adjust shades to match your event’s theme, making the ice cream even more festive.
Imagine serving this vibrant treat during a spring picnic or summer birthday party!Cookie Crunch: Swap gumballs for crushed cookies or crumbled brownies to add a delightful crunch to your ice cream.
Every bite will surprise you with delightful textures, making it an exciting treat for all ages.Nutty Flavor: Add chopped nuts such as pistachios or almonds for a tasty, crunchy contrast to the creamy mixture.
This combination will elevate your ice cream experience, giving a delightful, nutty richness.Dairy-Free Delight: Replace the heavy cream with a can of coconut cream for a fantastic dairy-free version of your ice cream.
You will gain a unique flavor twist that brings out an exotic flavor reminiscent of summer adventures.Spicy Kick: For the daring, a pinch of cayenne or chili powder can introduce an unexpected heat that complements the sweetness.
This adventurous addition can elevate your ice cream to gourmet status, sparking intriguing conversations!Decadent Swirl: Drizzle caramel or peanut butter sauce into your mixture before freezing for a delightful surprise with every scoop.
This layer of flavor will turn your ice cream into an irresistible dessert everyone will adore.
Feel free to explore these variations to match your taste preferences. After all, this No Churn Bubblegum Ice Cream is all about making sweet memories one scoop at a time! If you’re in the mood for something different, check out my recipe for Creamy Chicken Poblano Soup or indulge in some Raspberry Cream Pie. Enjoy your culinary adventures!
What to Serve With No Churn Bubblegum Ice Cream
On a sun-soaked day, nothing pairs better with a scoop of joy than delightful accompaniments that enhance every delicious bite.
Rainbow Sprinkles: A classic addition that adds a visual pop and extra crunch, making each scoop even more festive. Sprinkle them generously for a colorful presentation.
Chocolate Chip Cookies: Perfect for an ice cream sandwich! The chewy texture and rich flavor of the cookies complement the creamy, nostalgic ice cream.
Fresh Berries: Strawberries or raspberries provide a tart contrast to the sweetness of the bubblegum ice cream, refreshing your palate between each sugary bite.
Waffle Cones: Serve your ice cream in a crispy waffle cone for added texture and flavor. The slight crunch brings an enjoyable contrast to the creamy dessert.
Whipped Cream: A dollop of fluffy whipped cream transforms your dish into a dreamy dessert. It adds lightness and a velvety mouthfeel that pairs beautifully with the bubblegum flavor.
Chocolate Syrup: A drizzle adds a decadent twist that perfectly balances the sweetness. Pair it with the ice cream and watch the kid in everyone come alive!
Gumball Garnish: More gumballs on top not only enhance the nostalgic feel but also offer a delightful chewiness that complements the creamy texture of the ice cream.
Lemonade: A refreshing glass of homemade lemonade with its tangy zing is the ideal drink to pair with the sweetness of bubblegum ice cream, keeping you cool and refreshed.
Cupcakes: Sweet, fluffy cupcakes can elevate your ice cream experience. Try a vanilla cupcake topped with cotton candy frosting for a whimsical touch!
Helpful Tricks for No Churn Bubblegum Ice Cream
Chill Your Tools: Always chill your mixing bowl and beaters beforehand. This improves the volume of whipped cream and ensures a light texture for your No Churn Bubblegum Ice Cream.
Gentle Folding: When incorporating the sweetened condensed milk, be sure to fold gently. This technique helps maintain the airiness of the whipped cream, resulting in a creamy ice cream base.
Careful Coloring: If using pink food coloring, add it one drop at a time. This allows you to achieve the perfect shade of bubblegum without over-saturating the mixture.
Mix-Ins Management: For best results, only fold in mini gumballs after the base is fully mixed. This prevents them from sinking and ensures an even distribution throughout your No Churn Bubblegum Ice Cream.
Avoid Freezer Burn: Press plastic wrap directly onto the surface of the ice cream before sealing it with a lid. This prevents ice crystals from ruining your creamy texture while stored.
How to Store and Freeze No Churn Bubblegum Ice Cream
Airtight Container: Always store your ice cream in an airtight container to retain its creamy texture and prevent freezer burn. Press plastic wrap against the surface for extra protection.
Freezer: No Churn Bubblegum Ice Cream can be stored in the freezer for up to 2 weeks. Be sure to label the container with the date for easy tracking.
Reheating: If the ice cream becomes too hard, let it sit at room temperature for about 5-10 minutes to soften before scooping. This will help it regain that delightful texture.
Avoid Refreezing: Do not refreeze melted ice cream, as this can lead to graininess and an unappetizing texture. Always scoop directly from the container.
Make Ahead Options
Preparing your No Churn Bubblegum Ice Cream ahead of time is a fantastic way to save precious moments during busy summer days! You can whip up the entire mixture and freeze it up to 24 hours in advance. Simply follow the steps for combining and adding the mini gumballs, then store it in an airtight container, making sure to cover the surface with plastic wrap to avoid ice crystals. This keeps your ice cream just as creamy and delightful when it’s time to serve. When you’re ready to enjoy, allow the ice cream to sit at room temperature for about 5 minutes for easy scooping—and you’ll have a delightful dessert ready to impress family and friends with minimal effort!
No Churn Bubblegum Ice Cream Recipe FAQs
What type of heavy cream should I use for the ice cream?
Absolutely! Always opt for cold heavy cream, as it whips better and leads to a fluffier texture. Look for cream with a high fat content, around 36%, for the richest flavor and smoothest consistency.
How long can I store No Churn Bubblegum Ice Cream?
You can keep your homemade No Churn Bubblegum Ice Cream in an airtight container for up to 2 weeks. Just remember to press plastic wrap directly against the surface to prevent freezer burn, ensuring every scoop remains creamy and delicious.
Can I freeze No Churn Bubblegum Ice Cream for later?
Yes, indeed! After making your ice cream, make sure it’s stored properly in an airtight container. It can be frozen for up to 3 months. When ready to enjoy, let it sit at room temperature for about 10 minutes to soften before scooping.
What should I do if my ice cream is too hard to scoop?
Very! If you find your No Churn Bubblegum Ice Cream is too hard after freezing, simply let it sit at room temperature for approximately 5-10 minutes. This slight warming will make it much easier to scoop and serve, restoring that lovely creamy texture.
Are there any allergy considerations for this recipe?
Keep an eye on the ingredients! The primary allergens here include dairy from the heavy cream and condensed milk, as well as potential allergens in the gumballs. Always read labels to check for any additional allergenic ingredients. If you’re serving to guests, consider providing alternatives like dairy-free whipped topping or alternative mix-ins for those with dietary restrictions.
Can I customize the flavor of my No Churn Bubblegum Ice Cream?
Of course! You can play around with the base by adding different extracts or mix-ins. For instance, try replacing the bubblegum extract with strawberry or vanilla, or add fun mix-ins like chocolate chips or crushed cookies. Be creative, and find your favorite combination!
No Churn Bubblegum Ice Cream: Simple, Nostalgic Summer Treat
Ingredients
Equipment
Method
- Chill a mixing bowl and electric beaters in the freezer for about 15 minutes. Pour in the heavy cream and whip on medium speed for around 3 minutes, until stiff peaks form.
- In a separate bowl, gently fold in the sweetened condensed milk into the whipped cream. Stir in the pure vanilla extract and bubble gum extract. If using, add a few drops of pink food coloring.
- Carefully mix in the mini gumballs, ensuring they are evenly distributed without deflating the whipped cream.
- Transfer the mixture into an airtight container, smoothing the top with a spatula. Cover the surface with plastic wrap before sealing the container. Freeze for at least 3 hours or overnight.
- Before serving, let the ice cream sit at room temperature for about 5 minutes to soften slightly. Serve into bowls or cones.