

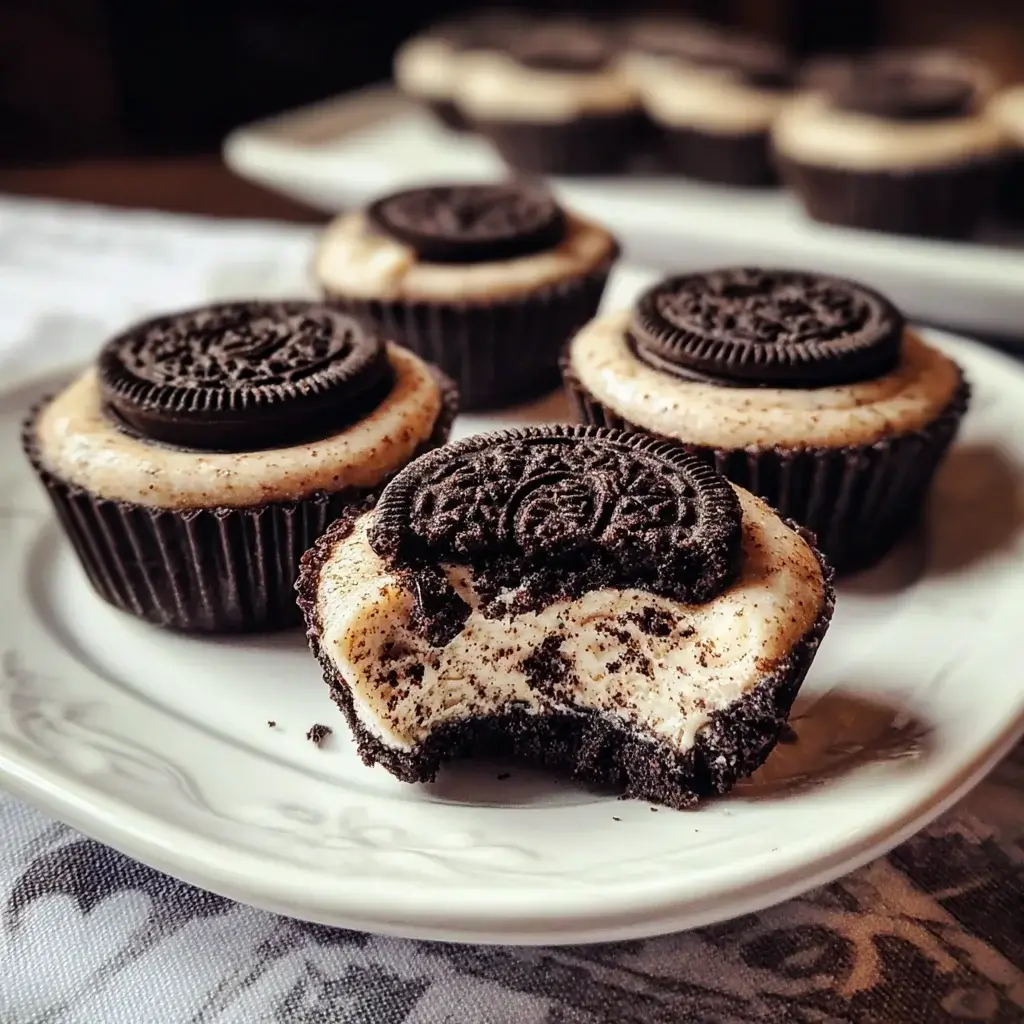
Introduction to Oreo Cheesecake Cookie Cups
There’s something magical about combining two beloved treats into one delightful dessert. That’s exactly what you get with these Oreo Cheesecake Cookie Cups. They’re not just a treat; they’re a celebration of flavors that can brighten any day. Whether you’re looking for a quick solution for a busy weeknight or a dish to impress your friends at a gathering, these cookie cups are the answer. With their creamy cheesecake filling nestled in a soft, cookie base, they’re bound to become a favorite in your home. Let’s dive into this delicious adventure together!
Why You’ll Love This Oreo Cheesecake Cookie Cups
These Oreo Cheesecake Cookie Cups are a game-changer in the dessert world. They’re incredibly easy to whip up, making them perfect for busy days when you crave something sweet. The combination of rich cheesecake and crunchy Oreo cookies creates a flavor explosion that’s hard to resist. Plus, they’re a hit with everyone, from kids to adults, ensuring you’ll be the star of any gathering. Trust me, you’ll want to make these again and again!
Ingredients for Oreo Cheesecake Cookie Cups
Gathering the right ingredients is the first step to creating these delightful Oreo Cheesecake Cookie Cups. Here’s what you’ll need:
- All-purpose flour: This is the base for your cookie cups, providing structure and texture.
- Baking soda: A leavening agent that helps the cookie cups rise and become fluffy.
- Salt: Just a pinch enhances the flavors and balances the sweetness.
- Unsalted butter: Softened butter adds richness and helps create a tender cookie base.
- Granulated sugar: This sweetener gives the cookie cups their delightful sweetness.
- Brown sugar: Packed brown sugar adds moisture and a hint of caramel flavor.
- Large egg: Acts as a binder, helping to hold everything together.
- Vanilla extract: A splash of vanilla brings warmth and depth to the flavor.
- Oreo cookies: The star of the show! Crushed Oreos add that signature flavor and crunch.
- Cream cheese: Softened cream cheese creates the creamy cheesecake filling.
- Powdered sugar: This sweetener gives the cheesecake a smooth, sweet finish.
- Whipped topping: Lightens the cheesecake filling, making it airy and fluffy.
- Additional crushed Oreo cookies: For topping, adding a final touch of crunch and flavor.
For those looking to mix things up, consider adding a tablespoon of cocoa powder to the cheesecake mixture for a richer flavor. You can also swap out the Oreos for your favorite sandwich cookies, like peanut butter or mint-flavored varieties. The exact quantities for each ingredient are listed at the bottom of the article, ready for you to print and take to the kitchen!
How to Make Oreo Cheesecake Cookie Cups
Creating these Oreo Cheesecake Cookie Cups is a fun and rewarding experience. Follow these simple steps, and you’ll have a delicious dessert that’s sure to impress!
Step 1: Preheat the Oven
Start by preheating your oven to 350°F (175°C). Preheating is crucial because it ensures even baking. If you skip this step, your cookie cups might not rise properly, leading to a dense texture.
Step 2: Prepare the Dry Ingredients
In a medium bowl, whisk together the all-purpose flour, baking soda, and salt. This step is essential for evenly distributing the leavening agent and salt throughout the flour. It sets the foundation for a well-balanced cookie cup.
Step 3: Cream the Butter and Sugars
In a large bowl, cream together the softened unsalted butter, granulated sugar, and brown sugar until the mixture is light and fluffy. This process incorporates air into the batter, giving your cookie cups a tender texture. Don’t rush it; take your time to achieve that perfect creaminess!
Step 4: Add Egg and Vanilla
Next, add the large egg and vanilla extract to the butter mixture. Mix until everything is well combined. The egg acts as a binder, helping to hold your cookie cups together, while the vanilla adds a warm, inviting flavor.
Step 5: Combine Wet and Dry Ingredients
Gradually add the dry ingredients to the wet mixture. Mix until just combined; overmixing can lead to tough cookie cups. You want a soft dough that’s ready for the next step!
Step 6: Fold in Crushed Oreos
Gently fold in the crushed Oreo cookies. This step is where the magic happens! The crushed Oreos will add that signature flavor and delightful crunch. Be careful not to overmix; you want those Oreo pieces to stay intact.
Step 7: Form the Cookie Cups
Scoop about 1 tablespoon of the cookie dough into each cup of a greased muffin tin. Press the dough down slightly to form a base. This will create a nice little cup for your cheesecake filling. Make sure to leave some space at the top!
Step 8: Bake and Cool
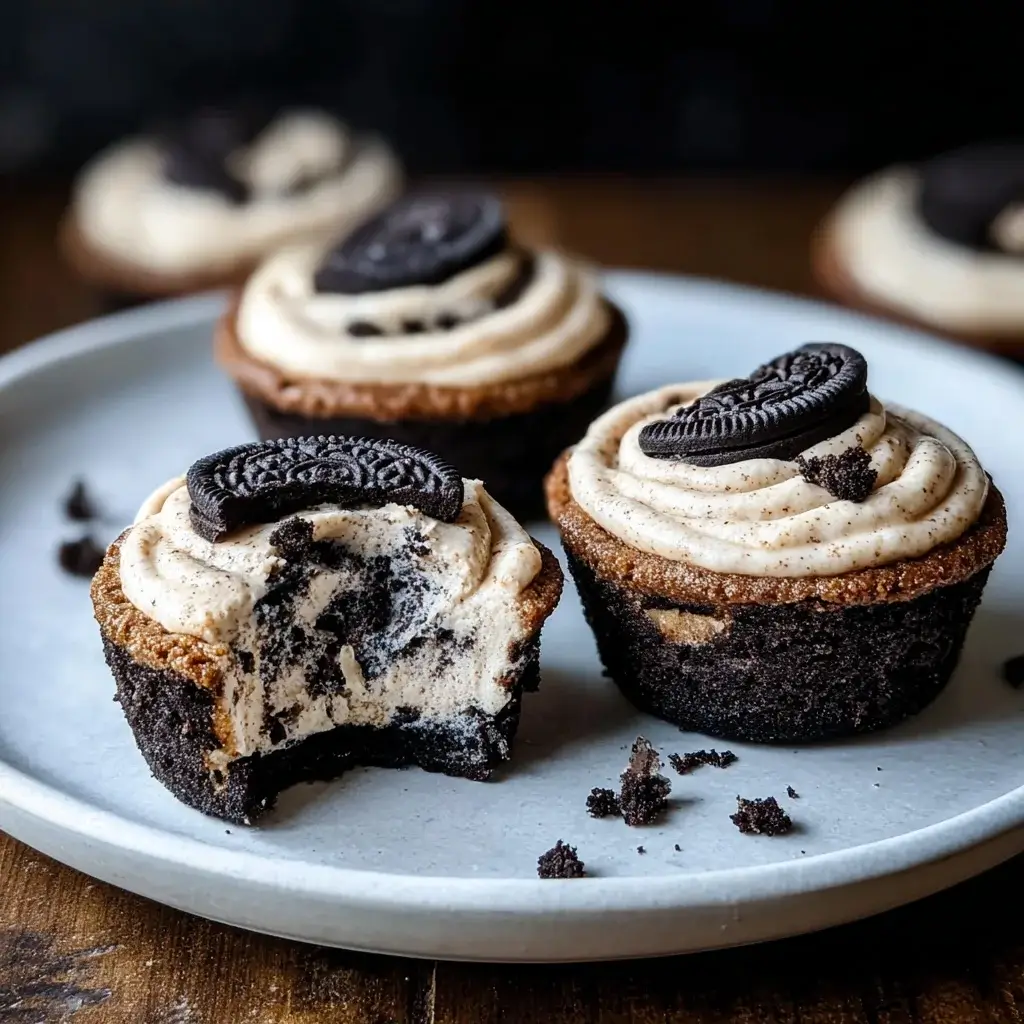
Bake the cookie cups for 10-12 minutes, or until the edges are golden brown. Once they’re done, remove them from the oven and let them cool completely in the muffin tin. Cooling is important; it allows the cookie cups to firm up and hold their shape.
Step 9: Prepare the Cheesecake Filling
In a separate bowl, beat the softened cream cheese until smooth. Gradually add the powdered sugar and vanilla extract, mixing until well combined. This creamy filling is what makes these cookie cups irresistible!
Step 10: Fill the Cookie Cups
Once the cookie cups are cool, fill each cup with the cheesecake mixture. Be careful not to overfill; a little goes a long way. You want to leave some space for the topping!
Step 11: Chill and Serve
Finally, chill the filled cookie cups in the refrigerator for at least 1 hour before serving. Chilling allows the flavors to meld together and gives the cheesecake filling a nice, firm texture. Trust me, the wait will be worth it!
Tips for Success
- Make sure your butter and cream cheese are at room temperature for easy mixing.
- Don’t skip the chilling step; it enhances the flavors and texture of the cheesecake filling.
- Use a cookie scoop for even portions when filling the muffin tin.
- Experiment with different cookie flavors for a unique twist on the classic recipe.
- Keep an eye on the baking time; every oven is different!
Equipment Needed
- Muffin tin: A standard 12-cup muffin tin works best, but a mini muffin tin can create bite-sized treats.
- Mixing bowls: Use medium and large bowls for mixing ingredients.
- Whisk: A simple whisk is perfect for combining dry ingredients.
- Electric mixer: A hand mixer or stand mixer makes creaming butter and sugar easier.
- Cookie scoop: This helps portion the dough evenly for consistent cookie cups.
Variations
- For a chocolate lover’s dream, add a tablespoon of cocoa powder to the cookie dough for a rich chocolate base.
- Try using gluten-free all-purpose flour to make these cookie cups gluten-free without sacrificing flavor.
- Swap out the Oreo cookies for other sandwich cookies, like peanut butter or mint-flavored varieties, for a fun twist.
- For a fruity touch, mix in some crushed strawberries or raspberries into the cheesecake filling.
- Make it a no-bake version by using a pre-made cookie crust instead of baking the cookie cups.
Serving Suggestions
- Pair these cookie cups with a scoop of vanilla ice cream for an indulgent dessert experience.
- Serve with a drizzle of chocolate or caramel sauce for added sweetness.
- Garnish with fresh berries for a pop of color and freshness.
- Enjoy with a cup of coffee or a glass of cold milk to balance the sweetness.
FAQs about Oreo Cheesecake Cookie Cups
Curious about these delightful treats? Here are some frequently asked questions that might help you on your baking journey!
Can I make Oreo Cheesecake Cookie Cups ahead of time?
Absolutely! You can prepare the cookie cups and cheesecake filling a day in advance. Just assemble them and chill before serving. They’ll taste just as delicious!
What can I use instead of cream cheese?
If you’re looking for a lighter option, try using Greek yogurt or mascarpone cheese. Both will give you a creamy texture, but the flavor will vary slightly.
How do I store leftover cookie cups?
Store any leftovers in an airtight container in the refrigerator. They’ll stay fresh for up to three days, but trust me, they won’t last that long!
Can I freeze these cookie cups?
Yes, you can freeze them! Just make sure they’re well-wrapped. Thaw them in the fridge before serving for the best texture.
What other cookies can I use for variations?
Feel free to experiment! Try using peanut butter cookies, mint Oreos, or even chocolate chip cookies for a fun twist on the classic Oreo Cheesecake Cookie Cups.
Final Thoughts
Creating these Oreo Cheesecake Cookie Cups is more than just baking; it’s about sharing joy and deliciousness with those you love. Each bite is a delightful blend of creamy cheesecake and crunchy Oreo, making them a perfect treat for any occasion. Whether you’re celebrating a special moment or simply indulging after a long day, these cookie cups bring smiles and satisfaction. Plus, they’re easy enough to whip up on a whim! So, roll up your sleeves, gather your ingredients, and let the sweet magic unfold in your kitchen. You won’t regret it!
"Oreo Cheesecake Cookie Cups: Irresistibly Delicious Recipe"
Ingredients
Method
- Preheat your oven to 350°F (175°C).
- In a medium bowl, whisk together the flour, baking soda, and salt.
- In a large bowl, cream together the softened butter, granulated sugar, and brown sugar until light and fluffy.
- Add the egg and vanilla extract to the butter mixture, mixing until well combined.
- Gradually add the dry ingredients to the wet ingredients, mixing until just combined.
- Fold in the crushed Oreo cookies.
- Scoop about 1 tablespoon of cookie dough into each cup of a greased muffin tin, pressing it down slightly to form a base.
- Bake for 10-12 minutes, or until the edges are golden. Remove from the oven and let cool completely.
- In a separate bowl, beat the softened cream cheese until smooth. Gradually add the powdered sugar and vanilla extract, mixing until well combined.
- Fold in the whipped topping until fully incorporated.
- Once the cookie cups are cool, fill each cup with the cheesecake mixture.
- Top with additional crushed Oreo cookies. Chill in the refrigerator for at least 1 hour before serving.
Nutrition
Notes
- For a richer flavor, try adding a tablespoon of cocoa powder to the cheesecake mixture.
- For a fun twist, substitute the Oreo cookies with your favorite sandwich cookies, like peanut butter or mint-flavored varieties.