

Introduction to Peanut Butter Blossom Cookies
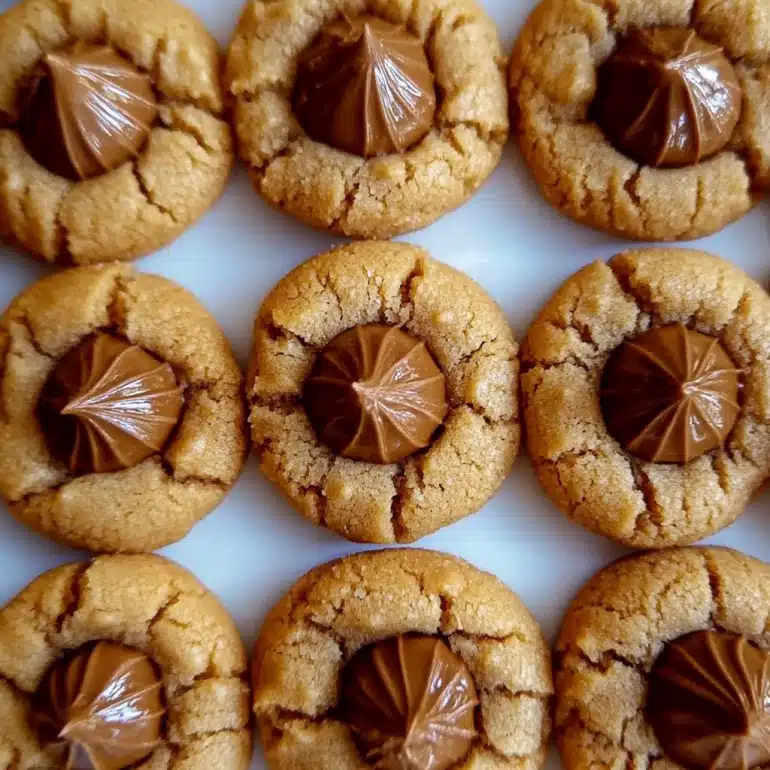
There’s something magical about the aroma of freshly baked cookies wafting through the house. It takes me back to my childhood, where my mom would whip up a batch of Peanut Butter Blossom Cookies every time we had a family gathering. These delightful treats are not just cookies; they’re a warm hug on a plate. Perfect for a quick solution on a busy day or a sweet surprise for loved ones, they combine the rich flavor of peanut butter with the irresistible charm of chocolate kisses. Trust me, once you try these, they’ll become a staple in your baking repertoire!
Why You’ll Love This Peanut Butter Blossom Cookies
These Peanut Butter Blossom Cookies are a game-changer in the baking world. They come together in just 27 minutes, making them perfect for those last-minute cravings or unexpected guests. The combination of creamy peanut butter and sweet chocolate creates a flavor explosion that’s hard to resist. Plus, they’re simple enough for even the most novice bakers. You’ll impress your friends and family without breaking a sweat!
Ingredients for Peanut Butter Blossom Cookies
Gathering the right ingredients is the first step to cookie perfection. Here’s what you’ll need for these delightful Peanut Butter Blossom Cookies:
- Smooth Peanut Butter: The star of the show! It adds that creamy texture and rich flavor.
- White Sugar: This sweetener gives the cookies a delightful crunch and sweetness.
- Brown Sugar: Packed with molasses, it adds moisture and a deeper flavor profile.
- Large Eggs: They bind everything together and help the cookies rise.
- Vanilla Extract: A splash of this adds warmth and enhances the overall flavor.
- Baking Soda: This leavening agent helps the cookies puff up and become soft.
- Sea Salt: Just a pinch balances the sweetness and enhances the flavors.
- All-Purpose Flour: The foundation of the cookie dough, providing structure.
- White Sugar (for coating): Rolling the dough balls in sugar gives them a sweet, sparkly finish.
- Chocolate Kisses: The iconic topping that melts slightly into the warm cookie, creating a delicious contrast.
For those looking to mix things up, consider swapping peanut butter for almond butter for a nutty twist. You can also experiment with different toppings, like caramel-filled chocolates or even chocolate-covered pretzels. The possibilities are endless!
Exact quantities for each ingredient can be found at the bottom of the article, ready for printing. Happy baking!
How to Make Peanut Butter Blossom Cookies
Now that you have all your ingredients ready, let’s dive into the fun part—making these Peanut Butter Blossom Cookies! Follow these simple steps, and you’ll have a batch of warm, gooey cookies in no time.
Step 1: Preheat the Oven
Start by preheating your oven to 350°F. This ensures it’s nice and hot when your cookies go in, helping them bake evenly and perfectly.
Step 2: Mix the Ingredients
In a spacious mixing bowl, blend together the smooth peanut butter, white sugar, brown sugar, eggs, and vanilla extract. Mix until everything is creamy and uniform. This is where the magic begins, as the rich peanut butter starts to shine!
Step 3: Add Dry Ingredients
Next, stir in the baking soda and sea salt. Then, fold in the all-purpose flour until everything is well combined. The dough should be thick and slightly sticky, perfect for shaping into cookies.
Step 4: Shape the Cookies
Take a tablespoon of dough and roll it into a ball. Then, coat each ball in white sugar. This step adds a delightful crunch and sweetness to the outside of your cookies.
Step 5: Arrange on Baking Sheet
Arrange the sugar-coated dough balls on a baking sheet lined with parchment paper. Make sure to space them about 2 inches apart. They’ll spread a bit while baking, so give them room to breathe!
Step 6: Bake the Cookies
Bake the cookies for 10-12 minutes, or until the edges are light golden brown. Keep an eye on them; you want them soft in the center but slightly firm around the edges.
Step 7: Add Chocolate Kisses
As soon as the cookies come out of the oven, press a chocolate kiss into the center of each cookie while they are still warm. The heat will melt the chocolate just enough to create a deliciously gooey topping.
Step 8: Cool the Cookies
Let the cookies rest on the baking sheet for about 5 minutes. This allows them to set before transferring them to a wire rack to cool completely. The aroma will be irresistible, so try not to eat them all at once!
Tips for Success
- Use room temperature ingredients for better mixing.
- Don’t overbake; cookies will continue to firm up as they cool.
- For a chewier texture, chill the dough for 30 minutes before baking.
- Experiment with different types of chocolate for unique flavors.
- Store cookies in an airtight container to keep them fresh longer.
Equipment Needed
- Mixing Bowl: A large bowl for combining ingredients. A sturdy pot can work in a pinch.
- Baking Sheet: A flat tray for baking. If you don’t have one, use a large oven-safe dish.
- Parchment Paper: For easy cleanup. Aluminum foil can be a good substitute.
- Measuring Cups: Essential for accuracy. Use a kitchen scale if you prefer weight measurements.
- Cookie Scoop: For uniform cookie sizes. A tablespoon works just as well!
Variations
- Nut Butter Swap: Try almond butter or cashew butter for a different nutty flavor.
- Gluten-Free Option: Substitute all-purpose flour with a gluten-free flour blend for a celiac-friendly treat.
- Chocolate Alternatives: Use dark chocolate or white chocolate kisses for a unique twist.
- Mix-Ins: Add chopped nuts, mini chocolate chips, or dried fruit to the dough for extra texture.
- Vegan Version: Replace eggs with flaxseed meal mixed with water and use a plant-based butter.
Serving Suggestions
- Pair these cookies with a tall glass of cold milk for a classic combination.
- Serve alongside a scoop of vanilla ice cream for an indulgent dessert.
- Present them on a colorful platter, garnished with fresh berries for a pop of color.
- Wrap them in cellophane and tie with a ribbon for a thoughtful gift.
FAQs about Peanut Butter Blossom Cookies
Can I use crunchy peanut butter instead of smooth?
Absolutely! Crunchy peanut butter will add a delightful texture to your Peanut Butter Blossom Cookies. Just keep in mind that it may slightly alter the dough consistency.
How do I store leftover cookies?
To keep your cookies fresh, store them in an airtight container at room temperature. They should stay delicious for about a week. If you want to keep them longer, consider freezing them!
Can I make these cookies ahead of time?
Yes! You can prepare the dough in advance and refrigerate it for up to 3 days. Just roll the dough into balls and coat them in sugar before baking when you’re ready.
What can I use instead of chocolate kisses?
If you want to switch things up, try using caramel-filled chocolates or even chocolate-covered pretzels. They’ll add a fun twist to your Peanut Butter Blossom Cookies!
Are Peanut Butter Blossom Cookies suitable for a gluten-free diet?
Yes, you can make these cookies gluten-free by substituting all-purpose flour with a gluten-free flour blend. Just ensure all other ingredients are also gluten-free!
Final Thoughts
There’s a special kind of joy that comes from baking Peanut Butter Blossom Cookies. The process is simple, yet the results are nothing short of magical. Each bite offers a delightful combination of creamy peanut butter and rich chocolate, evoking memories of family gatherings and shared laughter. Whether you’re baking for a crowd or just treating yourself, these cookies bring warmth and happiness to any occasion. So, roll up your sleeves, embrace the sweet chaos of the kitchen, and let these cookies become a cherished part of your baking tradition. You won’t regret it!
Peanut Butter Blossom Cookies: A Sweet Delight Awaits!
Ingredients
Method
- Preheat your oven to 350°F.
- In a spacious mixing bowl, blend together the peanut butter, white sugar, brown sugar, eggs, and vanilla extract until creamy and uniform.
- Stir in the baking soda and sea salt, then fold in the flour until well combined.
- Take a tablespoon of dough and roll it into a ball, then coat each ball in white sugar.
- Arrange the sugar-coated dough balls on a baking sheet lined with parchment paper, spaced about 2 inches apart.
- Bake the cookies for 10-12 minutes, or until the edges are light golden brown.
- Press a chocolate kiss into the center of each cookie while they are still warm.
- Let the cookies rest on the baking sheet for about 5 minutes before transferring them to a wire rack to cool completely.
Nutrition
Notes
- For a unique twist, swap peanut butter for almond butter.
- Consider replacing chocolate kisses with caramel-filled chocolates or chocolate-covered pretzels for variation.