

As I assembled the layers for these Easy Spicy Shrimp Sushi Stacks, the vibrant colors and enticing aromas transported me straight to my favorite sushi spot. Quick dinner ideas can sometimes lean towards the mundane, but this dish combines the crunch of fresh vegetables with creamy shrimp and a delightful kick of heat, making it a true crowd-pleaser. Perfect for both casual weeknight meals and elegant appetizers, these stacks are not only stunning but also incredibly easy to whip up in just 20 minutes. So, ready to elevate your dinner game and impress guests with a homemade twist on sushi? Let’s dive into this delicious recipe!
Why are these sushi stacks a must-try?
Quick & Easy: This dish promises delicious flavor without the hassle, taking only 20 minutes from start to finish! Perfect for busy weeknights or spontaneous gatherings.
Vibrant & Flavorful: The combination of spicy shrimp, creamy mayonnaise, and fresh vegetables creates a mouthwatering experience that’s far superior to your average takeout.
Crowd-Pleasing Appeal: These stacks are visually stunning, making them a great choice for impressing guests or serving at parties alongside a dipping sauce.
Versatile Options: Feel free to customize with different proteins like chicken or tofu, or add extra veggies for an even fresher bite!
Meal Prep Friendly: Prepping the shrimp mixture and rice in advance means you can assemble these sushi stacks whenever you’re ready for a tasty treat.
Spicy Shrimp Sushi Stacks Ingredients
For the Shrimp Mixture
- Shrimp – Use cooked shrimp for a juicy protein base; swap for cooked chicken or tofu if desired.
- Mayonnaise – Adds creaminess to the filling; adjust the amount based on your preferred texture.
- Sriracha – Introduces a delightful spice; feel free to adjust according to your heat tolerance.
For the Rice Layer
- Sushi Rice – Provides the perfect structure; ensure it’s cooked to avoid mushiness for these Spicy Shrimp Sushi Stacks.
For the Fresh Vegetables
- Cucumber – Adds a refreshing crunch; thinly slice to complement the creamy shrimp.
- Avocado – Brings a rich and buttery flavor; consider it for added smoothness or substitute with other veggies like bell peppers for diversity.
Step‑by‑Step Instructions for Spicy Shrimp Sushi Stacks
Step 1: Cook the Sushi Rice
Begin by rinsing 1 cup of sushi rice under cold water until the water runs clear. Then, cook the rice following package instructions, which usually means combining it with 1 ¼ cups of water and bringing it to a boil. Once boiling, reduce heat to low, cover, and let it steam for about 15 minutes. Afterward, turn off the heat and let it rest for an additional 5 minutes before fluffing it with a fork to ensure perfect texture for your sushi stacks.
Step 2: Prepare the Shrimp Mixture
In a medium bowl, combine 1 cup of cooked shrimp with ¼ cup of mayonnaise and 2 tablespoons of Sriracha, mixing until the shrimp is evenly coated. Taste the mixture and adjust the seasoning by adding more Sriracha if you desire additional heat. This creamy, spicy shrimp mixture will create the flavorful core of your Spicy Shrimp Sushi Stacks, bringing that delightful boost of flavor you love.
Step 3: Slice the Fresh Vegetables
While your sushi rice cools, take ½ a cucumber and 1 avocado. Slice the cucumber thinly for a refreshing crunch and scoop the avocado to slice it into thin pieces as well, allowing them to be nestled in your sushi stacks. These fresh vegetables not only enhance the visual appeal of your dish but also offer a lovely contrast in texture alongside the creamy shrimp.
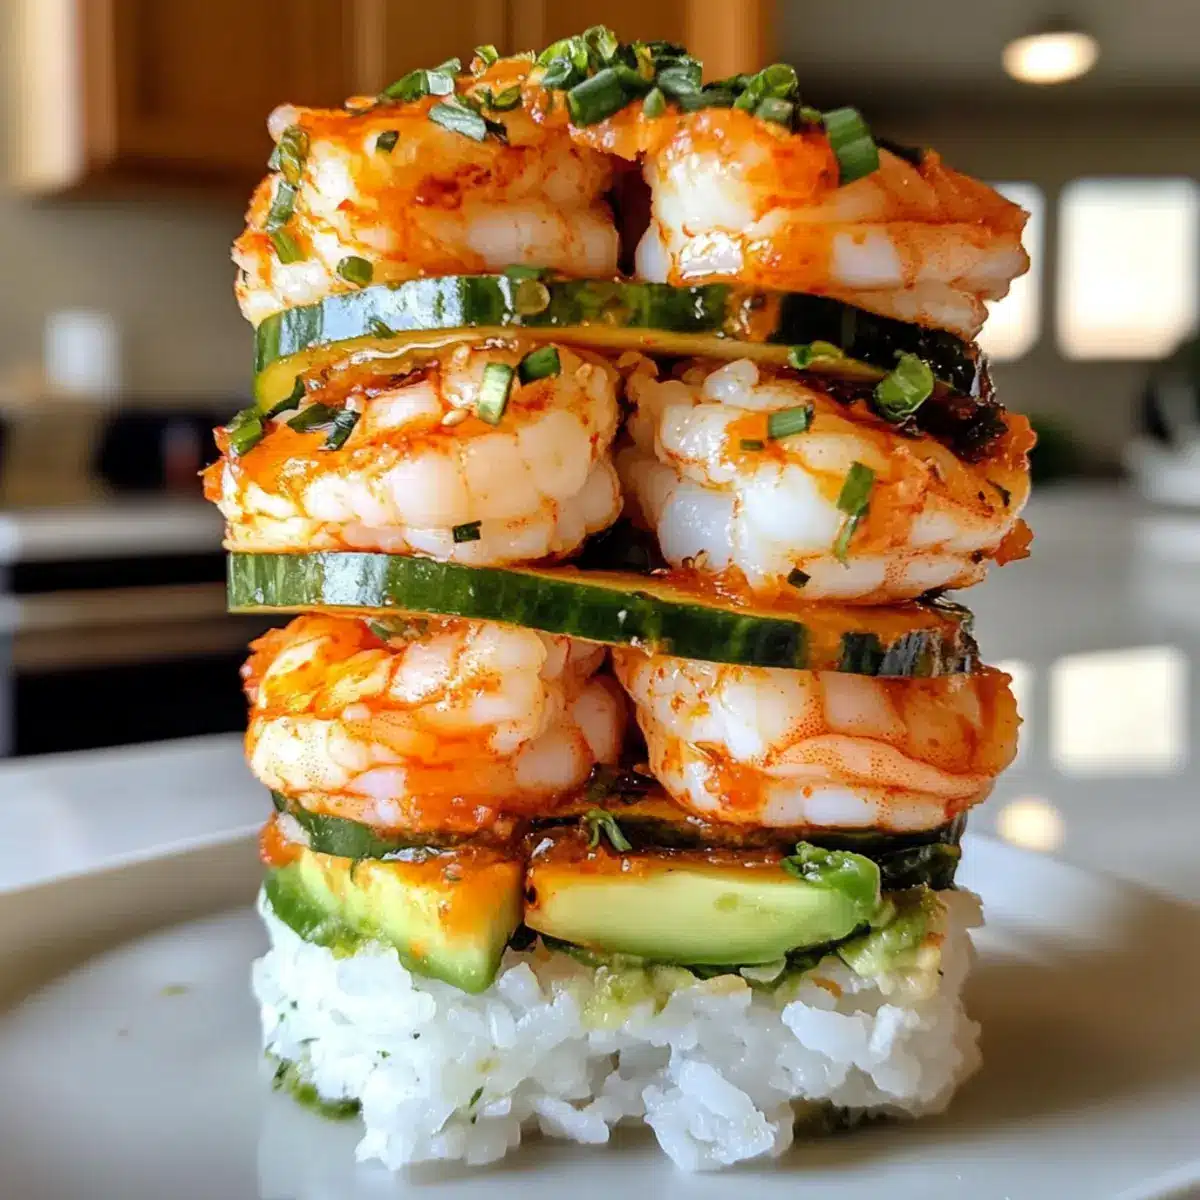
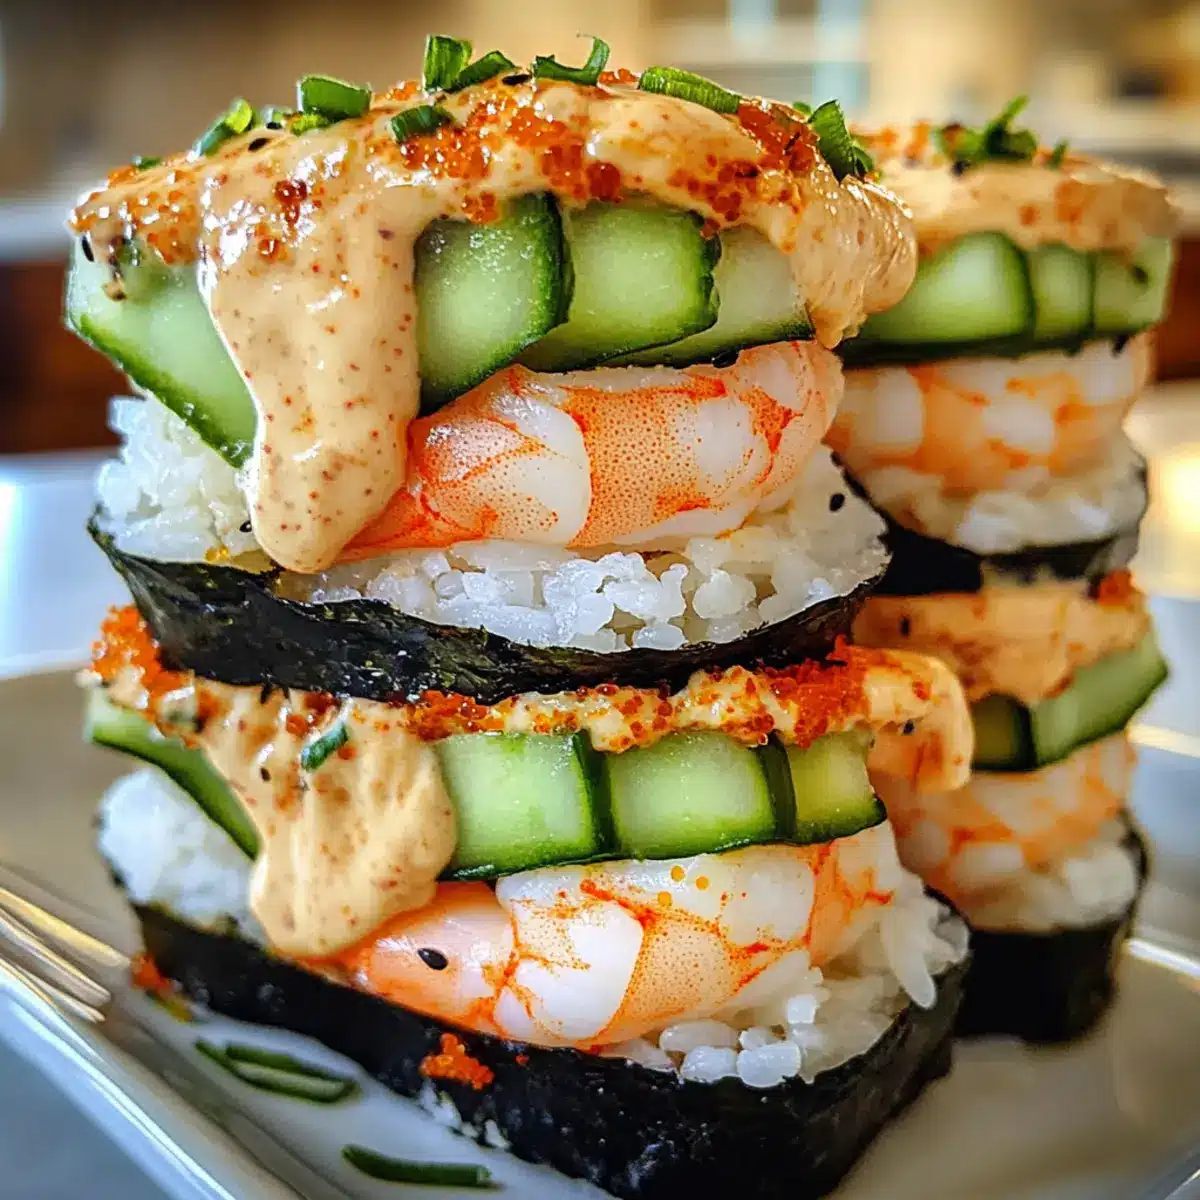
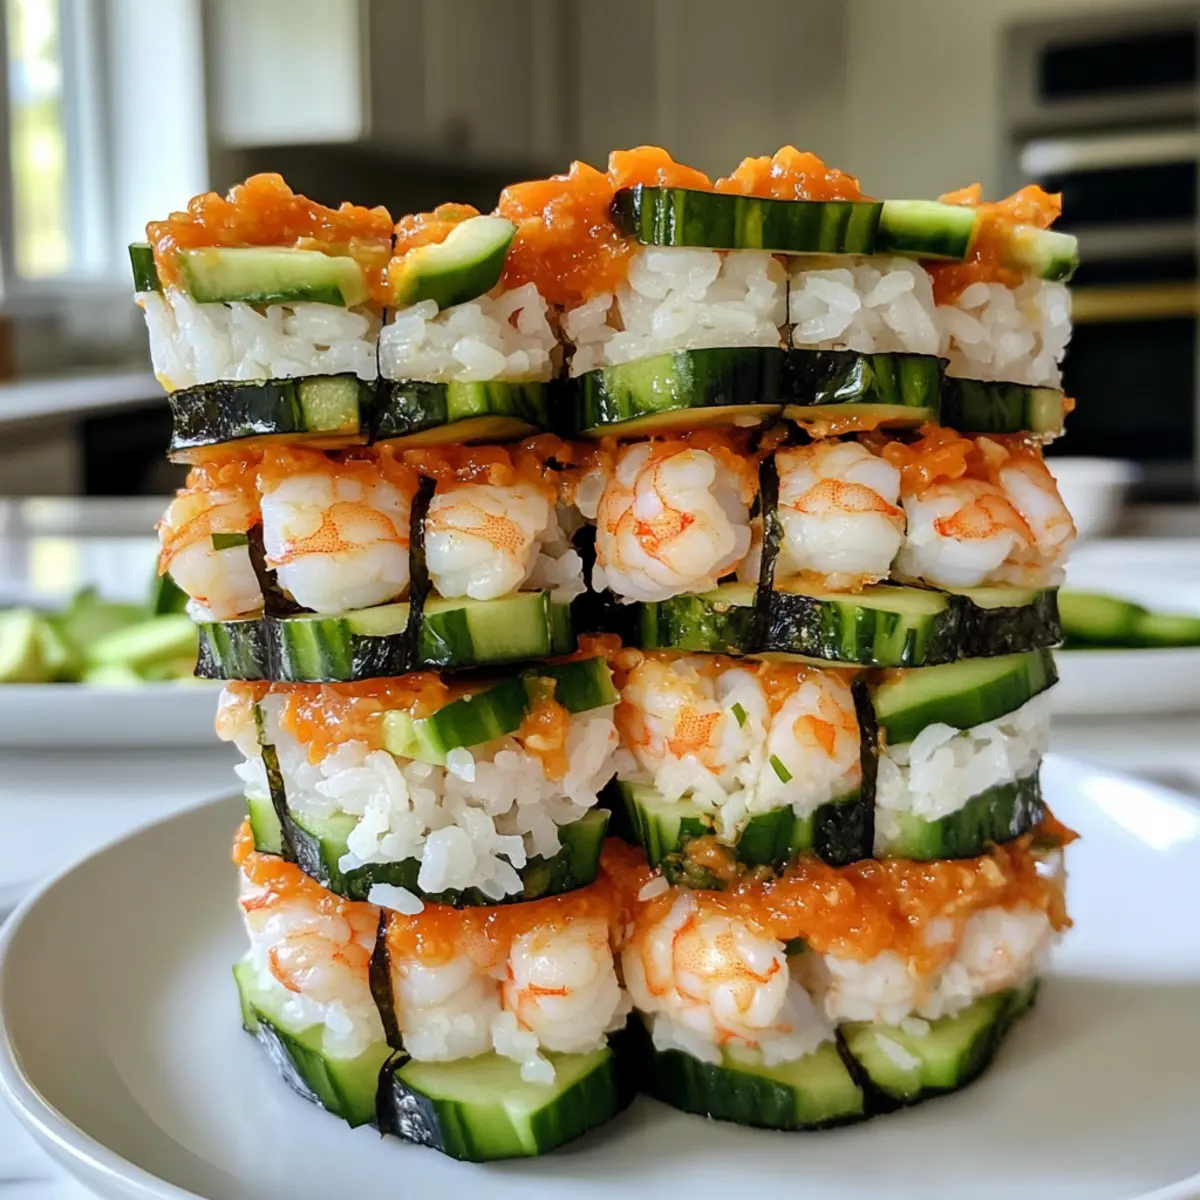
Step 4: Assemble the Sushi Stacks
On a clean cutting board, place a layer of sushi rice approximately ½ inch thick. Use wet hands to help shape it, preventing sticking. Next, spread an even layer of the shrimp mixture on top, followed by a layer of cucumber and avocado slices. This creates a delicious build-up of flavors and textures—vibrant colors will make your Spicy Shrimp Sushi Stacks visually inviting and appetizing!
Step 5: Form and Serve
Carefully press down the layers while stacking them to ensure they hold together. Use a ring mold or your hands if desired to shape the stacks neatly. Once assembled, serve the sushi stacks immediately for the best texture, or place them in the fridge for up to 3 days. These delightful stacks are not only quick to prepare but also provide a fresh and satisfying alternative to takeout.
Make Ahead Options
These Easy Spicy Shrimp Sushi Stacks are perfect for meal prep enthusiasts! You can prepare the sushi rice and shrimp mixture up to 24 hours in advance. To do so, cook 1 cup of sushi rice according to package instructions and allow it to cool completely before refrigerating. Meanwhile, combine 1 cup of cooked shrimp with ¼ cup of mayonnaise and 2 tablespoons of Sriracha, and store this mixture in an airtight container for optimal freshness. To maintain quality, keep the sliced vegetables, like cucumber and avocado, separate and add them just before serving to prevent browning. When ready to enjoy, simply assemble the stacks and serve for a delightful, stress-free dining experience!
How to Store and Freeze Spicy Shrimp Sushi Stacks
Fridge: Store assembled Spicy Shrimp Sushi Stacks in an airtight container for up to 3 days. Enjoy them fresh for the best texture and flavor.
Freezer: For freezing, separate the shrimp mixture and sushi rice in airtight containers. You can freeze them for up to 1 month; thaw overnight in the fridge before assembling.
Reheating: If you have leftovers, gently reheat the stacks in the microwave for 15 seconds to avoid compromising texture. Serve immediately for the best taste!
Spicy Shrimp Sushi Stacks Variations
Feel free to mix things up with these fun twists to make your sushi stacks uniquely yours!
Protein Swap: Substitute shrimp with cooked chicken or cubed tofu for a different protein profile. Each option brings its own flavor to the dish.
Flavor Boost: Add a squeeze of lime juice or a splash of sesame oil to the shrimp mixture for an extra zing. This little twist livens up the taste remarkably.
Veggie Upgrade: Incorporate sliced bell peppers or crunchy radishes for added color and texture. The variety can turn each bite into a delightful surprise!
Spicy Alternatives: Experiment with spicy mayo made from mayo and chili paste instead of Sriracha for a different heat level. Tailor it to your own preference and taste!
Dinner Twist: Transform stacks into sushi rolls by wrapping the layers in nori for a fun sushi experience. Grab some wasabi and soy sauce for dipping!
Hearty Additions: Mix in some cooked quinoa or farro with the sushi rice to add a hearty grainy texture and make it even more filling.
Texture Contrast: Incorporate crunchy seaweed salad on the side for a delightful combination of flavors and textures. Serve it alongside your stacks for extra variety!
Quick Assembly: For an on-the-go variation, layer the shrimp and veggies inside lettuce wraps instead of sushi rice for a light, fresh meal. Perfect for lunch or a picnic!
What to Serve with Easy Spicy Shrimp Sushi Stacks
Nothing elevates a homemade meal quite like the perfect accompaniments to your dish, adding flavor and flair to your table.
- Soy Sauce: A classic choice for sushi lovers, the salty richness of soy sauce enhances the spicy shrimp and complements the flavors beautifully.
- Wasabi: This zesty condiment brings an additional heat that pairs perfectly with the creamy shrimp, giving each bite an exciting twist.
- Crispy Edamame: Lightly salted and packed with protein, crispy edamame adds a satisfying crunch that balances the tenderness of the sushi stacks.
- Seaweed Salad: Fresh and tangy, this salad introduces a delightful ocean flavor that aligns wonderfully with your seafood choice. It’s refreshing and vibrant!
- Miso Soup: This warm and comforting soup offers a soothing contrast, making it a wonderful starter before diving into the sushi stacks.
- Pickled Ginger: Known for cleansing the palate, pickled ginger provides a sweet and tangy burst that tantalizes the taste buds between bites.
- Chilled Green Tea: This soothing drink complements the flavors of the dish nicely while providing a refreshing finish to your meal.
- Sushi Rolls: If you’re feeling ambitious, serve some classic sushi rolls along with your stacks, allowing a variety of textures and flavors to delight your diners.
- Chocolate Mochi: For dessert, a chewy and sweet chocolate mochi is a delightful way to conclude your meal, adding a fun texture contrast to finish.
- Coconut Milk Ice Cream: This creamy treat delivers a tropical vibe that suits the seafood theme and will leave everyone smiling with satisfaction!
Expert Tips for Spicy Shrimp Sushi Stacks
- Perfect Rice Texture: Avoid mushy rice by rinsing the sushi rice thoroughly and following package instructions closely to ensure a delicious texture in your stacks.
- Adjust Spice Levels: Start with less Sriracha in your shrimp mixture, allowing everyone to customize the heat to their preference—this makes your Spicy Shrimp Sushi Stacks enjoyable for all!
- Freshness Counts: For the best flavor and texture, use fresh ingredients—crunchy cucumbers and ripe avocados elevate the taste significantly.
- Assemble Gently: When stacking, use wet hands or a ring mold to avoid crushing the layers, ensuring your sushi stacks maintain their beautiful presentation.
- Quick Reheat Tip: If you have leftovers, a quick 15 seconds in the microwave can warm your stacks without losing their delicious texture.
Easy Spicy Shrimp Sushi Stacks Recipe FAQs
How do I select the best shrimp for this recipe?
Absolutely! For the best flavor and texture, choose fresh, cooked shrimp that’s firm and plump. Look for shrimp that has a slight sheen and no dark spots or strong odor. If you’re opting for frozen shrimp, ensure it’s properly thawed and use within a day for the best results.
What is the best way to store leftover sushi stacks?
Very simple! Store the assembled Easy Spicy Shrimp Sushi Stacks in an airtight container in the refrigerator for up to 3 days. Remember, they taste best when fresh, so enjoy them quickly! If you have leftover shrimp mixture or sushi rice, you can store those separately for even longer-lasting freshness.
Can I freeze the sushi stacks?
Definitely! To freeze, you should separate the shrimp mixture and sushi rice into airtight containers before freezing. They can be stored for up to 1 month. When you’re ready to enjoy, simply thaw them overnight in the fridge, then assemble the stacks as you would fresh ingredients.
What if my rice becomes mushy while cooking?
No worries! If your sushi rice turns out mushy, it may be due to either overcooking or not rinsing it properly before cooking. Always rinse your sushi rice under cold water until the water runs clear, then follow cooking instructions. If it gets mushy, try reducing the water next time, or serve it in a fashion that complements its texture, such as in a layered dish or sushi roll.
Are there any dietary considerations for the shrimp sushi stacks?
Absolutely! If you have guests with seafood allergies, you can substitute the shrimp with cooked chicken or firm tofu for a satisfying alternative. Just ensure to adjust your seasonings accordingly. For anyone following special diets (like gluten-free), check your mayonnaise and any sauces for gluten content to keep the dish safe and enjoyable!
How can I enhance the flavors of my sushi stacks?
For an extra punch, consider marinating your shrimp in a mixture of soy sauce, lime juice, or sesame oil for about 15 minutes before mixing it with mayonnaise and spices. This adds depth of flavor that elevates your Easy Spicy Shrimp Sushi Stacks to a whole new level! Enjoy experimenting!

Spicy Shrimp Sushi Stacks That Wow in Just 20 Minutes
Ingredients
Equipment
Method
- Rinse sushi rice under cold water until it runs clear, then cook with 1 ¼ cups of water for 15 minutes and let rest for 5 minutes.
- Combine shrimp, mayonnaise, and Sriracha in a medium bowl, mixing until evenly coated.
- Slice cucumber thinly and scoop avocado to slice into thin pieces.
- On a cutting board, layer sushi rice, shrimp mixture, cucumber, and avocado.
- Press layers down gently to hold together and serve immediately or refrigerate for up to 3 days.