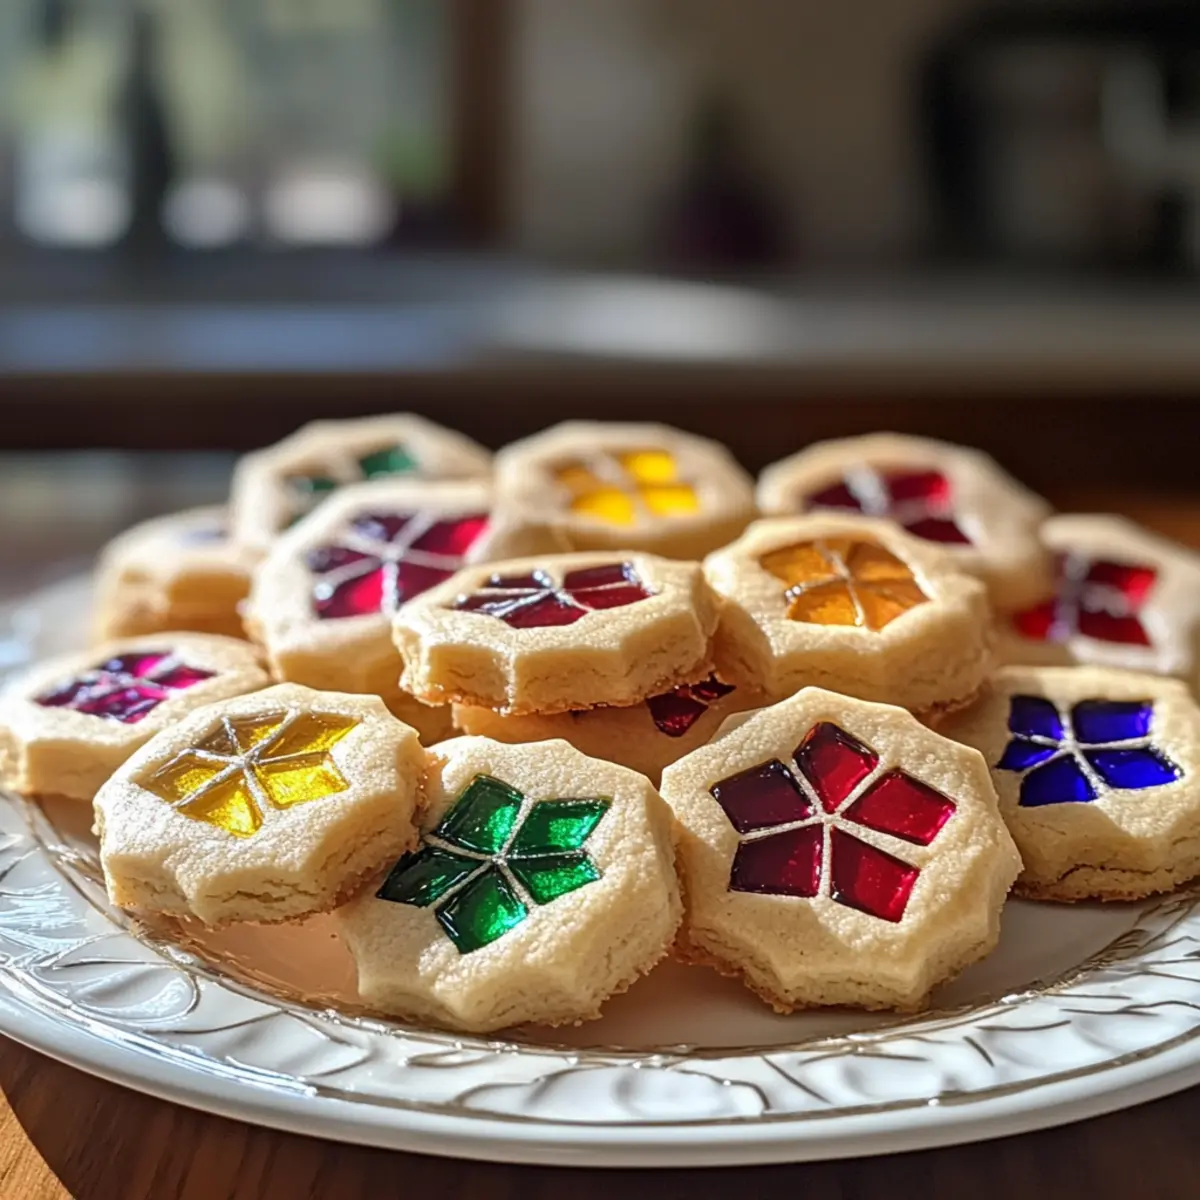
As I stood in my kitchen, my heart raced as colorful glimpses of candy filled my mind—my favorite holiday tradition was about to unfold. Today, I’m making Stained Glass Cookies, those dazzling treats that not only taste like a sweet hug but also work beautifully as edible ornaments. With their crisp golden edges and vibrant, jewel-toned centers, these cookies add a splash of color to any dessert table and make the perfect gift for cookie exchanges. The best part? They’re easy to whip up, making them a joyful project to tackle with family or friends during the festive season. Let’s dive into this delightful recipe and transform ordinary cookies into a stunning holiday masterpiece that’s sure to captivate everyone! What color combinations will you choose for your stained glass magic?
Why Make Stained Glass Cookies?
Unforgettable Visual Appeal: Each cookie is a mini masterpiece, adorned with vibrant, stained glass-like centers that add a festive flair to your holiday spread.
Easy and Fun: Perfect for all skill levels, this recipe is a delightful way to spend time with loved ones while creating something truly special.
Versatile Flavors: Switch up the hard candies to match your holiday theme, making them as unique as your celebrations.
Creative Presentation: Not only are these cookies delicious, but they double as charming ornaments, perfect for decorating your tree or as thoughtful gifts.
Make Ahead: The dough can be prepared in advance, allowing you to save time on busy baking days. Get ready to impress your friends and family this season with these stunning Stained Glass Cookies!
Stained Glass Cookies Ingredients
For the Dough
- All-purpose flour – Provides structure; you can use gluten-free flour if needed.
- Butter – Adds richness and a buttery flavor; substitute with margarine for a dairy-free option.
- Granulated sugar – Sweetens the dough; consider brown sugar for a chewier texture.
- Egg – Binds everything together; a flax egg works well for a vegan alternative.
- Baking powder – A leavening agent; make sure it’s fresh for optimal rise.
- Vanilla extract – Enhances the cookie flavor; feel free to swap in almond extract for a twist.
For the Stained Glass Effect
- Crushed hard candies (various colors) – Creates the stunning stained glass centers when melted; choose candy flavors that complement your holiday theme.
Get ready to transform your holiday baking experience with these delightful Stained Glass Cookies that will amaze everyone with their beauty and taste!
Step‑by‑Step Instructions for Stained Glass Cookies
Step 1: Prepare the Dough
In a large mixing bowl, combine 2 ¾ cups of all-purpose flour and 1 teaspoon of baking powder. Cut in 1 cup of softened butter until the mixture resembles coarse crumbs. Gradually add 1 cup of granulated sugar, 1 egg, and 1 teaspoon of vanilla extract. Mix until a smooth dough forms, ensuring every ingredient is well incorporated.
Step 2: Chill the Dough
Once the dough is ready, wrap it tightly in plastic wrap and refrigerate for at least 30 minutes. Chilling is essential to firm up the dough, preventing it from spreading while baking. You’ll know it’s ready when it’s firm to the touch and slightly cold, making it easier to roll out.
Step 3: Cut Shapes
After chilling, lightly flour your work surface and roll out the dough to about ¼ inch thickness. Use festive cookie cutters to create shapes, ensuring to cut out the centers with a smaller cutter to form the stained glass effect. Gather scrapes and reroll as needed until all dough is shaped.
Step 4: Fill with Candy
Place the cut cookies on a baking sheet lined with parchment paper. Fill each center with a heaping spoonful of crushed hard candies in various colors, ensuring they are well packed but not overflowing. The colorful candy will melt beautifully, creating the stunning stained glass appearance during baking.
Step 5: Bake the Cookies
Preheat your oven to 350°F (175°C). Bake the cookies for 8–10 minutes, or until the edges are lightly golden. Keep an eye on them to avoid overbaking; the tops should remain pale while the candy melts into a vibrant glass-like center.
Step 6: Cool and Set
Once baked, remove the cookie sheet from the oven and allow the cookies to cool on the sheet for about 5 minutes. Carefully transfer them to a wire rack to cool completely. This step ensures the candy sets properly, achieving that perfect stained glass look.
Step 7: Decorate (Optional)
If you want to add a charming touch, use a small straw to poke holes at the top of each cooled cookie. Thread a colorful ribbon through the holes to hang them as festive ornaments. These delightful stained glass cookies not only taste incredible but also serve as beautiful holiday decorations!
What to Serve with Stained Glass Cookies
Stained glass cookies are a festive delight, and the right pairings can elevate your holiday gathering to new heights.
-
Creamy Hot Chocolate: A rich, velvety drink that perfectly complements the buttery flavor of the cookies, adding warmth to your festive occasion.
-
Classic Eggnog: This indulgent holiday beverage, spiced and creamy, pairs wonderfully with the sweet crunch of stained glass cookies.
-
Fruit Salad: Fresh, colorful fruits add a refreshing contrast to the sweetness of your cookies, lightening the dessert table.
-
Gingerbread Cookies: This classic holiday treat brings a delightful variety of flavors, creating a fun cookie exchange experience. Consider adding these to your holiday platter for texture and flavor variety!
-
Cheese Board: A selection of soft cheeses and dried fruits can enhance the experience with savory notes, balancing the sweetness of your stained glass cookies.
-
Sparkling Cider: This bubbly drink provides a festive touch, its effervescent nature making it a joyous companion to your delightful cookies.
-
Peppermint Bark: Crunchy, festive, and infused with minty flavor, this treat echoes holiday cheer, perfectly pairing with the colorful cookies.
-
Coffee or Tea: A warm brew serves as the ideal warm-up, cutting through the sweetness while enhancing the cozy holiday vibe.
Make Ahead Options
These Stained Glass Cookies are perfect for busy home cooks looking to streamline holiday baking! You can prepare the dough up to 3 days in advance—just wrap it tightly in plastic wrap and refrigerate. If you’d like to prep even further ahead, freeze the dough for up to 3 months; simply thaw it in the fridge overnight before rolling and cutting. Additionally, you can crush the hard candies and store them in an airtight container at room temperature for up to 2 weeks. When you’re ready to bake, follow the final steps: roll, cut, fill, and bake, ensuring your cookies come out just as vibrant and delicious as if they were made fresh!
Stained Glass Cookies Variations & Substitutions
Let your creativity flow and make these stained glass cookies uniquely yours with simple twists and swaps!
- Flavor Alternatives: Experiment with different flavored hard candies like cherry or lime for a surprising taste explosion. These changes can create a vibrant and fun flavor profile.
- Citrus Zest: Add lemon or orange zest to the dough for a refreshing zing. This simple addition brightens the overall flavor and elevates the cookie experience.
- Gluten-Free Option: For a gluten-free spin, substitute all-purpose flour with your favorite gluten-free flour blend. It’s an easy swap that keeps the texture delightful!
- Vegan Substitute: Replace the butter with coconut oil and use a flax egg for a fully vegan treat. Your friends won’t believe these cookies are plant-based!
- Food Coloring: Mix vibrant food coloring into the dough for a beautiful base that complements the stained glass effect. Each cookie can be a work of art.
- Spiced Variation: Add a pinch of cinnamon or ginger to your dough for an unexpected warm spice note. This is particularly delightful during the holiday season.
- Nutty Crunch: Fold in some finely chopped nuts or seeds for added texture and flavor. This could be a game changer for those who love a little crunch!
- Heat Level: For a spicy kick, add a sprinkle of cayenne or chili powder to the candy center mix. It’s a daring twist that highlights the contrast between sweet and spicy, making each bite exciting.
These variations make it easy to personalize your Stained Glass Cookies and ensure they are perfectly suited for every taste!
How to Store and Freeze Stained Glass Cookies
- Room Temperature: Keep your cooled stained glass cookies in an airtight container at room temperature for up to 1 week. This will help maintain their freshness and texture.
- Fridge: If you prefer a firmer cookie, you can store them in the fridge for up to 2 weeks. Just be sure they are in a sealed container to avoid moisture.
- Freezer: Freeze the baked cookies in a single layer, then transfer to a freezer bag for up to 3 months. Thaw at room temperature before serving to enjoy their full flavor.
- Dough Storage: If you want to prep ahead, wrap the dough tightly in plastic wrap and freeze for up to 3 months as well. When ready to bake, thaw overnight in the fridge and proceed with your recipe!
Expert Tips for Stained Glass Cookies
- Chill the Dough: Ensure your dough is chilled for at least 30 minutes. This prevents the cookies from spreading too much while baking, leading to perfectly shaped stained glass cookies.
- Keep It Clean: Use a sharp knife or pizza cutter when cutting to create cleaner edges and shapes. This makes for a more polished final look, so your cookies appearing as stunning as they taste.
- Candy Care: Choose hard candies that melt well, avoiding those with fillings. Opt for brands that are known for their melting properties—watch your colors for the best holiday effect!
- Watch the Bake Time: Keep a close eye as cookies bake. They should be golden at the edges but not browned. Overbaking leads to a drier cookie base.
- Experiment with Colors: Don’t hesitate to mix candy colors! Create unique combinations to give a whimsical twist perfect for your holiday theme. Making these cookies a true reflection of your personal style!
Stained Glass Cookies Recipe FAQs
What type of hard candies should I use for the stained glass effect?
Absolutely! Use clear hard candies like Jolly Ranchers or Life Savers, as they melt beautifully to create that stunning stained glass look. Avoid candies with fillings, as they may not melt properly.
How long do stained glass cookies last?
You can store your cooled stained glass cookies in an airtight container at room temperature for up to 1 week. If stored in the fridge, they’ll last for around 2 weeks. Just ensure they’re kept sealed to prevent moisture.
Can I freeze stained glass cookies?
Yes, you can freeze your baked stained glass cookies! Place them in a single layer on a baking sheet until firm, then transfer them to a freezer bag for up to 3 months. When you’re ready to enjoy, simply thaw at room temperature.
What if my cookies spread too much while baking?
No worries! If you find that your cookies are spreading too much, it could be because the dough wasn’t chilled adequately. Always allow the dough to chill for at least 30 minutes. If they still spread, try adding a bit more flour next time to help maintain their shape.
Can I use gluten-free flour for this recipe?
Very! You can substitute all-purpose flour with a gluten-free blend to make this recipe accommodating. I often suggest a 1:1 gluten-free flour mix, which should work perfectly in maintaining the cookies’ texture!
Any tips for making cookie dough ahead of time?
Sure! To prep ahead, wrap your dough tightly in plastic wrap and freeze it for up to 3 months. When you’re ready to bake, simply thaw it overnight in the fridge, then follow the recipe instructions as usual. This saves time on busy baking days!
Stained Glass Cookies: An Edible Holiday Masterpiece
Ingredients
Equipment
Method
- In a large mixing bowl, combine 2 ¾ cups of all-purpose flour and 1 teaspoon of baking powder. Cut in 1 cup of softened butter until the mixture resembles coarse crumbs. Gradually add 1 cup of granulated sugar, 1 egg, and 1 teaspoon of vanilla extract. Mix until a smooth dough forms.

- Once the dough is ready, wrap it tightly in plastic wrap and refrigerate for at least 30 minutes.

- After chilling, lightly flour your work surface and roll out the dough to about ¼ inch thickness. Use festive cookie cutters to create shapes, cutting out the centers with a smaller cutter.

- Place the cut cookies on a baking sheet lined with parchment paper. Fill each center with a heaping spoonful of crushed hard candies in various colors.

- Preheat your oven to 350°F (175°C). Bake the cookies for 8–10 minutes, or until the edges are lightly golden.

- Once baked, allow the cookies to cool on the sheet for about 5 minutes, then transfer to a wire rack to cool completely.

- Optionally, you can poke holes at the top of each cooled cookie and thread a colorful ribbon through to hang them as ornaments.