

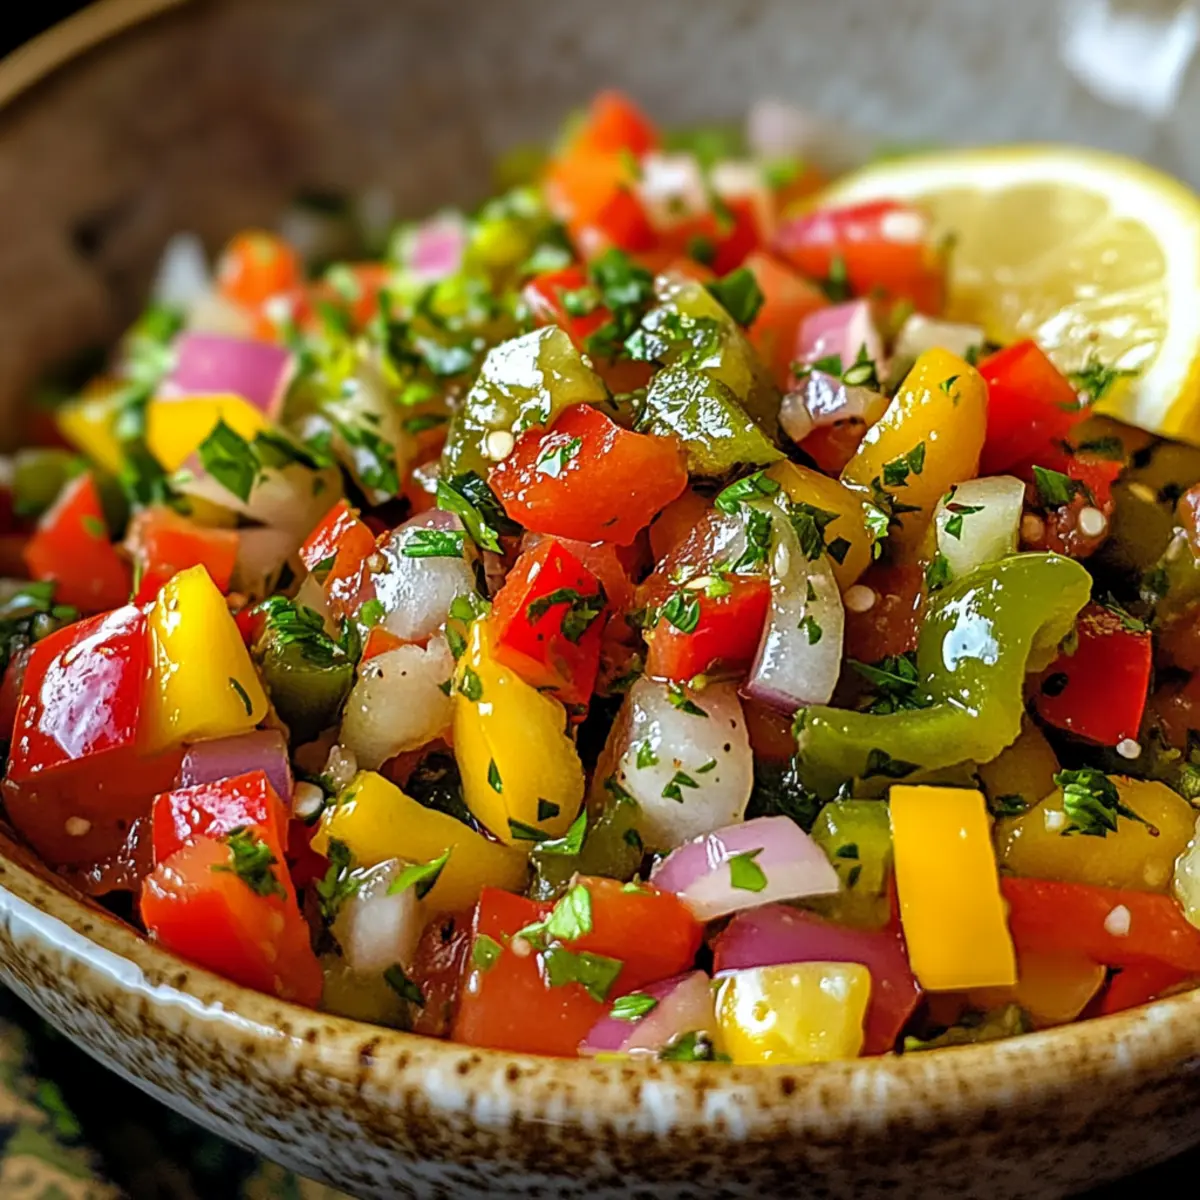
As I stood in the kitchen, the vibrant colors of fresh peppers caught my eye, and I knew I was ready to whip up something special. This 10-Minute Pepperoncini Relish is my go-to condiment when I need a quick, zesty kick to elevate any meal. The blend of tangy pepperoncini with fresh veggies and a hint of heat from jalapeños creates a relish that’s not just versatile but also a crowd-pleaser. Perfect for everything from hot dogs to burgers, this relish is an effortless way to add a burst of flavor to your everyday dishes. Plus, it’s incredibly simple to make, taking only minutes to prepare! Ready to bring some zing to your table? Let’s get started!
Why is this relish a must-try?
Quick and Simple: This Pepperoncini Relish is ready in just 10 minutes, making it an excellent choice for those busy weeknight dinners.
Vibrant Flavor: Featuring a delightful mix of tangy pepperoncini and zesty jalapeños, this relish adds an explosion of taste to your sandwiches and snacks.
Versatile Condiment: Perfect for toppings on everything from hot dogs to grilled meats, it’s a way to elevate any meal without extra effort.
Healthy Choice: Low in calories but high in flavor, it’s a guilt-free way to enjoy a burst of freshness from real ingredients.
Crowd-Pleaser: Your family and friends will rave about this relish at summer cookouts, making it a favorite at gatherings. Ready to take your dishes to the next level? Check out our Serving Suggestions for creative ideas!
Pepperoncini Relish Ingredients
• Ready to elevate your meals with this Pepperoncini Relish?
For the Relish
- Mezzetta Golden Greek Peperoncini – Adds classic tanginess to the relish; be sure to remove the stems.
- Mezzetta Sliced Tamed Jalapeno Peppers – Provides a mild heat that complements the other flavors without overwhelming.
- Red Bell Pepper – A sweet and colorful addition; remove seeds and chop roughly for texture.
- Yellow Bell Pepper – Offers extra sweetness and color; also remove seeds and chop roughly.
- White Onion – Adds a sharp flavor that beautifully contrasts with the sweetness of the peppers; chop roughly.
- Garlic – Enhances flavor; use fresh cloves, halved for a pungent kick.
- Pepperoncini Juice – Incorporates additional tanginess, elevating the relish’s flavor profile.
- Fresh Lemon Juice – Brightens the flavors; for best results, use freshly squeezed over bottled juice.
- Red Pepper Flakes – Sprinkles in a kick of heat; adjust the amount according to your spice preference.
- Fresh Parsley – Contributes freshness and vibrant color; chop before adding.
- Olive Oil – Emulsifies the mixture while adding a rich mouthfeel.
- Salt and Black Pepper – Essential for enhancing the overall flavor profile of this irresistible condiment.
Step‑by‑Step Instructions for Pepperoncini Relish
Step 1: Prepare the Vegetables
Start by washing all your fresh vegetables thoroughly. In a food processor, combine the Mezzetta Golden Greek Pepperoncini, Mezzetta Sliced Tamed Jalapeño Peppers, red bell pepper, yellow bell pepper, white onion, and halved garlic cloves. Pulse the mixture until the vegetables are finely chopped, resembling a grainy but cohesive texture, taking about 1-2 minutes.
Step 2: Cook the Mixture
Transfer the finely chopped vegetable mixture into a medium saucepan. Stir in the pepperoncini juice, fresh lemon juice, and red pepper flakes, ensuring everything is well combined. Warm the mixture over medium heat, allowing it to simmer for 3 to 5 minutes. Watch for the vegetables to soften and become fragrant, avoiding a boiling point to maintain the desired texture.
Step 3: Drain Excess Liquid
Once the vegetables have softened, remove the saucepan from heat. Carefully pour the mixture into a fine mesh sieve over a bowl to drain any excess liquid. Let the relish cool completely in the sieve for about 5-10 minutes. This step ensures your Pepperoncini Relish maintains a perfect chunky consistency without being too watery.
Step 4: Final Seasoning
After the relish has cooled, transfer it back to the saucepan or a mixing bowl. Gently fold in the chopped fresh parsley and drizzle in the olive oil, mixing until everything is well combined. Season the relish with salt and black pepper to taste, adjusting the flavors to your preference. This final touch enhances the overall flavor profile of your Pepperoncini Relish.
Step 5: Serve or Store
Your Pepperoncini Relish is now ready to be enjoyed! You can serve it immediately as a vibrant topping for grilled meats, hot dogs, or sandwiches. Alternatively, store it in an airtight container in the refrigerator for up to 2 weeks, allowing the flavors to meld and intensify over time.
Make Ahead Options
These Pepperoncini Relish preparations are perfect for busy home cooks looking to save time during hectic weeks! You can chop the vegetables (peperoncini, jalapeños, bell peppers, onion, and garlic) up to 24 hours in advance and store them in an airtight container in the refrigerator. The rest of the cooking steps can be completed just before serving; simply combine the chopped veggies in a saucepan with the juices and heat for 3-5 minutes. To maintain quality, avoid adding the fresh parsley and olive oil until the relish is finished cooking. This way, your Pepperoncini Relish will be just as delicious and zesty, adding a burst of flavor to your meals with minimal effort!
Helpful Tricks for Pepperoncini Relish
-
Chop Smartly: Use a food processor for quick chopping; it saves time and ensures even consistency in your Pepperoncini Relish.
-
Control the Heat: Adjust jalapeños and red pepper flakes to suit your spice tolerance; start with less and gradually add more for a personalized kick.
-
Prevent Watery Relish: Drain excess liquid using a fine mesh sieve to maintain the relish’s chunky texture, preventing it from becoming too runny.
-
Enhance Flavors: Allow the Pepperoncini Relish to chill for a couple of hours before serving. This resting time helps the flavors blend beautifully.
-
Creative Storage: For longer shelf-life, consider canning techniques using the brine from the pepperoncini jar, ensuring freshness for your relish.
Pepperoncini Relish Variations & Substitutions
Feel free to let your creativity shine and personalize this relish to best suit your taste buds!
- Mild Option: Substitute banana peppers for pepperoncini for a gentler, sweeter flavor profile. This makes it great for those who prefer less spice.
- Dill Delight: Incorporate diced dill pickles to add a delightful sweetness and crunch. The added tangy bite pairs wonderfully with grilled meats!
- Intense Heat: Use pickled jalapeños for a bolder flavor and a spicy kick. This twist is sure to ignite your taste buds and perfect for heat lovers.
- Creamy Dip: Blend the relish with cream cheese for a sumptuous dip that’s fantastic with crackers or veggie sticks. It transforms your relish into a whole new appetizer!
- Vegetarian Twist: Swap out the fresh parsley for fresh cilantro for a unique aromatic flavor. Cilantro adds a vibrant freshness that some will adore!
- Flavor Boost: Add a splash of balsamic vinegar for a sweet tang that can elevate your relish. This rich flavor enhancement adds depth to sandwich toppings.
- Sweet Surprise: Mix in finely chopped green apples for a touch of natural sweetness and crunch. This unexpected juicy twist will brighten up any dish!
- Garlic Punch: Roasting the garlic before adding it will bring out a sweeter, milder flavor. Roasted garlic adds a rich dimension to your relish that can surprise your guests!
As you experiment with these variations, you can create your favorite version of this versatile Pepperoncini Relish! For more ideas on how to serve your relish, consider our Serving Suggestions to elevate your mealtime experience!
What to Serve with 10-Minute Pepperoncini Relish
Enhancing your meals with vibrant flavors is easier than ever with this quick relish by your side.
-
Grilled Sausages: The tangy zing of the relish complements smoky sausage flavors, creating a mouthwatering combination.
-
Burgers: Spread this relish on your burgers for an added crunch and a burst of freshness that elevates each bite.
-
Tacos: Use it as a topping for tacos to provide a zesty contrast to meaty fillings, adding a delicious textural crunch.
-
Creamy Potato Salad: Pairing this relish with a rich potato salad adds a bright note, cutting through the creaminess and refreshing the palate.
-
Zesty Quinoa Bowl: Stir a spoonful of this relish into a quinoa bowl for a refreshing flavor upgrade that harmonizes with grains and veggies.
-
Crispy Tortilla Chips: Serve as a dip for crunchy tortilla chips, turning a simple snack into a flavor-packed treat that’s hard to resist.
-
Chilled Beer: A crisp lager goes hand-in-hand with this relish, as its freshness balances the drink’s carbonation and flavors beautifully.
-
Fruit Salad: For an adventurous twist, serve alongside a fruit salad — the relish’s tanginess pairs intriguingly with sweet fruits, creating an unexpected delight.
How to Store and Freeze Pepperoncini Relish
Fridge: Store the Pepperoncini Relish in an airtight container for up to 2 weeks. This keeps the flavors fresh while allowing them to meld beautifully.
Freezer: For longer storage, pour the relish into freezer-safe containers, ensuring there’s some headspace to allow for expansion. It can be frozen for up to 3 months.
Thawing: When ready to use, transfer the frozen relish to the fridge to thaw overnight. Stir well before serving to revive its texture and flavors.
Reheating: If serving warm, gently heat the relish on the stovetop over low heat, stirring frequently until warmed through; avoid boiling for best results.
Pepperoncini Relish Recipe FAQs
How do I choose ripe ingredients for the relish?
Absolutely! When selecting your vegetables, look for fresh and vibrant colors. The pepperoncini should be firm with a glossy skin, and avoid any that have dark spots or wrinkling. For bell peppers, choose those that are bright and feel heavy for their size—this indicates freshness.
How should I store my Pepperoncini Relish, and how long does it last?
Very easy! Store your Pepperoncini Relish in an airtight container in the fridge for up to 2 weeks. This ensures the flavors stay fresh while allowing them to meld beautifully. If you notice any off-smell or unusual appearance, it’s best to discard it.
Can I freeze Pepperoncini Relish? If yes, how do I do it?
Yes indeed! To freeze your relish, simply pour it into freezer-safe containers, leaving about an inch of headspace for expansion. Seal tightly and label the containers with the date. Your relish can last for up to 3 months in the freezer. When ready to enjoy, thaw it in the refrigerator overnight and give it a good stir before serving.
What if my Pepperoncini Relish turns out too watery?
No worries! If you find your relish is too watery, ensure you properly drain any excess liquid using a fine mesh sieve after cooking. You can also try simmering it a bit longer to allow some of the liquid to evaporate, giving it a thicker consistency.
Is this relish safe for pets or those with allergies?
While the Pepperoncini Relish is a flavorful addition to your meals, it’s not advisable to share it with pets. The ingredients, particularly onions and garlic, can be harmful to dogs and cats. Moreover, if you or someone in your family has allergies, always check ingredient labels, especially for packaged items like pepperoncini and jalapeños.
Can I adjust the heat level of the Pepperoncini Relish?
Absolutely! You can modify the heat by varying the amount of jalapeños and red pepper flakes used. Start with less and gradually add more to reach your desired spice level, ensuring it fits your taste perfectly. Enjoy experimenting!
Zesty Pepperoncini Relish Ready in Just 10 Minutes
Ingredients
Equipment
Method
- Wash all fresh vegetables thoroughly and combine the peppers, onion, and garlic in a food processor. Pulse until finely chopped.
- Transfer the mixture to a medium saucepan and stir in the pepperoncini juice, lemon juice, and red pepper flakes. Simmer for 3 to 5 minutes.
- Pour mixture into a fine mesh sieve over a bowl to drain excess liquid and let it cool for about 5-10 minutes.
- Return cooled mixture to a bowl, fold in parsley and olive oil, and season with salt and black pepper to taste.
- Serve immediately or store in an airtight container in the refrigerator for up to 2 weeks.