

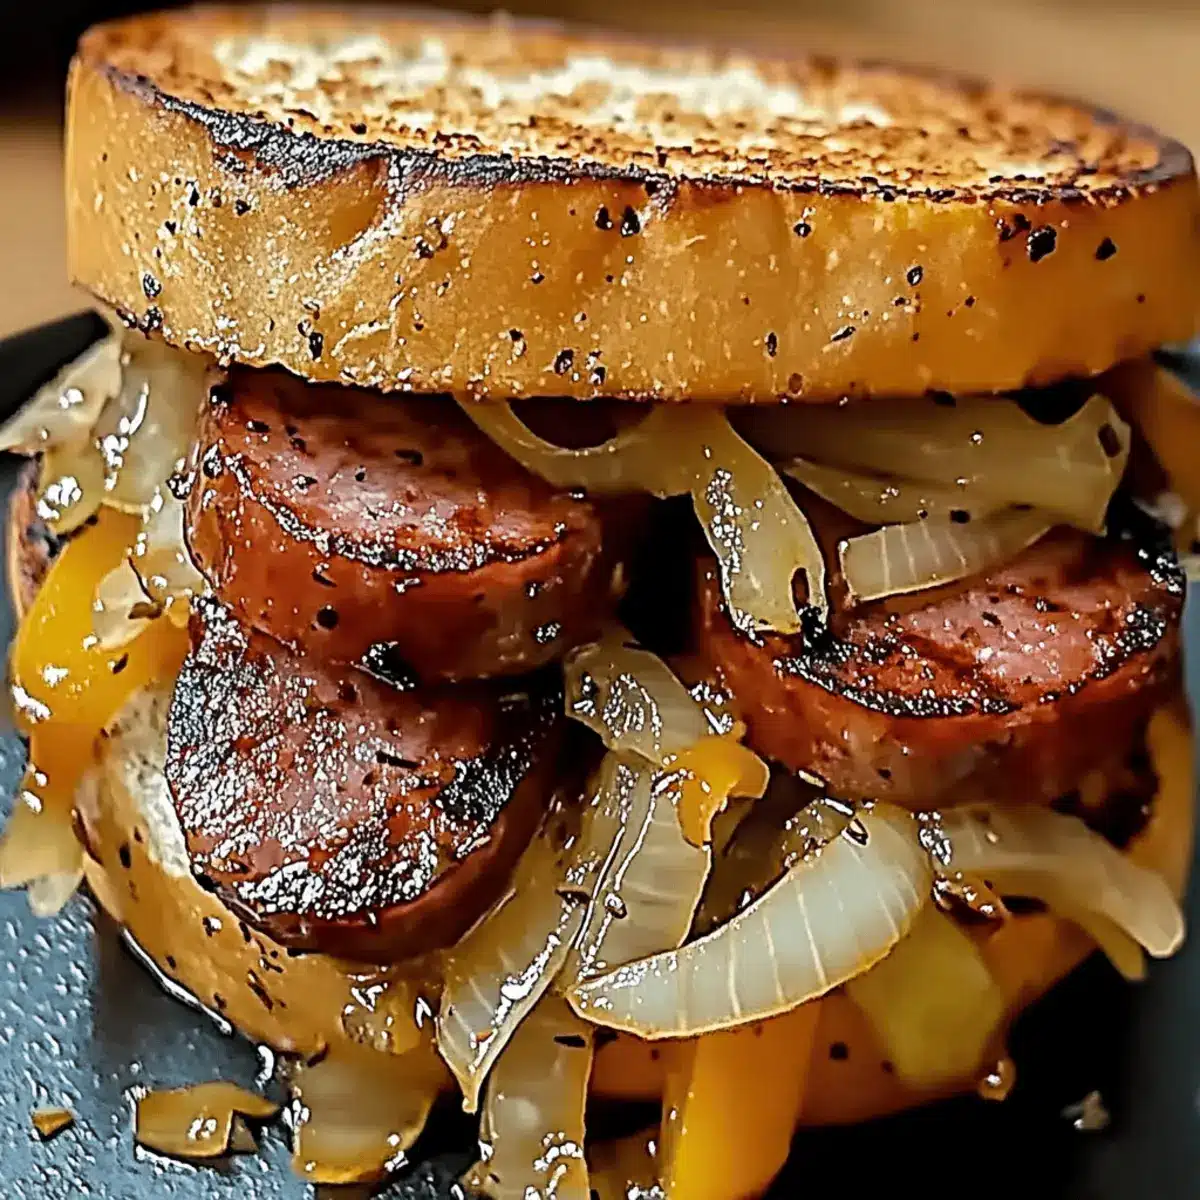
As I stood over the grill, the sizzle of juicy kielbasa mingled with the sweet aroma of caramelized onions and vibrant bell peppers danced in the air. This simple yet satisfying recipe—Grilled Kielbasa Sandwiches with Sweet Onion Flavor—is my go-to for summer gatherings and easy weeknight dinners. With just a few minutes of prep, you can create a hearty meal that’s not just delicious but also completely customizable. Whether you stick to classic toppings or throw in a twist, these sandwiches are a guaranteed crowd-pleaser. Ready to elevate your grilling game and enjoy a taste of Eastern European charm right in your backyard? Let’s dive in and get grilling!
Why are Grilled Kielbasa Sandwiches so Amazing?
Flavor Explosion: Each bite delivers a delightful burst of smoky kielbasa combined with sweet caramelized onions and colorful bell peppers, making your taste buds dance.
Quick Cooking: These sandwiches come together in minutes—perfect for busy weeknights or spontaneous weekend barbecues.
Customization at Its Finest: You can tailor each sandwich to your liking with various toppings and bun options, transforming it into your own culinary masterpiece. For extra ideas, check out options like Grilled Shrimp Bowl or a hearty Grilled Chicken Sandwich.
Family-Friendly: With a familiar yet exciting flavor profile, these sandwiches are a hit with both kids and adults, bringing everyone to the table.
Satisfying and Hearty: Packed with protein and veggies, this dish offers a fulfilling option that keeps everyone coming back for seconds!
Grilled Kielbasa Sandwiches with Sweet Onion Ingredients
Get ready to grill up some mouth-watering goodness!
For the Sandwiches
- Beef Kielbasa Sausage – The star of the show; grills quickly while retaining juiciness and can be swapped with turkey kielbasa for a lighter option.
- Hoagie or Sandwich Rolls – The perfect base; try brioche or ciabatta for a different texture and taste.
For the Grilled Vegetables
- Large Onion – Sweetens when grilled; yellow onions are preferred for their sweetness, while red onions add a lovely color twist.
- Red Bell Pepper – Adds vibrant color and sweetness; substitute with orange or yellow bell pepper for a similar effect.
- Yellow Bell Pepper – Gives a vibrant look; green bell peppers can be swapped for a more bitter taste if desired.
- Green Bell Pepper – Offers a crunch and tang; can be exchanged with another sweet bell pepper.
For Flavoring
- Olive Oil – Coats veggies for grilling; can be substituted with another cooking oil.
- Garlic Powder – Elevates the dish’s flavor; fresh garlic can be used if you prefer a stronger taste.
- Italian Seasoning or Dried Oregano – Adds aromatic notes; thyme or basil can be great substitutes.
- Salt and Black Pepper – Essential for seasoning; adjust according to taste.
Optional Toppings
- Mustard – Adds a zing; perfect if you enjoy a bit of spice.
- Mayonnaise – A creamy contrast that enhances flavor; feel free to use your favorite!
- Provolone or Mozzarella Cheese – Melts beautifully over the sausage; experiment with sharp cheddar for a bolder kick.
These delicious Grilled Kielbasa Sandwiches with Sweet Onion Flavor are perfect for summer grilling or family dinners, easily customized to suit any palate!
Step‑by‑Step Instructions for Grilled Kielbasa Sandwiches with Sweet Onion Flavor
Step 1: Preheat the Grill
Begin by preheating your grill or grill pan to medium-high heat, around 400°F. This temperature is essential for achieving the perfect sear on your kielbasa and vegetables, ensuring a delicious char. While the grill heats up, gather all your ingredients and prep the vegetables to keep the cooking process smooth and efficient.
Step 2: Prepare the Vegetables
In a large bowl, toss sliced red, yellow, and green bell peppers along with your large onion using a drizzle of olive oil. Add garlic powder, Italian seasoning, salt, and freshly cracked black pepper to elevate the flavor. Aim for a nice coating—this will enhance caramelization as they grill. Set the seasoned vegetables aside to allow the flavors to meld while the grill heats.
Step 3: Grill the Vegetables
Once the grill is ready, carefully place the veggies on the grates. Grill them for about 8–10 minutes, turning occasionally until they soften and develop beautiful grill marks. You’ll want them slightly charred but tender, creating that irresistible sweet onion flavor. As the vegetables cook, they will fill your kitchen or backyard with a delightful aroma.
Step 4: Grill the Kielbasa
Next, take your kielbasa sausage and place it on the grill, laying it diagonally across the grates for those lovely cross-hatch marks. Allow it to grill for about 4–5 minutes per side until the sausage is nicely browned and heated through. This step ensures that each bite of your grilled kielbasa sandwiches is bursting with juicy flavor.
Step 5: Toast the Rolls
If you like a crispy texture, now is the perfect time to toast your sandwich rolls. Place them cut-side down on the grill for 1–2 minutes until they are golden and warm. This quick toasting will enhance the overall flavor and prevent sogginess when you assemble your grilled kielbasa sandwiches. Keep a close eye, as they can burn quickly!
Step 6: Assemble the Sandwiches
Now it’s time to create your masterpiece! Layer the grilled kielbasa on each toasted roll, then generously add the grilled vegetables on top. Feel free to sprinkle with optional toppings such as provolone cheese, mustard, or mayonnaise to suit your taste. Each assembly offers a generous combination of sweet notes and smoky flavors, showcasing the essence of your grilled kielbasa sandwiches.
Step 7: Serve and Enjoy
Once assembled, serve your grilled kielbasa sandwiches warm and share with family or friends. These sandwiches are perfect for summer gatherings or casual weeknight dinners. The balance of juicy kielbasa, sweet caramelized onions, and bell peppers wrapped in a soft roll will surely become a favorite. Savor every bite of this hearty meal, customized just for you!
What to Serve with Grilled Kielbasa Sandwiches with Sweet Onion Flavor
Elevate your grilled kielbasa sandwiches into a full meal with these delightful pairings that bring together vibrant flavors and textures.
-
Creamy Coleslaw: A refreshing crunch that cuts through the richness of the kielbasa, adding a tangy contrast to every bite.
-
Potato Salad: This classic side brings comforting textures and a hint of creaminess, perfectly balancing the smoky flavors from the grill.
-
Corn on the Cob: Sweet, juicy corn enhances your meal with a burst of summer sweetness, especially when brushed with a bit of garlic butter.
-
Grilled Veggies: Extend your grilling prowess with an assortment of seasonal vegetables; the char adds depth, harmonizing beautifully with kielbasa.
-
Baked Beans: The sweetness of baked beans complements the savory sausages, creating a satisfying combination perfect for any backyard barbecue.
-
Kettle Chips: For a crispy contrast, serve with kettle-cooked chips; their crunch will keep the textures interesting and fun.
-
Ice-Cold Lemonade: Refreshing and tart, this drink makes a lively pairing, cutting through the meal’s richness while keeping it light and enjoyable.
-
Brownies: Conclude the meal with fudgy brownies for dessert, offering a delightful sweetness that everyone will love.
These sides and beverages bring harmony to your grilled kielbasa sandwiches with sweet onion flavor, ensuring a memorable dining experience!
Make Ahead Options
These Grilled Kielbasa Sandwiches with Sweet Onion Flavor are perfect for meal prep enthusiasts! You can chop and season the bell peppers and onions up to 24 hours in advance, storing them in an airtight container in the refrigerator to keep them fresh. Additionally, you can grill the kielbasa and vegetables up to 3 days ahead, allowing them to cool before refrigerating separately. When you’re ready to serve, simply reheat everything on the grill or in a pan until warmed through, then assemble your sandwiches with toasted rolls and your favorite toppings for a delicious meal with minimal effort. This prep method ensures your sandwiches are just as flavorful and satisfying as if made fresh!
Expert Tips for Grilled Kielbasa Sandwiches
-
Prep Ahead: Cut and season your vegetables in advance. This not only saves time but allows flavors to meld beautifully by grilling time.
-
Avoid Overcooking: Keep an eye on your vegetables; overcooking can lead to mushy texture. Aim for tender and slightly charred for the best grilled kielbasa sandwiches.
-
Toast Wisely: For unbeatable texture, toast rolls cut-side down on the grill for just 1–2 minutes. This prevents soggy sandwiches and enhances crunch.
-
Slicing Kielbasa: For quicker grilling and a delightful sear, slice the kielbasa lengthwise before placing it on the grill. This increases its surface area and helps it cook faster.
-
Customize Your Sandwich: Don’t be afraid to get creative! Experiment with different toppings like spicy aioli, sauerkraut, or a mix of cheeses to personalize your grilled kielbasa sandwiches.
Grilled Kielbasa Sandwiches with Sweet Onion Variations
Feel free to have fun and make this recipe your own with these exciting twists and swaps!
-
Spicy Twist: Add jalapeños or your favorite hot sauce for a fiery kick. Heat brings out a whole new dimension to the flavors!
-
Gluten-Free: Opt for gluten-free rolls or lettuce wraps. This ensures everyone can enjoy these delicious sandwiches without compromise.
-
Veggie Delight: Swap kielbasa for grilled portobello mushrooms or zucchini for a vegetarian version. They’re hearty yet offer a different flavor profile altogether.
-
Beer-Brined Kielbasa: For a rich, unique taste, go for beer-brined kielbasa instead. The added maltiness enhances the overall flavor experience beautifully.
-
Cheese Lovers: Experiment with different cheeses like sharp cheddar or pepper jack. The creamy melt blends perfectly with the sausage and veggies.
-
DIY Sauce Bar: Create a sandwich bar with various sauces like spicy aioli, tangy barbecue, or even a zesty ranch dip beside your grilled kielbasa sandwiches. Guests will love customizing their bites!
-
Crunchy Toppings: Top with crispy fried onions or coleslaw for an unexpected crunch and added texture. These elements provide a delightful contrast to the juicy sausage.
-
Herb Infusion: Toss in some fresh herbs like cilantro or parsley for a fresh finish. The pop of color and flavor brightens the entire sandwich, making each bite even more delightful!
For even more grilling inspiration, give Grilled Chicken Sandwich or Grilled Shrimp Bowl a try!
How to Store and Freeze Grilled Kielbasa Sandwiches
Fridge: Store any leftover grilled kielbasa sandwiches in an airtight container in the refrigerator for up to 3 days. Reheat in the oven for best texture.
Freezer: For longer storage, freeze assembled sandwiches wrapped tightly in plastic wrap and aluminum foil for up to 2 months. Thaw in the fridge overnight before reheating.
Reheating: To reheat, place thawed sandwiches in a preheated oven at 350°F for about 10-15 minutes, or until warmed through and crispy.
Ingredient Storage: Keep grilled vegetables in a separate container in the fridge for up to 4 days for fresh toppings later on your next grilled kielbasa sandwiches!
Grilled Kielbasa Sandwiches with Sweet Onion Recipe FAQs
What type of kielbasa should I use for the best flavor?
Absolutely! You want to use beef kielbasa for its juicy and rich flavor. However, turkey kielbasa is a fantastic lighter option that still offers great taste. If you’re feeling adventurous, try beer-brined kielbasa for an extra kick of flavor.
How should I store leftover grilled kielbasa sandwiches?
To keep your leftovers fresh, store any uneaten sandwiches in an airtight container in the refrigerator for up to 3 days. When you’re ready to enjoy them again, reheat in the oven to maintain their crispy texture—just place them at 350°F for about 10-15 minutes until warmed through.
Can I freeze grilled kielbasa sandwiches?
Yes, you can freeze assembled sandwiches! Wrap them tightly in plastic wrap followed by aluminum foil and store them in the freezer for up to 2 months. To reheat, thaw in the fridge overnight, then pop them in a preheated oven at 350°F for 10-15 minutes. This method will keep the buns nice and toasty!
What are some common troubleshooting tips for grilling kielbasa?
Not a problem! One common issue is overcooking the vegetables, which can make them mushy. Keep an eye on them while grilling; around 8-10 minutes should make them tender with a nice char. Also, if your buns feel soggy after assembling, try toasting the insides for just 1-2 minutes to gain that crunchy texture. Slicing the kielbasa lengthwise will also help it cook evenly and quickly.
Are there any dietary considerations when making these sandwiches?
Very! If you’re cooking for friends or family with dietary restrictions, consider using gluten-free rolls or a different type of sausage, like chicken or turkey, to cater to various preferences. Additionally, you can add other non-allergenic toppings to keep it enjoyable for everyone!

Grilled Kielbasa Sandwiches with Sweet Onion Flavor Bliss
Ingredients
Equipment
Method
- Preheat the grill or grill pan to medium-high heat, around 400°F.
- In a large bowl, toss sliced red, yellow, and green bell peppers along with your large onion using olive oil. Add garlic powder, Italian seasoning, salt, and pepper. Set aside.
- Carefully place the seasoned veggies on the grates and grill for about 8–10 minutes until softened.
- Place the kielbasa on the grill, grilling for about 4–5 minutes per side until nicely browned.
- Toast the sandwich rolls cut-side down on the grill for 1–2 minutes until golden.
- Layer the grilled kielbasa on each toasted roll, then add the grilled vegetables. Add optional toppings if desired.
- Serve warm and enjoy with family or friends.