


Introduction to Crispy Zucchini Chips
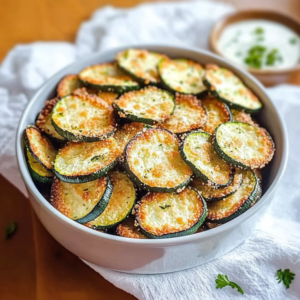
There’s something magical about transforming a simple vegetable into a crunchy delight. Crispy Zucchini Chips are not just a snack; they’re a guilt-free way to satisfy those pesky cravings without derailing your healthy eating goals. I remember the first time I made these chips; my friends couldn’t believe they were made from zucchini! Perfect for a quick solution on a busy day or a fun appetizer to impress your loved ones, this recipe is a game-changer. Let’s dive into the world of crispy goodness that will have everyone reaching for more!
Why You’ll Love This Crispy Zucchini Chips
These Crispy Zucchini Chips are a revelation! They’re incredibly easy to whip up, making them perfect for busy weeknights or spontaneous gatherings. The best part? They bake to a golden crisp without the guilt of traditional snacks. With a delightful crunch and savory flavor, they’ll satisfy your cravings while keeping your health goals intact. Trust me, once you try them, you’ll be hooked!
Ingredients for Crispy Zucchini Chips
Gathering the right ingredients is key to making these Crispy Zucchini Chips a hit. Here’s what you’ll need:
- Zucchinis: Fresh, medium-sized zucchinis are the star of the show. They provide a mild flavor and a satisfying crunch.
- Salt: A sprinkle of salt enhances the natural flavors and helps draw out moisture from the zucchini.
- Black Pepper: This adds a subtle kick, balancing the flavors beautifully.
- Garlic Powder: For that savory depth, garlic powder is a must. It brings a warm, aromatic quality to the chips.
- Onion Powder: Similar to garlic, onion powder adds a rich flavor that complements the zucchini perfectly.
- Breadcrumbs: Panko or regular breadcrumbs create that irresistible crunch. Panko is lighter and crispier, while regular breadcrumbs are more traditional.
- Parmesan Cheese: Grated Parmesan adds a savory, cheesy flavor that elevates the chips to a whole new level.
- Egg: A beaten egg acts as the glue, helping the breadcrumbs stick to the zucchini slices.
- Cooking Spray or Olive Oil: A light spray or drizzle ensures the chips bake to a perfect golden brown without excess oil.
Feel free to get creative! You can add your favorite herbs or spices to the breadcrumb mixture for extra flavor. For those who like a bit of heat, a sprinkle of red pepper flakes can do wonders. Exact quantities for each ingredient are available at the bottom of the article for easy printing.
How to Make Crispy Zucchini Chips
Now that you have your ingredients ready, let’s get cooking! Making Crispy Zucchini Chips is a straightforward process that will have your kitchen smelling amazing. Follow these simple steps, and you’ll be snacking on these delicious chips in no time!
Step 1: Preheat the Oven
First things first, preheat your oven to 225°F (110°C). This low temperature is key to achieving that perfect crispiness. While the oven warms up, line a baking sheet with parchment paper. This will prevent the chips from sticking and make cleanup a breeze.
Step 2: Prepare the Zucchini
Next, grab those zucchini slices and toss them in a large bowl with salt, black pepper, garlic powder, and onion powder. This seasoning mix is where the magic begins! Let the zucchini sit for about 10 minutes. This step helps draw out moisture, which is crucial for that crispy texture.
Step 3: Dry the Zucchini
After the zucchini has soaked up the flavors, it’s time to dry them off. Pat the slices gently with paper towels to remove any excess moisture. This will ensure your chips don’t turn out soggy. Trust me, a little drying goes a long way!
Step 4: Set Up Breading Stations
Now, let’s get our breading stations ready. In one bowl, place the beaten egg. In another bowl, combine the breadcrumbs and grated Parmesan cheese. This two-bowl setup makes it easy to coat the zucchini slices evenly. Plus, it keeps things organized!
Step 5: Coat the Zucchini
Time to get your hands a little messy! Dip each zucchini slice into the egg, allowing any excess to drip off. Then, coat it with the breadcrumb mixture, pressing gently to help it stick. This is where the crunch factor comes into play, so make sure each slice is well-coated!
Step 6: Arrange on Baking Sheet
Carefully place the coated zucchini slices in a single layer on your prepared baking sheet. Avoid overcrowding; this ensures even baking. Lightly spray or drizzle them with cooking spray or olive oil. A little oil helps achieve that golden-brown finish.
Step 7: Bake to Perfection
Pop the baking sheet into your preheated oven and let the magic happen! Bake for 1 to 1.5 hours, flipping the chips halfway through. Keep an eye on them; you want them golden and crispy, not burnt. The aroma wafting through your kitchen will be irresistible!
Step 8: Cool and Serve
Once they’re done baking, remove the chips from the oven and let them cool for a few minutes. This cooling time is essential for that final crunch. Serve them up as a snack or appetizer, and watch them disappear!
Tips for Success
- Choose firm zucchinis for the best texture; avoid soft or overripe ones.
- Don’t skip the drying step; it’s crucial for achieving that crispy finish.
- Experiment with different seasonings in the breadcrumb mix for unique flavors.
- Keep an eye on the chips during baking; every oven is different.
- Store leftovers in an airtight container to maintain crispness.
Equipment Needed
- Baking Sheet: A standard baking sheet works well, but a wire rack can help with airflow for extra crispiness.
- Parchment Paper: This keeps the chips from sticking; aluminum foil can be a substitute.
- Mixing Bowls: Any size will do, just ensure they’re deep enough for tossing ingredients.
- Paper Towels: Essential for drying the zucchini slices.
Variations
- Herb-Infused: Add dried herbs like oregano, thyme, or basil to the breadcrumb mixture for an aromatic twist.
- Spicy Zucchini Chips: Mix in red pepper flakes or cayenne pepper to the seasoning for a fiery kick.
- Cheesy Delight: Experiment with different cheeses like cheddar or mozzarella for a unique flavor profile.
- Gluten-Free Option: Substitute regular breadcrumbs with gluten-free panko or crushed cornflakes.
- Sweet Variation: For a sweet treat, sprinkle cinnamon and a touch of sugar on the zucchini before baking.
Serving Suggestions
- Pair your Crispy Zucchini Chips with a zesty dipping sauce like ranch or tzatziki for an extra flavor boost.
- Serve alongside a fresh salad for a light meal that’s both satisfying and healthy.
- For a fun presentation, stack the chips in a cone-shaped paper holder for a party vibe.
- Enjoy with a cold beverage, like iced tea or a light beer, to complement the crunch.
FAQs about Crispy Zucchini Chips
Got questions about making the perfect Crispy Zucchini Chips? You’re not alone! Here are some common queries that might help you on your culinary journey.
Can I use other vegetables for this recipe?
Absolutely! While zucchini is the star, you can experiment with other veggies like eggplant or sweet potatoes. Just adjust the cooking time as needed.
How do I store leftover Crispy Zucchini Chips?
To keep them crispy, store your leftover chips in an airtight container at room temperature. Avoid the fridge, as moisture can make them soggy.
Can I make these chips in an air fryer?
Yes! An air fryer is a fantastic option for making Crispy Zucchini Chips. Just set it to 375°F (190°C) and cook for about 15-20 minutes, flipping halfway through.
What dipping sauces pair well with these chips?
These chips are delicious on their own, but they shine when paired with dipping sauces like ranch, marinara, or a spicy aioli. Get creative!
Can I make these chips vegan?
Definitely! Substitute the egg with a flaxseed mixture or a vegan egg replacer, and use nutritional yeast instead of Parmesan for a cheesy flavor.
Final Thoughts
Making Crispy Zucchini Chips is more than just a cooking project; it’s a delightful experience that brings joy to your kitchen. The satisfying crunch and savory flavors create a snack that feels indulgent yet guilt-free. Whether you’re enjoying them solo or sharing with friends, these chips are sure to impress. Plus, they’re a fantastic way to sneak in some veggies without anyone noticing! So, roll up your sleeves, embrace the process, and savor the deliciousness that comes from your own oven. Trust me, once you start, you won’t want to stop snacking on these crispy delights!
Crispy Zucchini Chips: Discover a Guilt-Free Snack!
Ingredients
Method
- Preheat your oven to 225°F (110°C). Line a baking sheet with parchment paper.
- In a large bowl, toss the zucchini slices with salt, pepper, garlic powder, and onion powder. Let them sit for about 10 minutes to draw out moisture.
- Pat the zucchini slices dry with paper towels to remove excess moisture.
- In one bowl, place the beaten egg. In another bowl, combine the breadcrumbs and Parmesan cheese.
- Dip each zucchini slice into the egg, then coat it with the breadcrumb mixture, pressing gently to adhere.
- Arrange the coated zucchini slices in a single layer on the prepared baking sheet. Lightly spray or drizzle them with cooking spray or olive oil.
- Bake in the preheated oven for 1 to 1.5 hours, flipping halfway through, until the chips are golden and crispy.
- Remove from the oven and let cool for a few minutes before serving.
Nutrition
Notes
- For extra flavor, try adding your favorite herbs such as Italian seasoning or paprika to the breadcrumb mixture.
- For a spicy kick, sprinkle some red pepper flakes into the seasoning mix or serve with a spicy dipping sauce.