

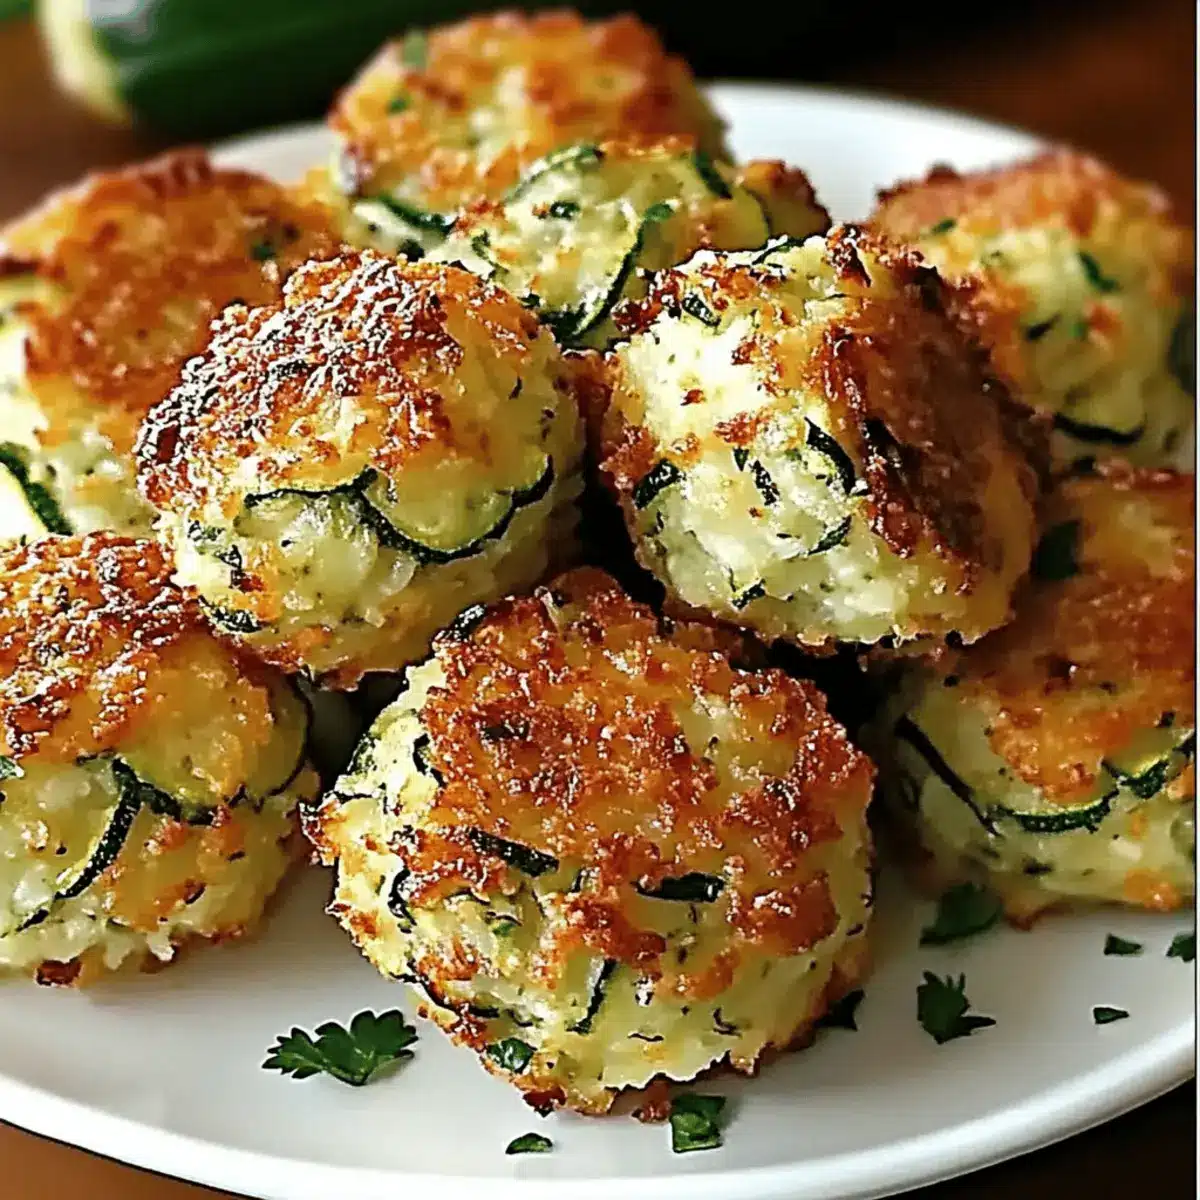
The other day, I found myself sorting through my fridge when a lone zucchini caught my eye, waiting patiently to be transformed into something delightful. That’s when I decided to whip up a batch of Crispy Zucchini Garlic Bites. These oven-baked gems are not only a healthy snack option, but they’re also unbelievably easy to make. With their crispy exterior and tender interior infused with garlic and herbs, they deliver a satisfying crunch that’s perfect for gatherings or as an everyday indulgence. What I love most about these bites is their versatility; whether you’re meal prepping for the week or looking for a last-minute appetizer, they’re sure to be a crowd-pleaser. Ready to add a pop of flavor to your snack routine? Let’s dive into the recipe!
Why Are These Zucchini Bites Amazing?
Healthier Snacking: With the guilt-free benefit of being baked rather than fried, these bites are a delicious way to indulge without the extra calories.
Quick Preparation: The straightforward process means you can whip these up in no time, making them ideal for any occasion.
Flavor Explosion: The aromatic garlic and herbs lend a rich taste that will leave everyone wanting more, making them perfect for friendly gatherings.
Versatile Pairings: Serve these crispy delights with your favorite dips like marinara, ranch, or garlic aioli for an extra flavor boost. Dive into a more substantial meal by pairing with options like Garlic Parmesan Chicken for a satisfying feast.
Make-Ahead Magic: Form your bites and freeze before baking, allowing you to have delicious snacks ready at a moment’s notice. These nutritious treats are perfect for meal preppers and busy families alike!
Crispy Zucchini Garlic Bites Ingredients
For the Bites
• Zucchini – Adds moisture and fiber; remember to drain excess water for that crispy texture.
• Breadcrumbs – Provides structure and crunch; feel free to use panko for an extra crunch.
• Parmesan Cheese – Delivers a rich, savory flavor; can be swapped with nutritional yeast for a dairy-free version.
• Eggs – Acts as the binder for the mixture; ensure they’re well-beaten for better integration.
• Garlic – Infuses the bites with aromatic flavor; fresh garlic is best, but powder works in a pinch.
• Onion – Contributes moisture and depth of flavor; finely chop for an even distribution.
• Parsley – Adds a fresh touch and lovely color; substitute with any fresh or dried herbs you have on hand.
• Salt & Black Pepper – Essential seasonings to enhance overall flavor; adjust these to your taste.
• Italian Seasoning (optional) – Provides an herby flavor boost; feel free to personalize according to your liking.
Step‑by‑Step Instructions for Crispy Zucchini Garlic Bites
Step 1: Preheat the Oven
Begin by preheating your oven to 400°F (200°C). While the oven heats up, grab a baking sheet and line it with parchment paper. Lightly grease the parchment to help prevent sticking and ensure your Crispy Zucchini Garlic Bites achieve that perfect golden crisp.
Step 2: Prepare the Zucchini
Next, take your zucchini and grate it using a box grater. Once grated, place it in a clean kitchen towel and squeeze out as much excess moisture as possible. This step is crucial for achieving the desired crispiness in your bites. Transfer the drained zucchini to a large mixing bowl.
Step 3: Combine the Ingredients
In the bowl with the prepared zucchini, add breadcrumbs, grated Parmesan cheese, beaten eggs, garlic, finely chopped onion, parsley, salt, pepper, and Italian seasoning if using. Mix everything together until the ingredients are fully combined, creating a thick, cohesive mixture that will form your bites.
Step 4: Form the Bites
Once your mixture is ready, use your hands to scoop and shape small balls, roughly 1 to 1½ inches in size. Making sure to compact them well, this will help them hold their shape during baking. Place each formed ball onto the prepared baking sheet, spacing them evenly apart for optimal cooking.
Step 5: Bake to Perfection
Now, place the baking sheet in your preheated oven. Bake the bites for about 20–25 minutes, turning them halfway through the cooking time. Look for a golden brown color and a slightly crisp exterior, which indicates that your Crispy Zucchini Garlic Bites are ready to be enjoyed.
Step 6: Cool and Serve
Once baked to perfection, remove the baking sheet from the oven and let the zucchini bites cool for a few minutes. This brief cooling period allows them to firm up slightly. Serve them warm with your favorite dipping sauces, and savor each delicious bite!

Make Ahead Options
These Crispy Zucchini Garlic Bites are perfect for meal prep enthusiasts looking to save time during busy weeknights! You can prepare the mixture and form the bites up to 24 hours in advance; just place them on a baking sheet and cover tightly with plastic wrap in the refrigerator. Alternatively, for long-term storage, freeze the formed bites on the sheet for about 1 hour until firm, then transfer them to a freezer-safe bag for up to 3 months. When you’re ready to indulge, bake them directly from frozen, adding a few extra minutes to the cooking time for just-as-delicious results. This way, you’ll always have a healthy snack option handy!
Expert Tips for Crispy Zucchini Garlic Bites
-
Moisture Matters: Properly squeeze out excess moisture from the grated zucchini to avoid soggy bites and ensure they become crispy when baked.
-
Breadcrumb Choices: For optimal crunch, consider using panko breadcrumbs instead of regular ones. They make a noticeable difference in texture in your Crispy Zucchini Garlic Bites.
-
Egg Beating: Make sure to beat your eggs well before adding them to the mixture. This helps bind everything together more effectively.
-
Even Baking: Arrange the formed bites evenly on the baking sheet. Avoid overcrowding to ensure they bake evenly and achieve that golden, crispy exterior.
-
Flavor Variations: Feel free to experiment with different herbs and spices to personalize your Crispy Zucchini Garlic Bites. Fresh basil or red pepper flakes can add a fun twist!
How to Store and Freeze Crispy Zucchini Garlic Bites
Fridge: Store leftover crispy zucchini garlic bites in an airtight container for up to 3 days. Reheat in the oven to regain their crispiness.
Freezer: For long-term storage, freeze formed but unbaked bites on a baking sheet until solid, then transfer to a freezer bag. They can be stored for up to 3 months.
Baking from Frozen: Bake directly from frozen, adding a few extra minutes to the cooking time to ensure they cook through and become crispy.
Make-Ahead: These bites are perfect for meal prep! Assemble ahead of time and keep them frozen for a quick and healthful snack option at any moment.
What to Serve with Crispy Zucchini Garlic Bites
Elevate your snacking experience by pairing these delightful bites with companions that balance flavor and texture beautifully.
-
Creamy Hummus: A smooth and satisfying dip that adds a nutty contrast, enhancing the garlicky flavor of the bites.
-
Homemade Marinara Sauce: The tangy sweetness of marinara complements the savory bites, perfect for dipping and adding a burst of flavor.
-
Classic Ranch Dressing: This cool and herby dressing provides a refreshing contrast, making every crunchy bite even more irresistible.
-
Tzatziki Sauce: This yogurt-based dip with cucumber and dill brings a fresh, creamy element that balances the warm garlic bites perfectly.
-
Fresh Garden Salad: A crisp, green salad offers vibrant textures and flavors, making for a light and wholesome meal alongside your snacks. Toss in sliced radishes and cucumbers for added crunch.
-
Lemon Garlic Aioli: This zesty aioli adds a creamy, tangy finish that accentuates the flavors of the zucchini, making each bite decadent.
-
Roasted Red Pepper Dip: A sweet and smoky dip that beautifully contrasts with the crispy texture and savory herbs in the bites, perfect for those who enjoy bold flavors.
-
Sparkling Lemonade: A refreshing drink that cuts through the richness, lifting the flavors of your meal while providing a fizzy, fun touch.
These pairings create a symphony of tastes and textures, turning your crispy zucchini garlic bites into the star of a delightful spread!
Crispy Zucchini Garlic Bites Variations
Feel free to play with these ideas and make the recipe your own while delighting your taste buds!
-
Yellow Squash: Swap zucchini for yellow squash for a similar taste and texture, adding a pop of color to your plate.
-
Herb Twist: Try bold herbs like basil or cilantro to switch up the flavor profile and keep things exciting.
-
Spicy Kick: Incorporate red pepper flakes or diced jalapeños for a fiery twist that brings heat and zest to every bite. The spice level can be adjusted based on preference, ensuring everyone can enjoy it!
-
Vegan Delight: Omit the cheese and use nutritional yeast for a dairy-free version that doesn’t sacrifice flavor. This is perfect for those following plant-based diets.
-
Add Bacon: For a richer taste, mix in cooked, crumbled bacon or turkey bacon to elevate the savory profile of these bites.
-
Cheesy Essence: Experiment with a different cheese such as feta or cheddar to give your bites a unique flair that complements the garlic perfectly!
-
Nutty Flavor: Add ground nuts like almonds or walnuts for an unexpected crunch that enhances both texture and taste. They can make the bites even more satisfying!
-
Baked Parmesan Crisp: Top each bite with a pinch of Parmesan before baking for an extra cheese layer that becomes deliciously crisp and irresistibly flavorful.
Searching for more inspiration? Check out these Garlic Parmesan Chicken or explore the delightful flavors of Garlic Butter Brazilian Steak to serve alongside your bites for a well-rounded meal!

Crispy Zucchini Garlic Bites Recipe FAQs
How do I choose the best zucchini for this recipe?
Absolutely! When selecting zucchini, look for firm, glossy ones without dark spots or soft areas. The ideal size is smaller to medium, around 6 to 8 inches long, as they’re younger and have fewer seeds, which makes them more flavorful and tender.
How should I store leftover Crispy Zucchini Garlic Bites?
Very! Store leftover crispy zucchini garlic bites in an airtight container in the refrigerator for up to 3 days. To keep them crispy during reheating, place them on a baking sheet in the oven at 350°F (175°C) for about 10 minutes until warmed through and slightly crisped again.
Can I freeze these zucchini bites?
Absolutely! To freeze, form your zucchini bites and place them on a baking sheet lined with parchment. Freeze until solid, then transfer them to a freezer-safe bag or container. They can be stored frozen for up to 3 months. When you’re ready to enjoy, bake directly from frozen, adding a few extra minutes to the cooking time to ensure they cook through.
What if my zucchini bites come out soggy?
Ah, that can happen! The key to prevent sogginess is to squeeze out as much moisture as possible from the grated zucchini using a clean kitchen towel before mixing. If they are already baked and soggy, try reheating them in the oven to help restore some crispness. If using too much zucchini, consider adjusting the amount to maintain the right texture.
Are there any dietary considerations for these bites?
The more the merrier! These crispy zucchini garlic bites are vegetarian and can be made gluten-free by using gluten-free breadcrumbs. For those with dairy allergies, simply substitute Parmesan cheese with nutritional yeast. Always check ingredient labels if guests have specific allergies, especially with the breadcrumbs and any herbs or toppings you choose!
Can I make these bites ahead of time for a gathering?
Definitely! One of the best parts of this recipe is that it’s make-ahead friendly. You can prepare the bites and freeze them before baking. When you’re ready to serve, pop them in the oven straight from the freezer for a quick snack or appetizer that will wow your guests!

Crispy Zucchini Garlic Bites: Irresistibly Crunchy & Healthy
Ingredients
Equipment
Method
- Preheat the Oven to 400°F (200°C) and prepare a baking sheet with parchment paper.
- Grate the zucchini and squeeze out excess moisture using a kitchen towel.
- In a mixing bowl, combine zucchini with breadcrumbs, Parmesan, beaten eggs, garlic, onion, parsley, salt, pepper, and Italian seasoning.
- Shape the mixture into small balls, about 1 to 1½ inches in size, and place them evenly on the baking sheet.
- Bake for 20-25 minutes or until golden brown, turning halfway through.
- Allow to cool slightly before serving with your favorite dipping sauces.