

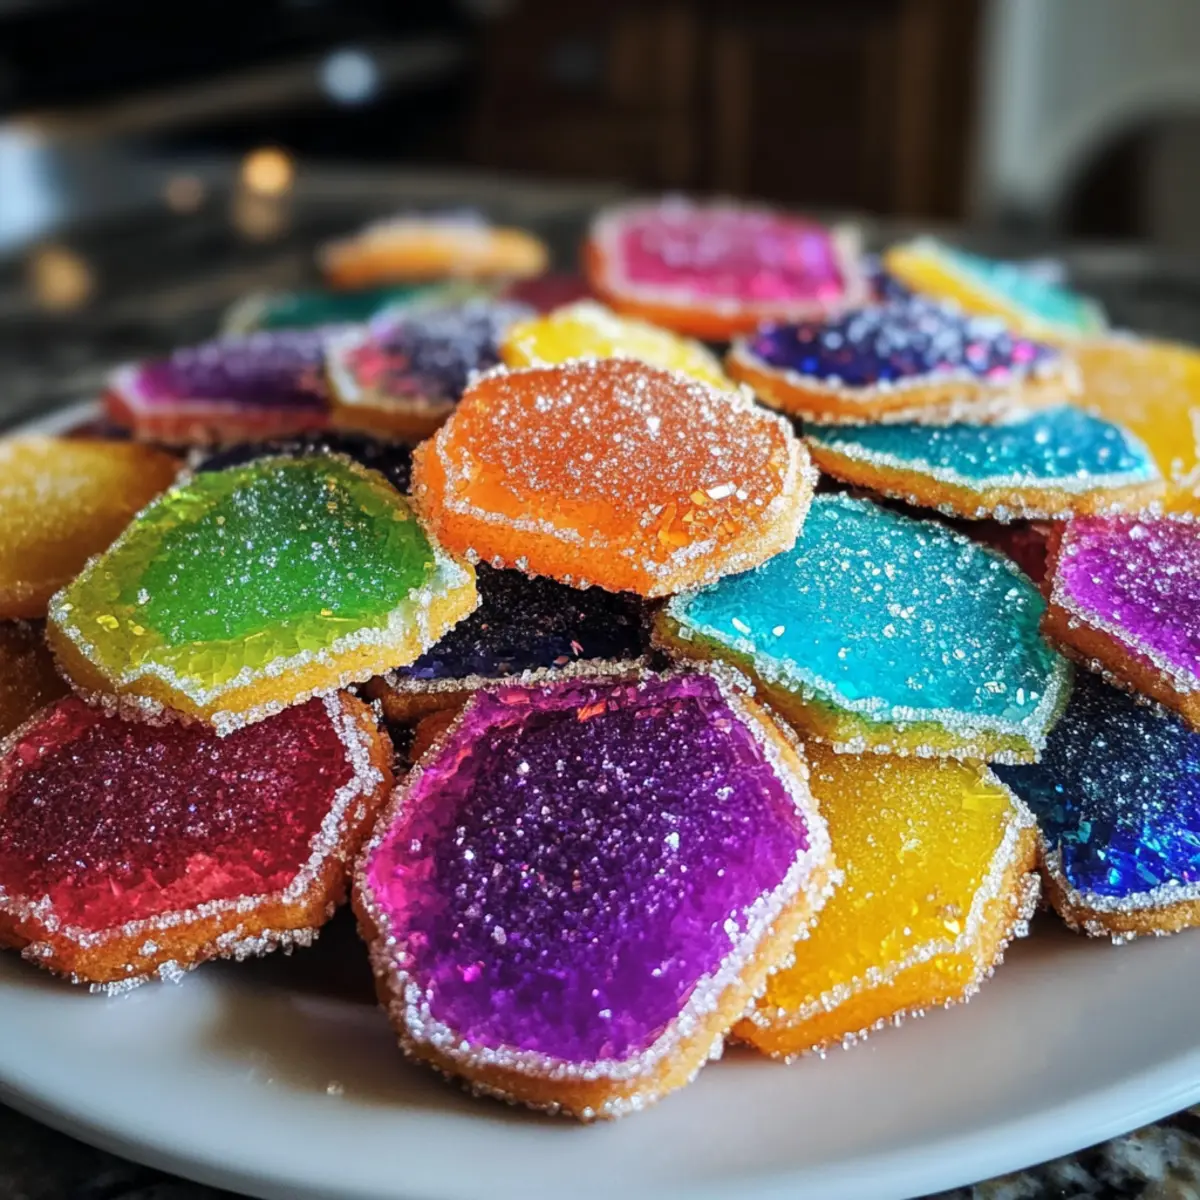
While rummaging through the cookie jar, I stumbled upon my latest artistic creation: Dazzling Geode Cookies! These stunning sweets are not just cookies; they’re an explosion of color and creativity that turns a simple baking session into a delightful experience. With a crunchy exterior that contrasts beautifully with a chewy center, these customizable treats are perfect for parties and gatherings. The sparkle of sugar crystals adds an extra layer of magic, making them not only a feast for the taste buds but also for the eyes. Whether you’re looking to impress at a birthday bash or simply want to bring a little joy to your day, these Geode Cookies will surely shine. Curious about how to create these edible gems? Let’s dive into the colorful world of geode baking together!
Why Are Geode Cookies So Irresistible?
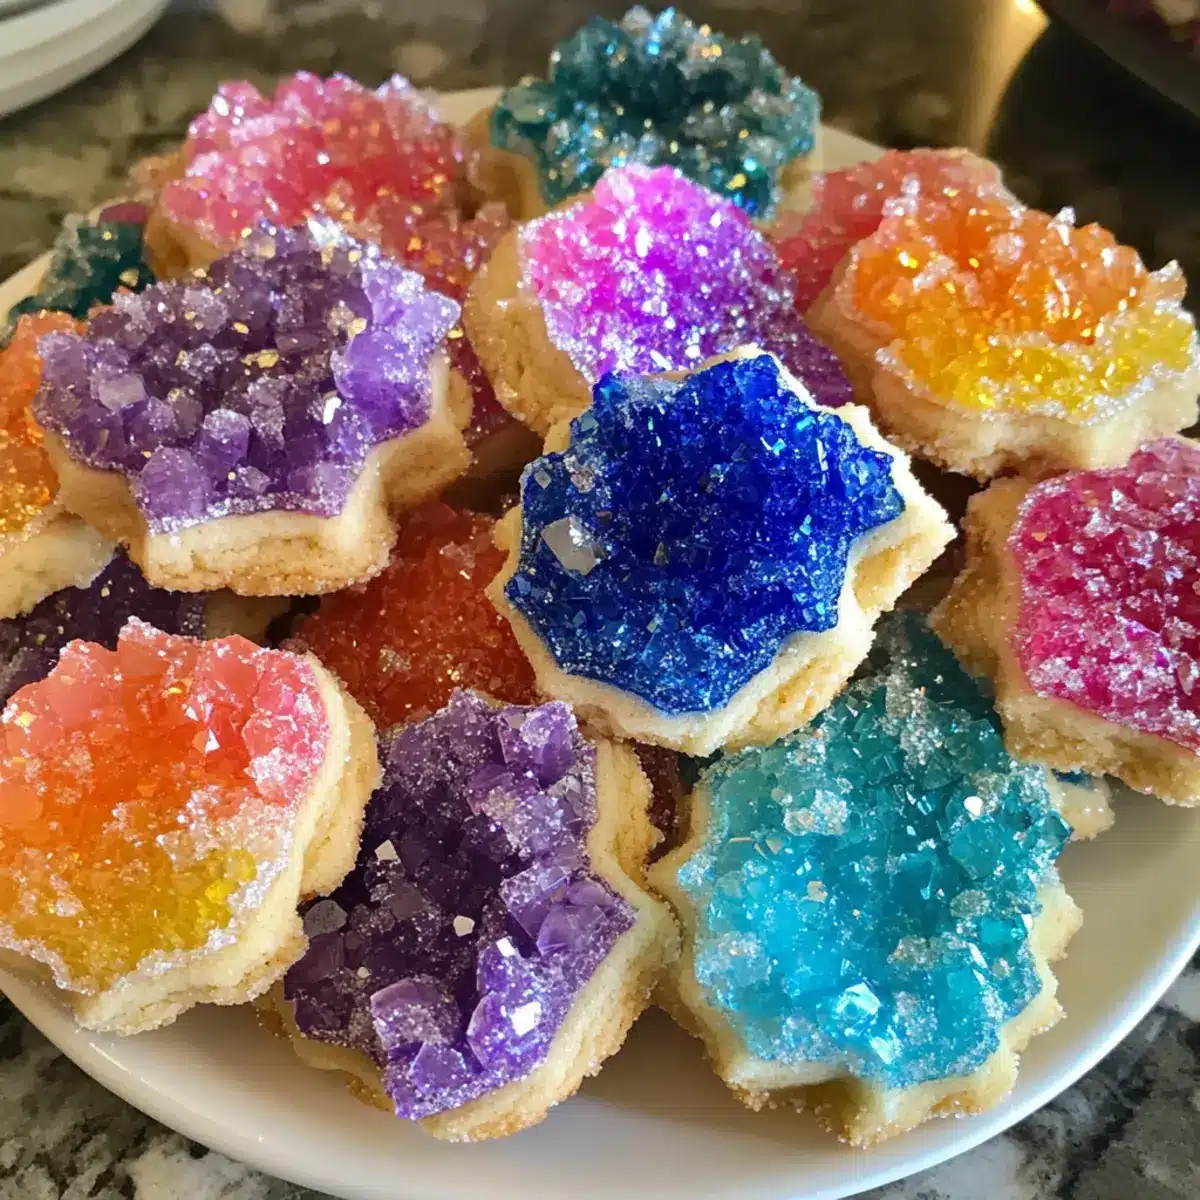
Visual Delight: Each cookie dazzles with vibrant colors and sparkling sugar crystals, making them a feast for the eyes.
Creative Customization: You can easily tweak colors and shapes, making every batch uniquely yours!
Easy to Make: With simple ingredients and straightforward steps, they’re perfect for bakers of all skill levels.
Perfect Party Treat: These cookies are sure to wow your guests at any celebration, from birthdays to holiday gatherings.
Memorable Experience: Baking these cookies transforms a typical day into a fun, artistic adventure, sparking creativity in the kitchen.
Dazzling Geode Cookies Ingredients
For the Cookie Base
• Butter – Use unsalted for better control over the flavor balance in these Dazzling Geode Cookies.
• Granulated Sugar – This sweetener gives the cookies their delightful crunch and sweetness.
• Eggs – Binding ingredients together, eggs contribute to the cookies’ fluffy texture.
• All-Purpose Flour – The main structural component; feel free to substitute gluten-free flour for a gluten-free version.
• Baking Powder – Helps the cookies rise and maintain a nice shape while baking.
For the Color
• Food Coloring – Unleash your inner artist by mixing vibrant colors into the dough to create a dazzling array.
For the Sparkly Decor
• Sugar Crystals or Rock Candy – These decorative elements add visual appeal and a delightful crunch to the finished cookies.
Step‑by‑Step Instructions for Dazzling Geode Cookies
Step 1: Preheat and Prep
Begin by preheating your oven to 350°F (175°C). While it heats, line two baking sheets with parchment paper to prevent the Dazzling Geode Cookies from sticking. This is a crucial step to ensure the cookies bake evenly and the bottoms don’t get burnt. Getting this right will set the stage for beautiful, effortless removal later!
Step 2: Cream the Butter and Sugar
In a large mixing bowl, cream together 1 cup of softened unsalted butter and 1 cup of granulated sugar using a hand mixer or stand mixer. Beat on medium speed for about 3 minutes until the mixture is light, fluffy, and has an almost white appearance. This aeration process will contribute to the delightful texture of your Dazzling Geode Cookies.
Step 3: Incorporate the Eggs
Next, add in two large eggs, one at a time, mixing well after each addition. Continue to beat the mixture until fully incorporated, which should take about 1-2 minutes. You’ll know it’s ready when the batter is smooth and creamy; this helps to bind the cookie ingredients together, ensuring a perfect chewy center.
Step 4: Combine Dry Ingredients
In a separate bowl, whisk together 3 cups of all-purpose flour and 1 teaspoon of baking powder. Gradually add this dry mixture into the wet ingredients, stirring until just combined. Avoid overmixing, as a few lumps are perfectly fine. This step creates the foundational structure for your Dazzling Geode Cookies, yielding a satisfying texture.
Step 5: Color the Dough
Divide the dough into several portions based on how many colors you’d like to use. Squeeze in your choice of food coloring to each portion, mixing until the desired shades are achieved. This colorful process is not only fun but essential for making your Dazzling Geode Cookies visually striking and full of personality.
Step 6: Scoop and Decorate
Using a cookie scoop or tablespoon, place dollops of the colored dough onto the prepared baking sheets, alternating colors for a beautiful effect. Gently press sugar crystals or rock candy into each dough ball, ensuring they’re nestled in for a sparkling finish. This adds a delightful crunch and the geode-like appearance to your baked cookies.
Step 7: Bake to Perfection
Carefully place the baking sheets in your preheated oven and bake for 10-12 minutes. Look for the edges to turn golden brown while the centers remain soft and slightly puffy; this contrast is crucial for the ultimate chewy experience that defines Dazzling Geode Cookies.
Step 8: Cool and Enjoy
Once baked, pull the cookies from the oven and let them cool on the baking sheets for about 5 minutes. Then, transfer the cookies onto wire racks to cool completely. This cooling time lets the structure set and enhances the flavors, ensuring every bite of your Dazzling Geode Cookies is a delightful experience!
Dazzling Geode Cookies Variations & Substitutions
Get ready to unleash your creativity and customize these vibrant cookies to suit your taste buds and special occasions!
- Gluten-Free: Substitute all-purpose flour with a gluten-free blend for your gluten-free friends, ensuring that everyone can enjoy the fun!
- Flavor Infusion: Add vanilla or almond extract to the base dough for a lovely surprise in every bite. Just a teaspoon can significantly enhance the flavor profile.
- Nutty Delight: Mix in some finely chopped nuts like pecans or walnuts to the dough for a lovely crunch and flavor depth. These additions make for a delightful contrast to the chewy texture.
- Edible Glitter: Sprinkle some edible glitter before baking for an extra touch of magic! These sparkling cookies will dazzle even more under the party lights.
- Fruit Zest: Incorporate lemon or orange zest into the dough. Just a teaspoon lifts the flavors and adds a refreshing citrus essence that plays beautifully with the sweetness.
- Chocolate Chips: Fold in mini chocolate chips for a richer treat. The sweet chocolate against the vibrant colors makes a delicious pair that’s hard to resist!
- Spice It Up: Add a pinch of cinnamon or nutmeg for a warm, inviting flavor. These spices can add festive flair, especially during holiday gatherings.
- Different Shapes: Use themed cookie cutters for various occasions. Whether it’s hearts for Valentine’s Day or stars for the Fourth of July, your Dazzling Geode Cookies can shine with seasonal creativity.
Each variation brings a unique touch, filling your kitchen with delightful aromas while creating those unforgettable moments. And if you’re feeling particularly adventurous, try pairing these cookies with a refreshing sorbet or hot chocolate for a delightful dessert experience!
Make Ahead Options
These Dazzling Geode Cookies are perfect for busy home cooks looking to streamline their meal prep! You can prepare the cookie dough up to 24 hours in advance by mixing all the ingredients together and then refrigerating the dough (this helps to enhance the flavors). If you’d like to go even further, you can scoop the colored dough balls and freeze them for up to 3 months; just place them on a parchment-lined baking sheet and then transfer them into an airtight container. When ready to bake, simply preheat the oven and bake directly from the freezer, adding a couple of extra minutes to the baking time. This way, you’ll have freshly baked Dazzling Geode Cookies ready whenever you need a burst of sweetness without the last-minute rush!
How to Store and Freeze Dazzling Geode Cookies
Room Temperature: Store your Dazzling Geode Cookies in an airtight container at room temperature for up to 7 days to keep them fresh and chewy.
Freezer: For longer storage, freeze unbaked cookie dough or decorated cookies for up to 3 months. Ensure they are wrapped tightly in plastic wrap and placed in a freezer-safe bag.
Thawing: When ready to enjoy, thaw cookies overnight in the refrigerator or at room temperature for a couple of hours before serving.
Refresh: If cookies become stale, a quick warm-up in a 300°F oven for 5 minutes can bring back their soft, chewy texture.
What to Serve with Dazzling Geode Cookies?
Elevate your cookie experience with delightful pairings that complement every colorful bite of these sugary gems.
-
Milk:
The classic pairing of a cold glass of milk adds a creamy balance to the sweet, sugary crunch of the cookies. -
Chocolate Fondue:
Dip your cookies into warm chocolate for an indulgent treat! This pairing brings richness and a touch of decadence to the vibrant flavors. -
Fruit Skewers:
Fresh strawberries, bananas, and pineapple provide a refreshing contrast, brightening up the dessert table and adding a healthy twist. -
Coffee or Espresso:
Brewed coffee brings a rich, warm undertone that beautifully complements the sweetness of the Geode Cookies, making them perfect for afternoon gatherings. -
Ice Cream:
Serve a scoop of your favorite ice cream alongside for a heavenly combination. The creamy, cold dessert enhances the cookies’ sparkling textures. -
Royal Icing Decorations:
Use extra icing to create edible decorations on platters; they add an artistic flair that ties in beautifully with the cookies’ design. -
Sparkling Lemonade:
A fizzy, citrusy drink sparks freshness, cleansing the palate between bites of these sweet treats while adding a festive element to any celebration.
Expert Tips for Dazzling Geode Cookies
Timing is Key: Allow cookies to cool completely before stacking to avoid sticking together and losing their sparkle.
Monitor Baking: Keep an eye on the cookies as they bake; take them out when the edges are golden while the centers still look slightly underbaked for a chewy texture.
Color Control: When mixing food coloring, start with a little and add more slowly to achieve your desired shade without over-saturating the dough.
Right Temperature: Ensure your butter is softened, but not melted, to create that light, fluffy consistency essential for Dazzling Geode Cookies.
Storage Matters: Store cookies in an airtight container at room temperature to maintain their freshness and avoid them becoming stale.

Dazzling Geode Cookies Recipe FAQs
How do I select the best ingredients for Dazzling Geode Cookies?
Absolutely! For the best results, use fresh unsalted butter, as it allows you to control the salt content better. Choose high-quality granulated sugar for a perfect crunch and flavor. I recommend using large eggs that are at room temperature, which helps them incorporate smoothly into the dough. As for flour, opt for all-purpose flour or a gluten-free blend if you have dietary needs—both will work beautifully!
What’s the best way to store Dazzling Geode Cookies?
To keep your Dazzling Geode Cookies fresh and chewy, store them in an airtight container at room temperature for up to 7 days. Make sure they’re completely cooled before sealing, as this prevents moisture buildup. If you’re planning to savor them later, placing a slice of bread in the container can help maintain their moisture!
Can I freeze Dazzling Geode Cookies?
Absolutely! You can freeze both unbaked cookie dough and decorated cookies for up to 3 months. To freeze the dough, scoop it into balls and place them on a baking sheet in the freezer until firm. Once frozen, transfer them to a freezer-safe zip-top bag. For decorated cookies, place them in a single layer between sheets of parchment paper in an airtight container. When ready to enjoy, simply thaw overnight in the refrigerator, or at room temperature for a few hours.
What should I do if my cookie dough is too sticky?
If your cookie dough seems too sticky, don’t worry—this can happen! Start by chilling the dough in the refrigerator for 30 minutes to help it firm up. If it’s still sticky after chilling, add a tablespoon of flour at a time until the right consistency is reached. The dough should be moldable but not overly sticky, which will promote that perfect chewy texture in your Dazzling Geode Cookies.
Are Dazzling Geode Cookies safe for pets or people with allergies?
It’s important to know that Dazzling Geode Cookies contain common allergens like eggs and wheat, so they’re not suitable for individuals with egg or gluten allergies. As for pets, it’s best to keep these cookies away from them. The sugar content and other ingredients can be harmful to your furry friends. Always check for any specific dietary restrictions before sharing!
How long do Dazzling Geode Cookies last?
When stored properly, Dazzling Geode Cookies can last up to 7 days at room temperature. For even longer enjoyment, following freezing instructions will keep them delightful for up to 3 months. Just remember to thaw them properly, so they maintain their wonderful chewy texture upon serving!

Dazzling Geode Cookies: Colorful Sweet Treats for Every Celebration
Ingredients
Equipment
Method
- Preheat your oven to 350°F (175°C) and line two baking sheets with parchment paper.
- Cream together 1 cup softened unsalted butter and 1 cup granulated sugar until light and fluffy.
- Add in two large eggs, mixing well after each addition until smooth.
- Whisk together 3 cups all-purpose flour and 1 teaspoon baking powder; add to wet ingredients.
- Divide dough and add food coloring, mixing to achieve desired colors.
- Scoop dollops of dough onto prepared sheets, alternately placing colors and pressing in sugar crystals.
- Bake for 10-12 minutes until edges are golden and centers are puffed.
- Cool on baking sheets for 5 minutes, then transfer to wire racks to cool completely.