

As I flipped through an old cookbook recently, a wave of nostalgia washed over me. The pages were splattered with memories from weekend gatherings where laughter and smoky aromas filled the air. That’s when I stumbled upon a recipe for Grilled Kielbasa Sandwiches with Sweet Onion Flavor. These vibrant sandwiches are the very essence of summer—juicy kielbasa nestled in a crusty roll, topped with sweet, caramelized onions and tangy bell peppers. Not only are they a fantastic way to indulge in homemade goodness, but they also come together in a snap, making them the ultimate crowd-pleaser for your next barbecue. Whether you opt for classic toppings or get creative with extras, these sandwiches are guaranteed to satisfy your cravings and impress your guests. Are you ready to fire up the grill and uncover the magic of this versatile recipe?

Why Are Grilled Kielbasa Sandwiches a Must-Try?
Bold, Flavorful Bite: Each sandwich is bursting with juicy kielbasa paired with sweet, caramelized onions and vibrant bell peppers, creating a perfect harmony of flavors.
Easy and Quick: You can whip these up in no time, making them an ideal choice for last-minute get-togethers or busy weeknights.
Versatile Toppings: Feel free to customize with your favorite toppings. Try adding melted provolone or a spicy aioli to make it your own!
Perfect for Gatherings: These sandwiches are sure to be a hit at any barbecue or picnic, catering to both meat lovers and veggie fans alike.
A Taste of Tradition: Embrace the nostalgia with a dish that celebrates a rich cultural heritage, bringing a twist to your summer grilling routine.
Pair these delicious sandwiches with some sides like coleslaw or grilled corn for a complete meal that everyone will rave about!
Grilled Kielbasa Sandwich Ingredients
Elevate your summer grilling with these flavorful components!
For the Sandwich
- Beef Kielbasa – A juicy protein source; can substitute with pork or turkey kielbasa for different flavors.
- Hoagie/Sandwich Rolls – Holds the sandwich together; experiment with pretzel rolls or brioche buns for a unique twist.
For the Vegetables
- Olive Oil – Adds moisture and helps char the veggies; can use canola or avocado oil as alternatives.
- Red Bell Pepper – Contributes sweetness and color; feel free to substitute with yellow or orange bell peppers.
- Yellow Bell Pepper – Adds mild sweetness; can be replaced with additional red or green peppers.
- Green Bell Pepper – Offers a slight bitterness that balances the sweetness; any color bell pepper works well.
- Onion – Essential for savory depth; choose sweet onions for grilling or yellow onions for a more robust flavor.
- Garlic Powder – Enhances flavor; use fresh garlic cloves instead for a stronger punch.
For Seasoning
- Italian Seasoning/Dried Oregano – Adds aromatic herbal notes; fresh herbs can offer a brighter flavor profile.
- Salt and Black Pepper – Essential for seasoning; adjust according to your taste preferences.
Optional Toppings
- Provolone or Mozzarella Cheese – Melt on top of the kielbasa for added creaminess; try sharp cheddar for a kick!
- Mustard or Mayo – Personalize your sandwich with your favorite spreads; a spicy aioli can add a wonderful zing.
With these ingredients, you’re all set to create delectable Grilled Kielbasa Sandwiches with Sweet Onion Flavor that everyone will adore!
Step‑by‑Step Instructions for Grilled Kielbasa Sandwiches with Sweet Onion Flavor
Step 1: Preheat the Grill
Start by preheating your grill or stovetop grill pan over medium-high heat, aiming for a temperature of around 400°F. This ensures a lovely sear on your ingredients. While the grill heats up, prepare your vegetables and kielbasa to maximize efficiency and flavor.
Step 2: Prepare the Vegetables
In a large mixing bowl, combine sliced red, yellow, and green bell peppers along with sweet onions. Drizzle in about two tablespoons of olive oil, followed by garlic powder, Italian seasoning, salt, and black pepper. Toss everything together until evenly coated, making sure the vibrant colors shine through for your Grilled Kielbasa Sandwiches.
Step 3: Grill the Vegetables
Once the grill is hot, spread the seasoned vegetables across the grates. Grill them for about 8–10 minutes, turning occasionally with tongs until they’re softened and slightly charred. The onions should turn translucent and the peppers vibrant with grill marks, adding that smoky flavor integral to your sandwich.
Step 4: Grill the Kielbasa
After setting the veggies aside, place the beef kielbasa on the grill. Grill for 4–5 minutes per side, allowing them to brown nicely and heat through. Look for a sizzling sound and golden-brown color; this will create that delectable flavor your Grilled Kielbasa Sandwiches are known for.
Step 5: Toast the Sandwich Rolls
As an optional step, toast the hoagie or sandwich rolls directly on the grill for 1–2 minutes, cut side down, until they’re golden and slightly crisp. This enhances the texture and prevents sogginess, making each bite of the Grilled Kielbasa Sandwich truly enjoyable.
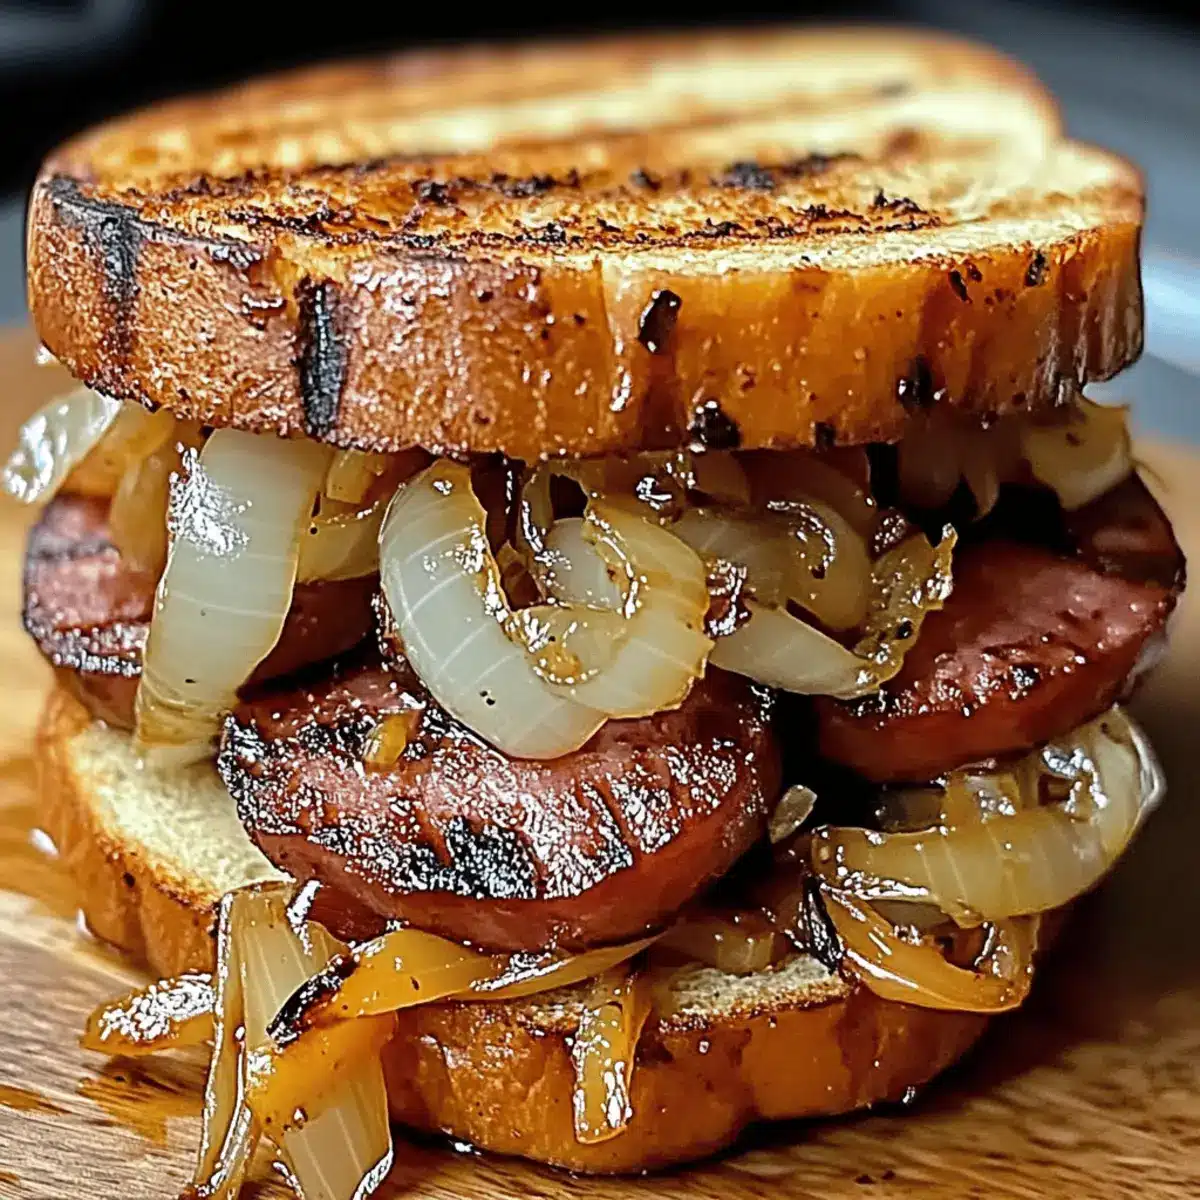
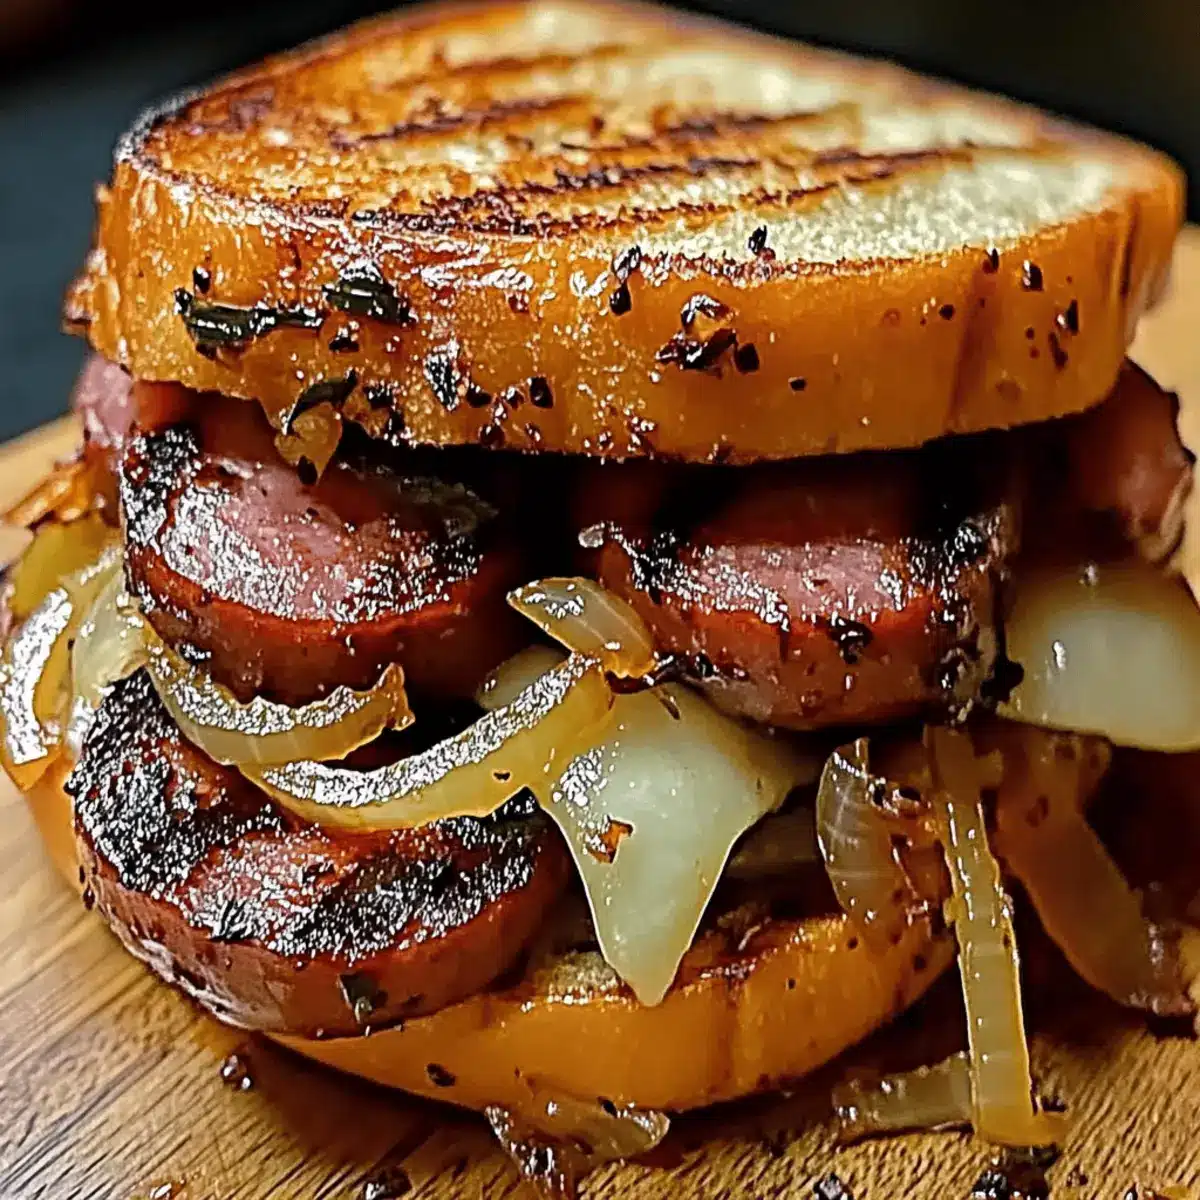
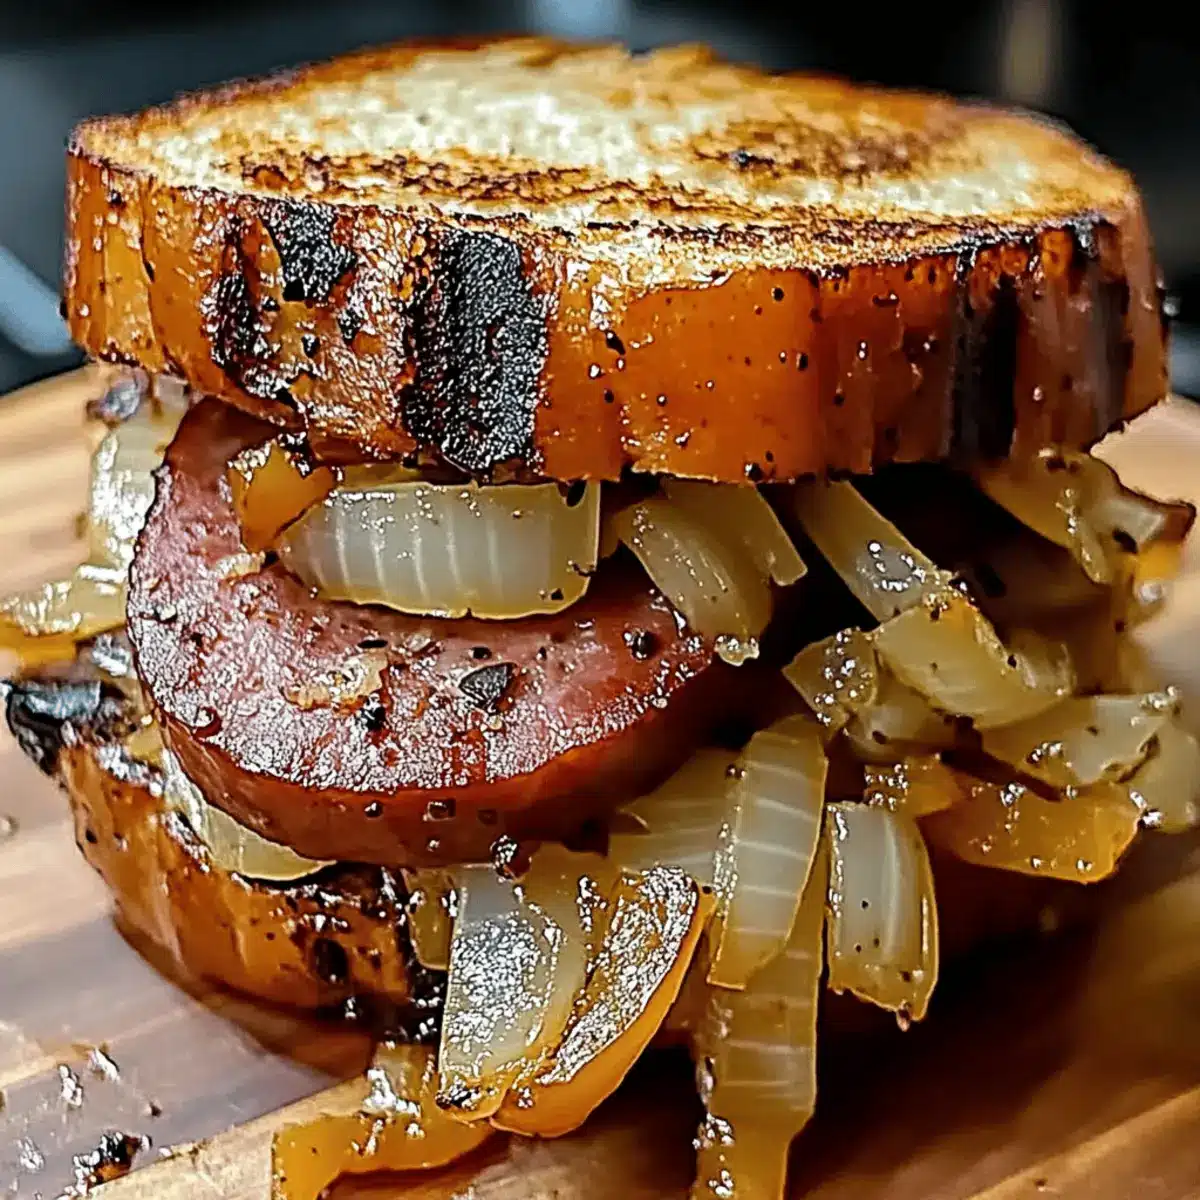
Step 6: Assemble the Sandwiches
Now it’s time to build your sandwiches! Place a juicy grilled kielbasa inside each toasted roll, then generously top it with the grilled peppers and onions. Feel free to add extras like melted provolone or a drizzle of mustard for an added flavor punch—it’s all about personalizing your Grilled Kielbasa Sandwiches with Sweet Onion Flavor.
Step 7: Serve and Enjoy
Finally, serve your delicious Grilled Kielbasa Sandwiches warm, accompanied by your favorite sides such as coleslaw or grilled corn. The combination of juicy kielbasa, sweet grilled veggies, and warm toasted rolls will surely make this a highlight of any summer gathering.
What to Serve with Grilled Kielbasa Sandwiches with Sweet Onions and Bell Peppers
Creating a well-rounded meal is a joyous way to turn an ordinary dinner into an extraordinary experience.
-
Creamy Coleslaw: The crisp and tangy crunch of coleslaw perfectly complements the savory kielbasa, offering a refreshing contrast to the grilled flavors.
-
Grilled Corn on the Cob: Sweet and smoky, grilled corn adds a delightful texture and flavor, enhancing the outdoor BBQ vibe. Pair with lime for an extra zest!
-
Potato Salad: A classic, creamy potato salad carries the same comforting essence that makes kielbasa sandwiches a favorite, offering heartiness in every bite.
-
Zucchini Noodles: Light and versatile, zucchini noodles can lend a fresh touch. Toss them with garlic and herbs for a vibrant side.
-
Baked Beans: Sweet and savory baked beans round out the meal with their rich flavors, providing robust seasoning that pairs beautifully with the smoky kielbasa.
-
Iced Lemonade: A refreshing drink option, iced lemonade brightens the palate and balances the savory notes of the hearty sandwiches.
-
Fruit Salad: A colorful, juicy fruit salad brings a hint of sweetness, acting as a lovely palate cleanser between bites of your savory grilled kielbasa sandwiches.
-
Mini Cheesecake Bites: For dessert, these little bites of creamy goodness bring a sweet finish and are easy to share, making them perfect for gatherings.
-
Beer Pairing: An ice-cold lager or pale ale harmonizes with the grilled and smoky flavors, washing down the savory richness of the kielbasa perfectly.
How to Store and Freeze Grilled Kielbasa Sandwiches
Fridge: Store leftover grilled kielbasa sandwiches in an airtight container for up to 3 days. Reheat in the oven or microwave before serving to restore warmth and flavor.
Freezer: If you want to save them for later, wrap each sandwich tightly in plastic wrap and then foil. They can be frozen for up to 2 months; simply reheat straight from the freezer.
Assembling Before Serving: To keep the rolls crispy, consider storing the grilled kielbasa and veggies separately from the rolls. Assemble just before eating for the best texture and taste.
Reheating: When reheating, use an oven or air fryer to achieve that delightful crispness, especially if you’ve frozen them. Enjoy your grilled kielbasa sandwiches with sweet onion flavor even after storing!
Grilled Kielbasa Sandwich Variations & Substitutions
Feel free to make this Grilled Kielbasa Sandwich your own with these delicious twists and substitutions that will ignite your culinary creativity!
-
Spicy Twist: Incorporate spicy andouille sausage for a kick. The heat plays beautifully against the sweetness of the grilled vegetables.
-
Dairy-Free: Use avocado or hummus instead of cheese for a creamy texture without the dairy. This adds richness while keeping it light.
-
Veggie Delight: Swap out kielbasa for grilled portobello mushrooms or eggplant for a vegetarian take. It’s a hearty option that everyone will love.
-
Extra Crunch: Add sliced pickles or coleslaw for an added crunch and tanginess. This little change livens up every bite, balancing flavors effortlessly.
-
Tropical Flavor: Toss in some sliced pineapple on the grill for a sweet, smoky addition. The juicy sweetness complements the savory kielbasa perfectly!
-
Herbed Infusion: Try using fresh herbs, like cilantro or basil, instead of dried Italian seasoning. The fresh flavor truly elevates your grilled toppings!
-
Garlicky Goodness: For a robust flavor, sauté minced fresh garlic with the grilled onions and peppers. This adds an aromatic punch that is simply irresistible.
-
Classic Upgrade: Choose artisanal buns such as ciabatta or pretzel rolls instead of standard hoagie rolls. The unique texture enhances the entire sandwich experience.
These variations not only offer fun twists to the classic recipe, but they also allow you to cater to different palates, making your next gathering a hit. For more delicious grilling ideas, check out my Mexican Grilled Chicken or consider these Grilled Shrimp Bowls for a delightful side!
Expert Tips for Grilled Kielbasa Sandwiches
-
Choose Quality Kielbasa: Opt for high-quality beef kielbasa for the best flavor and juiciness. Avoid pre-packaged versions that may contain fillers.
-
Vegetable Care: Slice veggies uniformly to ensure even grilling. Overcrowding the grill can lead to steaming instead of charring, which affects the flavor of your Grilled Kielbasa Sandwiches.
-
Oil Wisely: While olive oil adds moisture, don’t overdo it! Too much oil can cause flare-ups on the grill and lead to a greasy sandwich.
-
Grill for Flavor: For extra flavor, consider adding a splash of balsamic vinegar to the vegetables while they marinate. This enriches the taste of your grilled toppings.
-
Experiment Freely: Feel free to get creative! Switch up your cheeses and toppings for a unique twist on the classic recipe, ensuring your Grilled Kielbasa Sandwiches are always exciting.
Make Ahead Options
These Grilled Kielbasa Sandwiches with Sweet Onion Flavor are perfect for meal prep enthusiasts! You can slice and season the bell peppers and onions up to 24 hours in advance, refrigerating them in an airtight container to maintain their vibrant colors and crisp texture. Additionally, grill the kielbasa ahead of time and store it in the fridge for up to 3 days. When you’re ready to serve, simply reheat the kielbasa on the grill for a few minutes until warmed through, then toast your sandwich rolls as desired. This way, you’ll have delicious, convenient sandwiches ready to enjoy, bringing that homemade goodness to your busy weeknights!
Grilled Kielbasa Sandwiches with Sweet Onion Flavor Recipe FAQs
How do I choose the best kielbasa?
Absolutely! When selecting kielbasa, look for high-quality brands that use fresh ingredients. Opt for beef, pork, or turkey based on your flavor preference. The sausage should feel firm and free from excessive air pockets, indicating a good texture. Avoid pre-packaged versions with fillers as they can detract from the flavor of your Grilled Kielbasa Sandwiches with Sweet Onion Flavor.
What is the best way to store leftovers?
Very! To store leftover grilled kielbasa sandwiches, place them in an airtight container in the fridge for up to 3 days. For the best results, consider wrapping each sandwich tightly in plastic wrap before placing it in the container. When you’re ready to serve again, reheat them in the oven to maintain the delicious flavors and warmth. Microwaving is also an option, but it may affect the bun’s texture.
Can I freeze grilled kielbasa sandwiches?
Of course! Wrapping your sandwiches tightly in plastic wrap followed by aluminum foil ensures they stay fresh. They can be frozen for up to 2 months! When you’re ready to eat, simply reheat directly from the freezer. Preheat your oven to 350°F (175°C) and bake wrapped sandwiches for about 20-25 minutes or until warmed through. This method helps retain a crispy bun!
What should I do if my veggies are overcooked?
Not to worry! If your grilled vegetables are overcooked, they may have lost their vibrant color and crisp texture. If they turn out mushy, next time try cutting your bell peppers and onions into larger pieces to prevent them from cooking too quickly. Also, keep an eye on the grill; stirring occasionally can help ensure they get that perfect char without becoming too soft.
Are these sandwiches suitable for people with dietary restrictions?
Absolutely! You can easily make these sandwiches gluten-free by using gluten-free rolls. To cater to different dietary needs, you can swap out the kielbasa for plant-based sausage. Always check labels for allergens like wheat or dairy if you’re serving guests with allergies. The optional toppings can also be adjusted to align with dietary preferences, making this recipe versatile for everyone!
What are the best toppings to add to my grilled kielbasa sandwiches?
Very! The topping options are limitless—add melted provolone or mozzarella cheese for richness, some tangy mustard, or even spicy aioli for a kick. You might also consider adding fresh herbs like basil or cilantro for an aromatic touch. Don’t hesitate to get creative; layer in toppings that appeal to your taste preferences to make each Grilled Kielbasa Sandwich with Sweet Onion Flavor truly unique!
Ultimate Grilled Kielbasa Sandwiches with Sweet Onion Flavor
Ingredients
Equipment
Method
- Preheat your grill or stovetop grill pan over medium-high heat, aiming for about 400°F.
- In a bowl, combine sliced red, yellow, and green bell peppers with sweet onions, drizzle with olive oil, garlic powder, Italian seasoning, salt, and pepper. Toss to coat.
- Spread the seasoned vegetables on the grill and cook for 8-10 minutes, turning occasionally.
- Place the beef kielbasa on the grill and cook for 4-5 minutes on each side until browned.
- Toast the hoagie rolls on the grill for 1-2 minutes, cut side down.
- Assemble the sandwiches with grilled kielbasa, grilled peppers, and onions, adding cheese and condiments if desired.
- Serve warm with sides like coleslaw or grilled corn.