

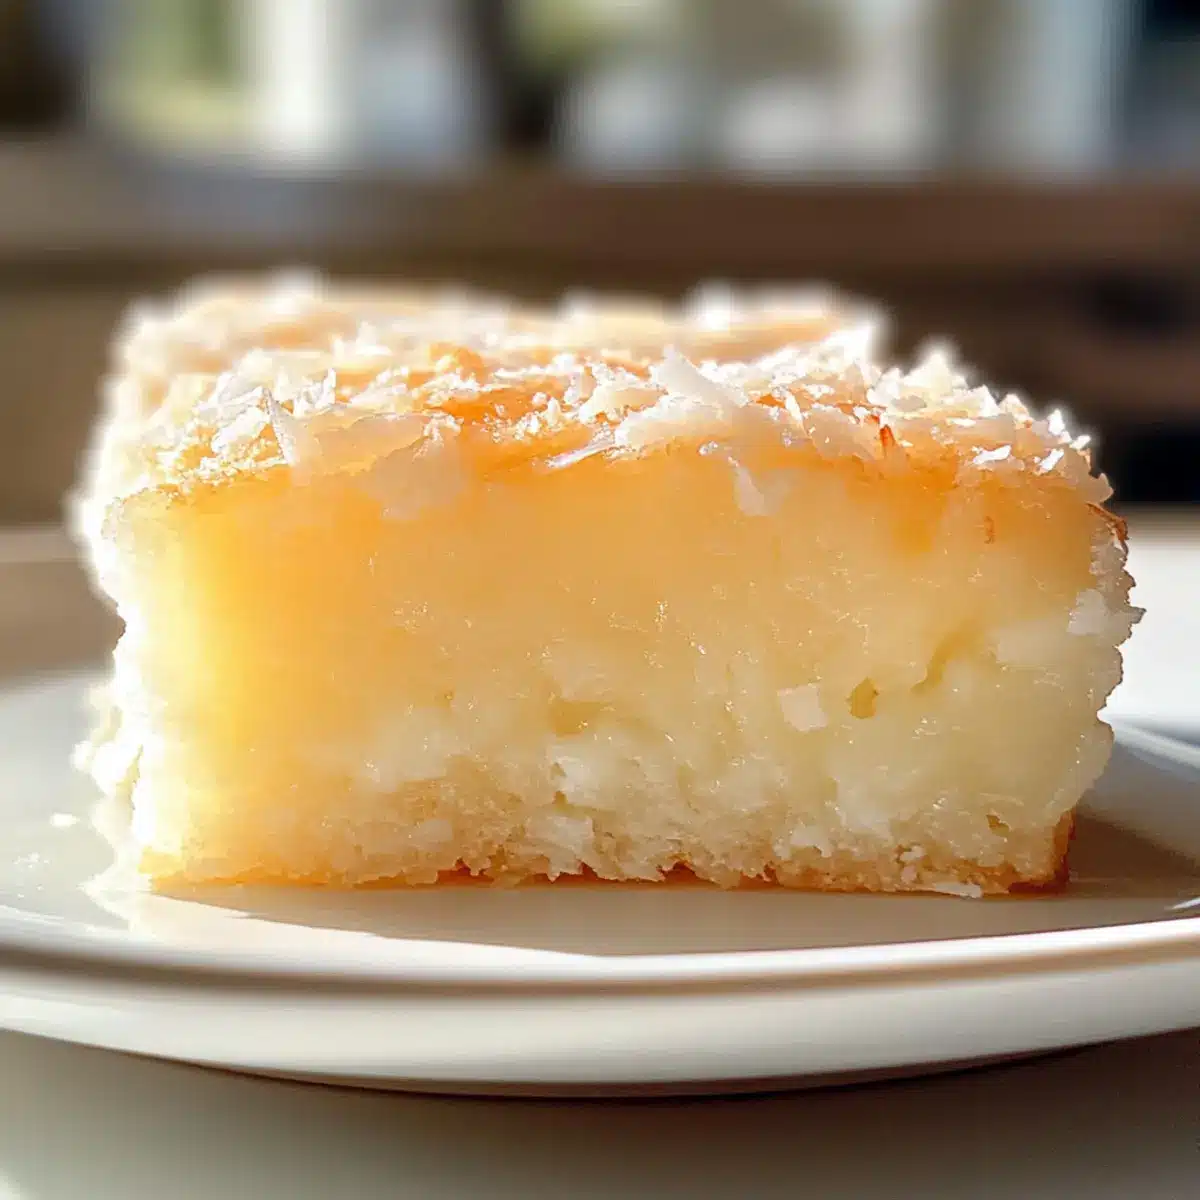
On a sun-kissed afternoon, the tantalizing aroma of baking filled the kitchen, hinting at something special on the way. Hawaiian Butter Mochi is an enchanting dessert that captures the spirit of the islands, bringing together a lush combination of chewy sweetness and creamy coconut goodness. This gluten-free treat is not only easy to whip up—just mix and bake—but it’s also a guaranteed crowd-pleaser that will leave your guests clamoring for seconds. With its unique texture and delightful flavor, this buttery mochi is perfect for any occasion, whether it’s a family gathering or a potluck with friends. As the sugary squares cool on the counter, I can’t help but wonder: will you be adventurous enough to try adding ube, matcha, or even pandan for an unexpected twist?
Why is Hawaiian Butter Mochi so irresistible?
Crowd-Pleasing Delight: This dessert is a guaranteed favorite, captivating both kids and adults alike.
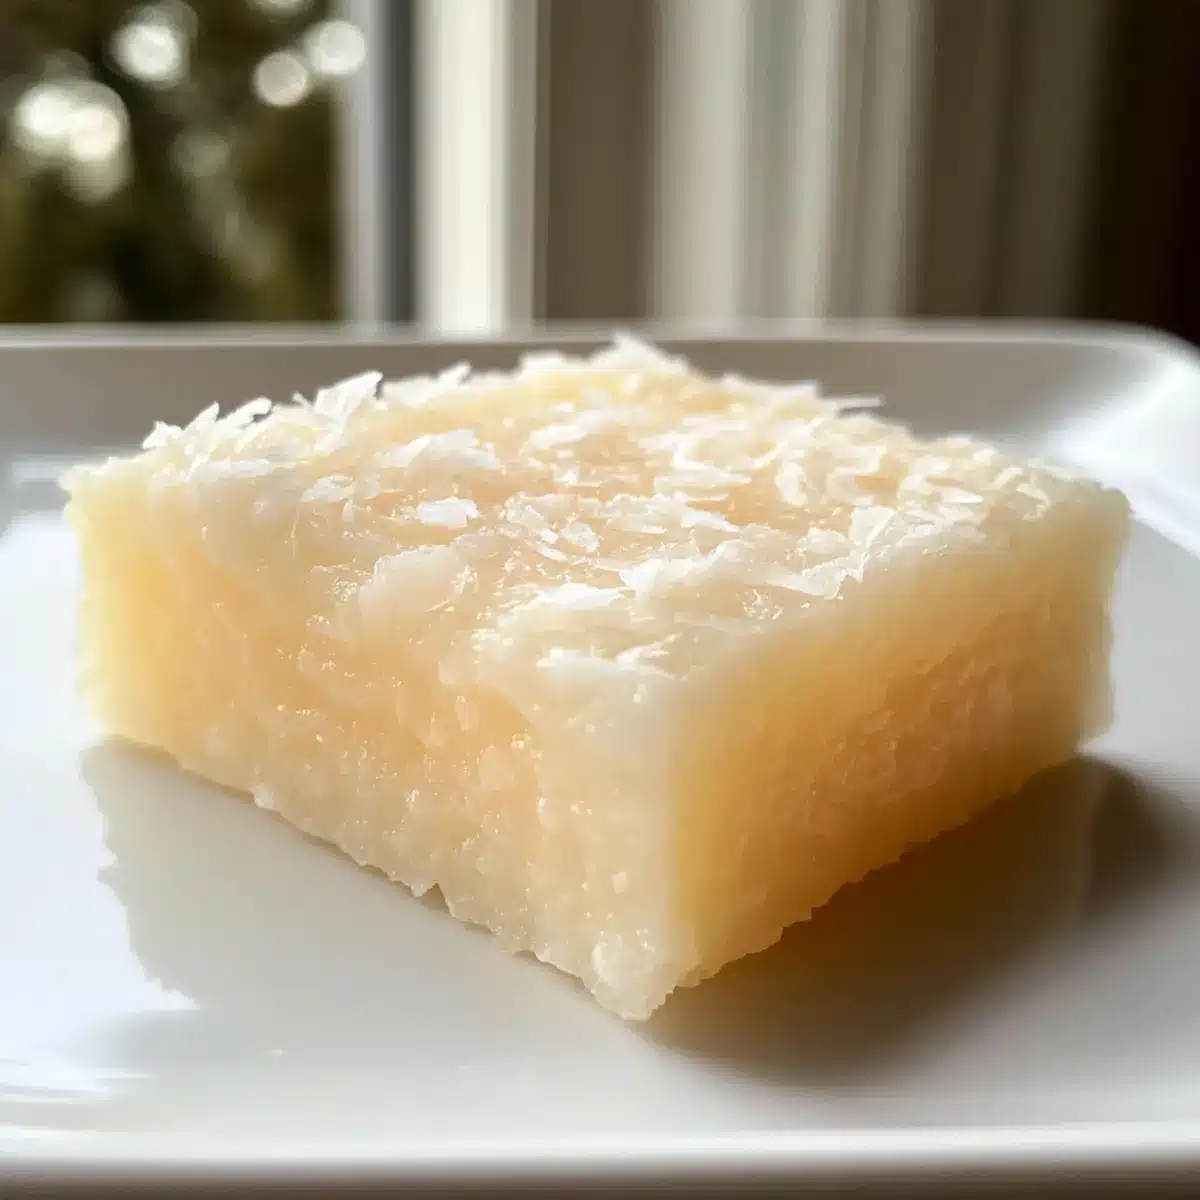
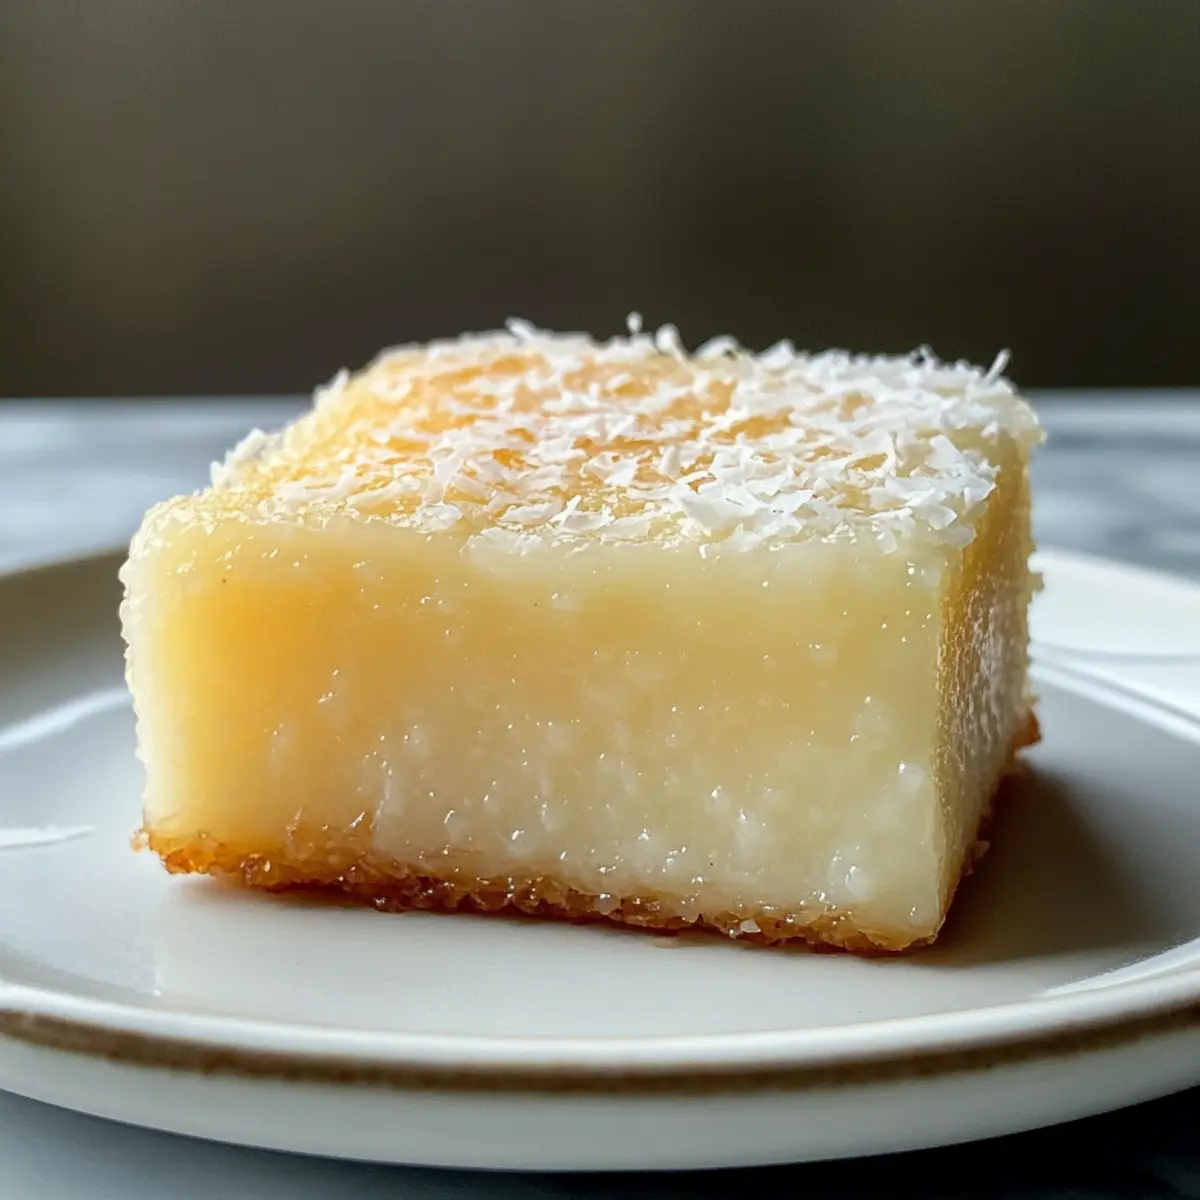
Unique Texture: The chewy, bouncy consistency offers a delightful experience that’s unlike any other treat.
Simple Preparation: Just mix, bake, and enjoy! Perfect for busy home cooks looking for hassle-free recipes.
Versatile Variations: Get creative! Customize it with shredded coconut, ube, or matcha for unique flavors. For inspiration, check out my Hawaiian Chicken Bowl for another delightful dish to enjoy!
Gluten-Free Option: Using sweet rice flour makes this treat suitable for gluten-sensitive friends.
Serving Flexibility: Serve warm, at room temperature, or chilled – perfect for any gathering or occasion!
Hawaiian Butter Mochi Ingredients
For the Batter
- Sweet Rice Flour – Provides the chewy texture of the mochi and is crucial for achieving that perfect bounce.
- Coconut Milk – Adds creaminess and a rich coconut flavor; you can substitute with whole milk if preferred.
- Eggs – Essential for structure and moisture—make sure to use room temperature eggs for smoother mixing.
- Sugar – Balances the flavors with sweetness; feel free to adjust to your personal taste.
- Melted Butter – Offers enhanced flavor and moisture; replace it with coconut oil for a dairy-free version.
- Vanilla Extract – Infuses depth and warmth; always opt for pure extract for the best results.
- Baking Powder – Creates a light and airy texture in your Hawaiian Butter Mochi.
Optional Add-ins
- Shredded Coconut – For an extra coconut kick, toss some into the batter or sprinkle on top before baking.
- Ube Extract or Paste – Transform your mochi into a stunning purple delight with a lovely flavor twist.
- Matcha Powder or Pandan Extract – Use these for a fun green version; they add color and unique taste!
Step‑by‑Step Instructions for Hawaiian Butter Mochi
Step 1: Preheat the Oven and Prepare the Pan
Start by preheating your oven to 350°F (175°C). While it heats up, grab a 9×13-inch baking pan and generously grease it with butter or cooking spray. For added assurance against sticking, line the bottom and sides with parchment paper, leaving some overhang. This will make it easy to lift out the finished Hawaiian Butter Mochi once it’s baked.
Step 2: Whisk Wet Ingredients Together
In a large mixing bowl, crack in two room temperature eggs and whisk them vigorously until frothy. Gradually add in the sugar, coconut milk, melted butter, and vanilla extract. Continue mixing until all the ingredients are thoroughly combined and the mixture becomes a smooth, creamy consistency. You should see a lovely blend of ingredients that smell deliciously tropical.
Step 3: Incorporate Dry Ingredients
Now, it’s time to bring in the dry ingredients! Gradually sift in the sweet rice flour and baking powder to the wet mixture. Using a spatula or wooden spoon, gently fold the ingredients together until the batter is smooth. Keep an eye out for any lumps, as you want a silky batter that will create that characteristic chewiness in your Hawaiian Butter Mochi.
Step 4: Transfer the Batter to the Pan
Carefully pour your beautifully mixed batter into the prepared baking pan. Use a spatula to spread the batter evenly, ensuring that it reaches the corners of the pan. At this stage, you can sprinkle in shredded coconut or any additional ingredients if you’re feeling adventurous. Smooth the surface for that perfect, even bake.
Step 5: Bake the Mochi
Place the pan in your preheated oven and bake for 1 hour and 25 minutes. Keep an eye on it, as the top should turn a gorgeous golden brown when it’s done. You can gently shake the pan; the center should have a slight jiggle but shouldn’t appear liquidy. Baking a little longer if you prefer a firmer texture is perfectly fine.
Step 6: Cool and Cut the Mochi
Once your Hawaiian Butter Mochi is baked, remove it from the oven and let it cool in the pan for about 15 minutes. Afterward, use the parchment paper overhang to lift it out onto a cutting board. Allow it to cool for another 10-15 minutes before cutting into squares. The cooling time allows the chewy texture to really set and makes slicing easier.
Make Ahead Options
These Hawaiian Butter Mochi are perfect for meal prep, allowing you to save time on busy days! You can prepare the batter up to 24 hours in advance; simply mix all the wet ingredients with the dry ingredients as instructed, then transfer it to your greased pan, cover tightly with plastic wrap, and refrigerate. This helps maintain the mochi’s unique texture while preventing any drying out. When you’re ready to bake, just let the batter sit at room temperature for about 30 minutes before placing it in the preheated oven. This way, you’ll have a delicious treat waiting for you with minimal effort—just bake, cool, and enjoy the delightful coconut goodness!
Expert Tips for Hawaiian Butter Mochi
- Use Quality Ingredients: Fresh, high-quality coconut milk and pure vanilla extract will elevate your Hawaiian Butter Mochi’s flavor and overall taste.
- Watch the Bake Time: Every oven is different; check your mochi a few minutes earlier to avoid overbaking, which can lead to a dry texture.
- Cool Correctly: Allow your mochi to cool thoroughly before cutting—it helps achieve that perfect chewy consistency.
- Experiment with Variations: Don’t hesitate to try adding shredded coconut, ube, or matcha to make your Hawaiian Butter Mochi truly unique!
- Storage Matters: Keep it in an airtight container to maintain moisture, ensuring it stays chewy and delicious for days.
Hawaiian Butter Mochi Variations & Substitutions
Feel free to get creative and personalize this delightful recipe to suit your taste buds and dietary preferences!
Dairy-Free: Replace melted butter with coconut oil for a rich, dairy-free version that’s just as delicious.
Ube Twist: Add ube extract or paste to the batter for a stunning purple hue and a hint of unique flavor that will surprise everyone.
Matcha Magic: Incorporate matcha powder for a fresh green version that not only adds color but also a delightful earthy taste.
Extra Coconut: Toss in shredded coconut for a beautiful chewy texture that enhances the tropical flavor of the mochi.
Pandan Variation: Use pandan extract instead of vanilla for a fragrant, colorful twist that brings an exotic touch to your dessert. Think of it as a celebration in every bite!
Gluten-Free Alternative: While sweet rice flour is already gluten-free, you can try using mochiko for a different texture and equal chewiness.
Nutty Flavor: For those who crave crunch, fold in some chopped nuts like macadamia or almond for a delightful textural contrast.
Spicy Heat: If you’re feeling adventurous, add a pinch of cayenne or chili powder to the batter for a surprising kick that balances the sweetness.
For even more culinary inspiration, check out my Hawaiian Chicken Bowl for another delicious dish to explore!
How to Store and Freeze Hawaiian Butter Mochi
Room Temperature: Keep leftover Hawaiian Butter Mochi in an airtight container at room temperature for up to 3 days to maintain its chewy texture.
Fridge: For prolonged freshness, refrigerate your mochi in an airtight container for up to 1 week. This will help maintain its moisture and flavor.
Freezer: Freeze Hawaiian Butter Mochi in a sealed, freezer-safe container or wrapped tightly in plastic wrap for up to 3 months. Thaw at room temperature before enjoying.
Reheating: For a warm treat, reheat individual pieces in the microwave for 10-15 seconds. This restores some of that fresh-baked deliciousness!
What to Serve with Hawaiian Butter Mochi
As you savor the delightful sweetness of Hawaiian Butter Mochi, consider these delicious pairings to create a memorable meal.
Fresh Mango Slices: The juicy, tropical flavor of fresh mango adds a refreshing contrast to the rich and chewy mochi. Pairing delightful sweetness with a light, fruity touch makes each bite a joy.
Coconut Sorbet: A scoop of creamy coconut sorbet enhances the mochi’s coconut notes while providing a cool, velvety texture that’s simply irresistible. It’s a perfect palate cleanser between bites!
Pineapple Chunks: Sweet, juicy pineapple brings a tangy brightness that complements the dessert beautifully. It adds a tropical flair, making every taste feel like a mini vacation.
Matcha Green Tea: This earthy, invigorating drink pairs wonderfully with the mochi, balancing its sweetness. The subtle bitterness of matcha emphasizes the dessert’s flavor profile and offers a refined touch.
Whipped Cream: A dollop of light, fluffy whipped cream adds a creamy contrast, elevating the mochi’s sweetness. Consider a sprinkle of toasted coconut on top for extra flair!
Espresso: The bold richness of a freshly brewed espresso offers a lovely contrast to the sweet Hawaiian butter mochi, making for an unforgettable coffee dessert combo.
Chocolate Drizzle: A light drizzle of melted chocolate provides a luxurious touch, enhancing the dessert’s sweetness while adding an inviting visual appeal. What better way to indulge?
Cacao Nibs: Sprinkle some crunchy cacao nibs on top for added texture and a touch of dark chocolate flavor that elegantly complements the mochi’s sweetness.
Lychee Drink: Pair this airy, sweet beverage with the dense, buttery mochi for a fusion of textures and flavors that will transport you to a sunny tropical setting.
Enjoy these delightful accompaniments and make your Hawaiian Butter Mochi experience even more special!
Hawaiian Butter Mochi Recipe FAQs
What type of sweet rice flour should I use for Hawaiian Butter Mochi?
Absolutely, you want to use glutinous sweet rice flour, often labeled as “mochiko.” This type of flour gives Hawaiian Butter Mochi its signature chewy texture, essential for that delightful bounce. If you can’t find sweet rice flour, you may try other gluten-free flours, but the texture won’t be the same.
How should I store leftover Hawaiian Butter Mochi?
To keep your Hawaiian Butter Mochi fresh, store it in an airtight container at room temperature for up to 3 days. If you have leftovers after that, transfer it to the refrigerator, where it can last up to 1 week while maintaining its deliciously chewy texture. Just make sure it’s sealed nicely to avoid drying out.
Can I freeze Hawaiian Butter Mochi?
Yes, you can freeze Hawaiian Butter Mochi! Simply place it in a sealed, freezer-safe container, or wrap it tightly in plastic wrap and then aluminum foil for protection. It will keep well in the freezer for up to 3 months. When you’re ready to enjoy it, let it thaw at room temperature, or pop it in the microwave for a quick reheat.
What should I do if my Hawaiian Butter Mochi comes out too dry?
If your Hawaiian Butter Mochi turns out dry, it might be due to overbaking. Always start checking for doneness a few minutes early; the top should be golden brown and slightly firm but still jiggle a bit in the center. For moisture, you can also try adding a little extra coconut milk to your batter next time, keeping that tropical richness intact!
Are there any dietary considerations for Hawaiian Butter Mochi?
Absolutely! Hawaiian Butter Mochi is gluten-free, making it a great option for those with gluten sensitivities. However, be mindful of any allergies, especially regarding eggs and coconut. If you’re looking for dairy-free options, substitute melted butter with coconut oil, and make sure any add-ins, like extracts or toppings, are also free from allergens you need to avoid.

Hawaiian Butter Mochi: Chewy Coconut Bliss Everyone Loves
Ingredients
Equipment
Method
- Preheat your oven to 350°F (175°C) and grease a 9x13-inch baking pan.
- Whisk the room temperature eggs until frothy, then add sugar, coconut milk, melted butter, and vanilla extract.
- Sift in sweet rice flour and baking powder, then fold until smooth.
- Pour the batter into the prepared pan and add shredded coconut if desired.
- Bake for 1 hour and 25 minutes until golden brown.
- Let cool in the pan for 15 minutes, then on a cutting board for another 10-15 minutes before slicing.