

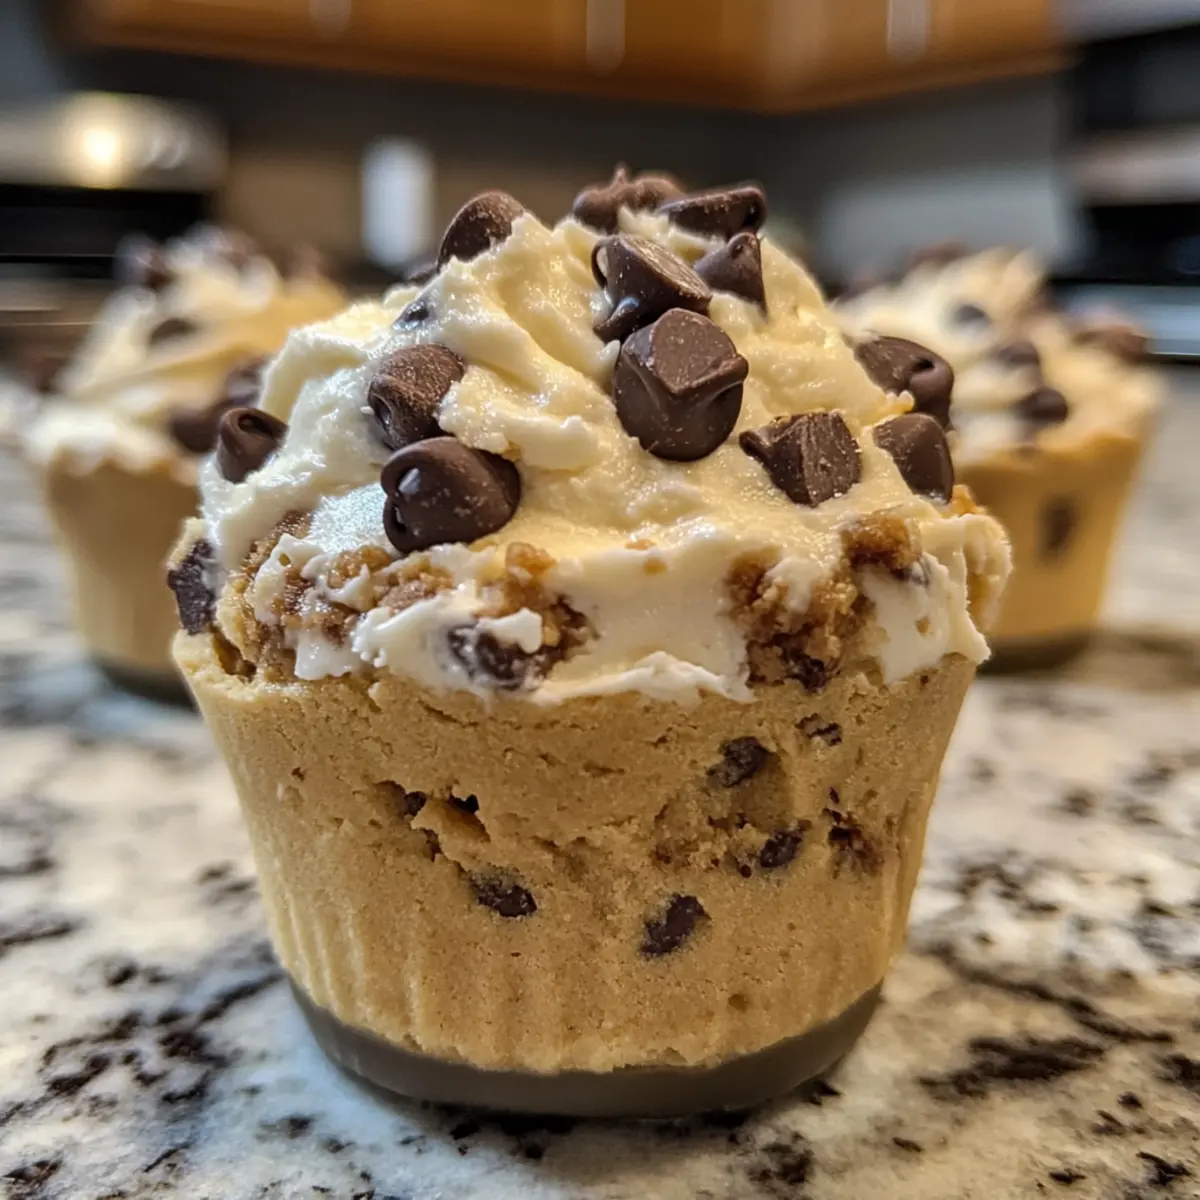
I stumbled upon a delightful secret that transformed my snack game: High Protein Yogurt Cookie Dough Cups. Picture creamy dairy-free yogurt mixed with rich peanut butter and a dash of vanilla protein powder, all enveloping delectable cookie dough bites. These treats not only satisfy your sweet tooth but also pack over 16 grams of protein, making them a guilt-free indulgence. Whether you’re reaching for a quick post-workout boost or seeking a healthier dessert, these cups are your new go-to solution! Plus, they’re freezer-friendly, meaning you can easily whip up a batch and enjoy them anytime. Want to discover how simple it is to create this nourishing treat? Let’s dive in!
Why are these cups a must-try?
Irresistible Flavor: Experience a perfect blend of creamy and nutty with every bite. The combination of dairy-free yogurt and peanut butter makes these cups incredibly delicious!
Nutritious and Guilt-Free: Each cup boasts over 16 grams of protein, giving you a satisfying treat without the guilt.
Versatile Recipe: Customize your cups by swapping in different nut butters or adding cocoa powder for a chocolate twist.
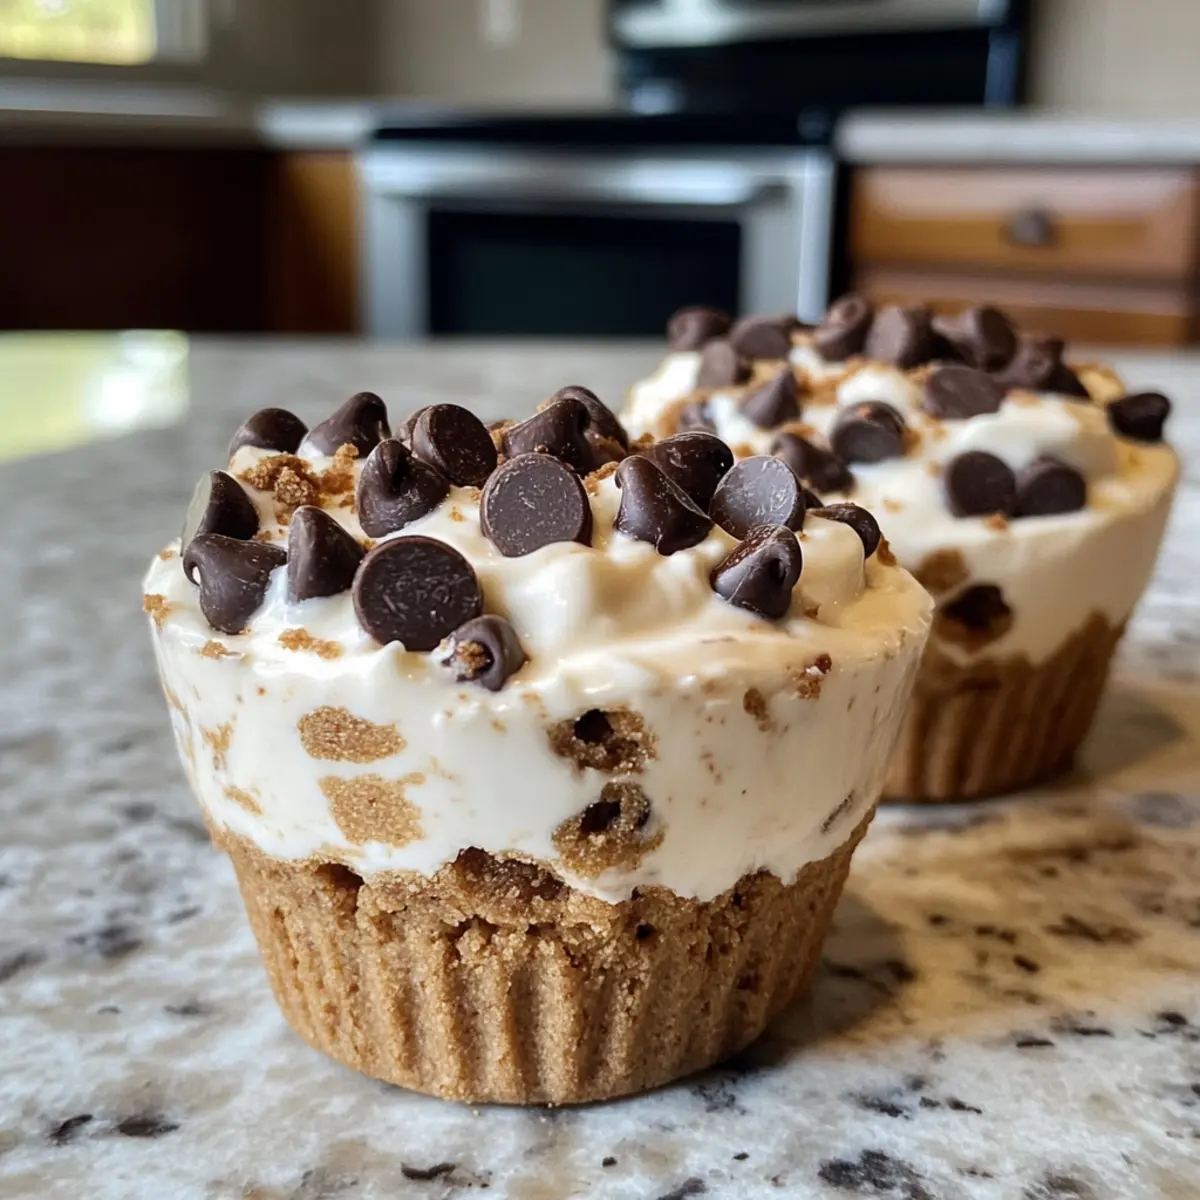
Freezer-Friendly: Make a batch and store them in your freezer for a quick snack or dessert anytime!
Perfect for Any Occasion: Whether for post-workout recovery or a sweet evening indulgence, these cups are sure to impress! Try them today and feel good knowing you’re enjoying something healthy.
High Protein Yogurt Cookie Dough Cups
Ingredient Breakdown
- Dairy-Free Yogurt – The creamy base that makes these cups delightful; consider using coconut yogurt for an even richer treat.
- Peanut Butter – Adds a nutty richness; almond butter can be a great alternative if you’re looking for a different flavor.
- Vanilla Protein Powder – Provides sweetness and packs in the protein; feel free to use any flavored protein powder for a twist.
- Vanilla Extract – Enhances the overall flavor profile; opt for pure vanilla extract for the best taste.
- Unsweetened Chocolate Chips – Bursts of chocolate flavor in every bite; dark or vegan chocolate chips can be used interchangeably.
- Protein Powder (for Cookie Dough) – Supplies structure and additional protein; any variety will work splendidly here.
- Oat Flour – Acts as the cookie dough base; almond flour or all-purpose flour can also be used if desired.
- Dairy-Free Milk – Helps reach the perfect cookie dough consistency; adjust the quantity based on the thickness you prefer.
- Maple Syrup – Sweetens the cookie dough naturally; if not vegan, honey or agave syrup make great substitutes.
- Chocolate Chips (for Cookie Dough) – Adds sweetness and texture; mini or dark chocolate chips work excellently based on your taste.
These High Protein Yogurt Cookie Dough Cups are not just delicious, but they’re also packed with goodness! Each bite brings you closer to a satisfying and nutritious treat.
Step‑by‑Step Instructions for High Protein Yogurt Cookie Dough Cups
Step 1: Mix the Yogurt Base
In a mixing bowl, combine 1 cup of dairy-free yogurt, 1/2 cup of peanut butter, 1 scoop of vanilla protein powder, and 1 teaspoon of vanilla extract. Stir until the mixture is smooth and creamy, ensuring no lumps remain. This should take about 2–3 minutes of mixing with a spatula or a whisk. You want a silky consistency that’s flavorful and inviting for your High Protein Yogurt Cookie Dough Cups.
Step 2: Prepare the Cookie Dough
In a separate bowl, combine 1 cup of protein powder, 1 cup of oat flour, 1 teaspoon of vanilla extract, and 1/4 cup of dairy-free milk with 1/4 cup of maple syrup. Mix everything together until a soft dough forms, about 3–5 minutes. If the dough is too sticky, gradually add more oat flour, but it should be cohesive and slightly sticky for perfect cookie bites.
Step 3: Incorporate Chocolate Chips
Once your cookie dough is ready, fold in 1/2 cup of chocolate chips—mini or dark based on your preference. Use a spatula to combine thoroughly, ensuring each bite is filled with delightful chocolatey goodness. This step adds texture and extra sweetness to your high protein yogurt cookie dough cups, making them even more scrumptious!
Step 4: Layer the Cups
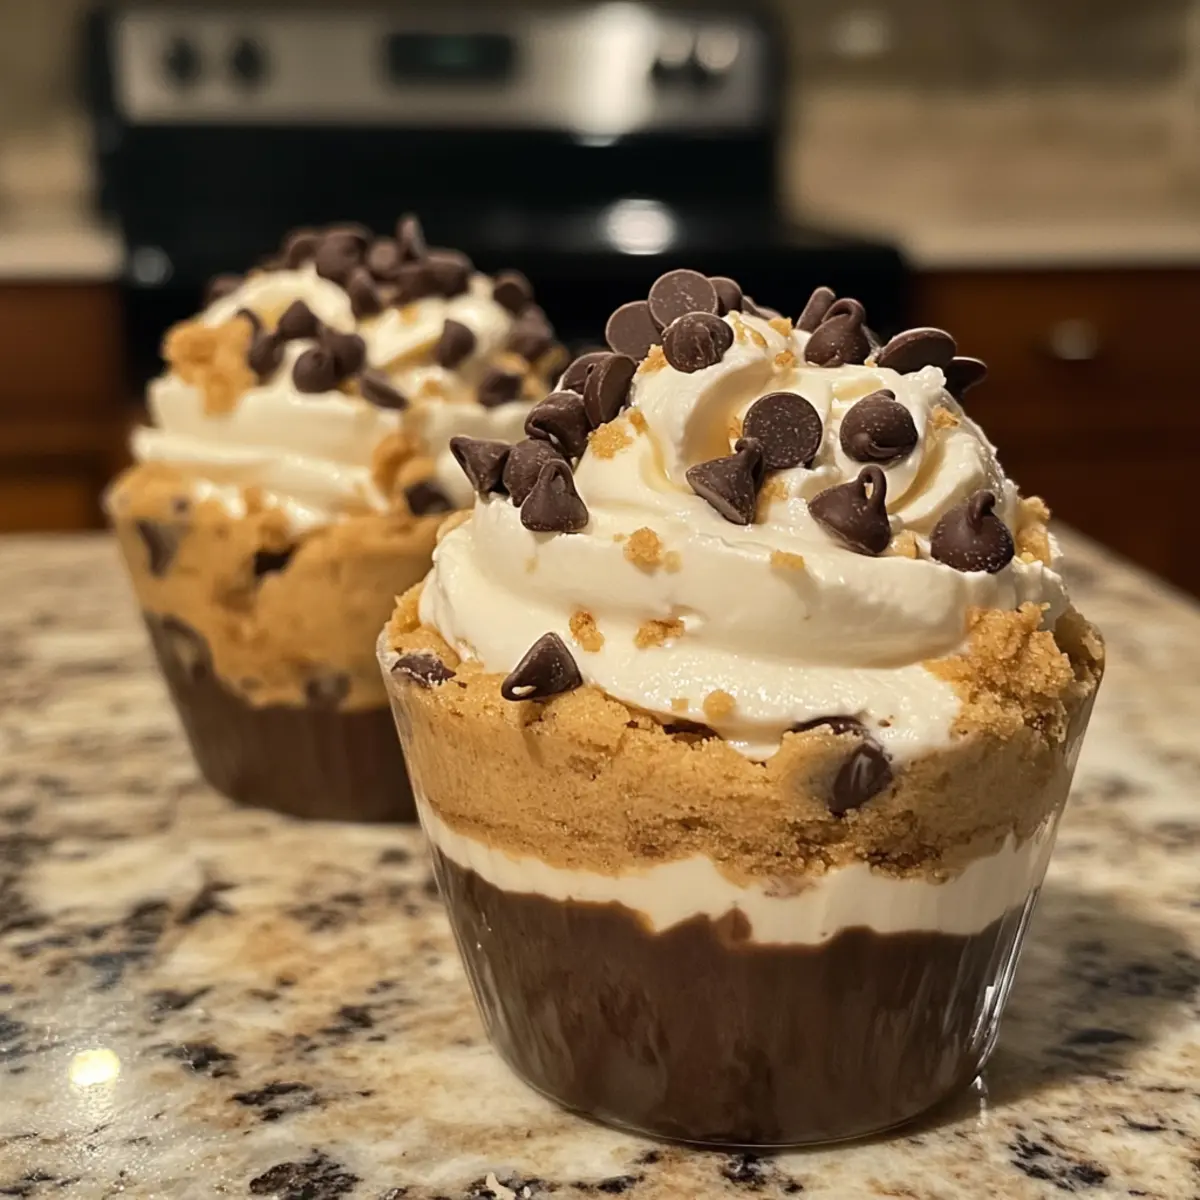
Take a set of small cups or silicone molds and add a spoonful of the yogurt mixture at the bottom of each. This layer creates the base for your treats. Use the back of a spoon to smooth it out evenly. The yogurt’s creaminess sets a perfect foundation for the indulgent cookie dough layer that follows, enhancing the overall flavor profile of your High Protein Yogurt Cookie Dough Cups.
Step 5: Add the Cookie Dough
Next, grab the cookie dough and form small rounds or spoonfuls, placing them on top of the yogurt layer in each cup. Gently press them to slightly flatten. This layer should be generous, showcasing the delicious cookie dough that complements the creamy yogurt. You want to see the contrasting layers as you build these delightful treats, creating a visual feast.
Step 6: Top with More Yogurt
Once the cookie dough is in place, add another layer of the yogurt mixture on top, covering the cookie dough completely. Smooth the top with a spatula, ensuring each cup is filled neatly. This layering not only enhances the aesthetics of your High Protein Yogurt Cookie Dough Cups but also balances the flavors between the creamy yogurt and the cookie dough.
Step 7: Freeze the Cups
Place the assembled cups in the freezer and allow them to chill for at least 2-3 hours, or until completely firm. This step is crucial to set the layers together and create that satisfying frozen treat texture. Once they’re solidified, you’ll know your High Protein Yogurt Cookie Dough Cups are ready to enjoy!
Step 8: Thaw Before Serving
When you’re ready to indulge, take the cups out of the freezer and let them thaw for about 5 minutes at room temperature. This brief wait ensures the cups have a more pleasant creamy texture when taking the first bite. Trust us—the wait will be worth it when you finally savor the delectable layers!

High Protein Yogurt Cookie Dough Cups Variations
Feel free to make these delightful cups your own by trying out these tasty variations!
Nut Butter Swap: Use almond or cashew butter instead of peanut butter for a different nutty flavor. Each nut brings its own unique richness that complements the creamy yogurt beautifully.
Cocoa Bliss: Mix in cocoa powder to the yogurt for a chocolaty twist that elevates the indulgence factor. The rich chocolate flavor pairs sublimely with the sweetness of the cookie dough.
Fruitful Addition: Incorporate dried fruits like cherries or cranberries in your cookie dough for a burst of natural sweetness and added texture. These fruits balance the richness perfectly!
Gluten-Free Option: Swap oat flour for almond flour to create a gluten-free version that still maintains that delicious cookie dough vibe. This adds a nutty undertone to each bite!
Spicy Kick: Add a pinch of cayenne or chili powder to the yogurt mixture if you enjoy a touch of heat with your sweets. The warm spice surprisingly enhances the flavor profile!
No-Sugar Option: Replace maple syrup with mashed bananas or unsweetened applesauce to create a naturally sweetened version. This makes the cups even healthier while keeping them delicious.
Texture Variation: For a crunchy surprise, toss in some crushed nuts or seeds into the cookie dough mix. The extra crunch creates an exciting contrast to the smooth yogurt.
Flavor Infusion: Try infusing your yogurt with a splash of almond or coconut extract for an additional layer of flavor. It will create a more complex taste experience in every delightful bite.
Explore these variations and revel in the joy of customizing your High Protein Yogurt Cookie Dough Cups to fit your cravings. For additional ideas, check out how to incorporate different ingredients into your snacks or explore other delicious healthy treats. Try it out and enjoy every moment of your culinary creativity!
Storage Tips for High Protein Yogurt Cookie Dough Cups
Fridge: Store in the refrigerator for up to 3 days in an airtight container if you plan to enjoy them soon.
Freezer: Keep your High Protein Yogurt Cookie Dough Cups in an airtight container or freezer-safe bag for up to one month. This allows for a quick and healthy snack anytime!
Thawing: Before enjoying, thaw the cups for about 5 minutes at room temperature for the best creamy texture.
Reheating: These cups are best enjoyed cold; avoid reheating as it may alter their delightful texture.
Make Ahead Options
These High Protein Yogurt Cookie Dough Cups are a fantastic choice for meal prep, allowing you to enjoy a delicious, nutritious treat anytime! You can prepare the yogurt mixture and cookie dough separately up to 3 days in advance, storing them in airtight containers in the refrigerator. To maintain the best quality, be sure to keep the yogurt and dough chilled and avoid mixing them until you’re ready to assemble. When you’re set to serve, simply layer the yogurt and cookie dough before freezing for at least 2-3 hours. This way, your cups will remain just as delightful and creamy whenever you need a quick snack or dessert!
What to Serve with High Protein Yogurt Cookie Dough Cups
Elevate your snack or dessert game with these delicious cups by pairing them with a few delightful accompaniments.
- Fresh Fruit Salad: A vibrant mix of seasonal fruits adds a refreshing contrast and brings natural sweetness to your treat.
- Nutty Granola: The crunch of nutty granola complements the creamy cups, adding texture and wholesome flavors to your snack experience.
- Dark Chocolate Drizzle: A rich drizzle of melted dark chocolate enhances the indulgence, making every bite even more irresistible!
- Chilled Coconut Milk: The creamy, tropical flavor of chilled coconut milk provides a luscious dip for your cups, enhancing the overall experience.
- Sweet Almond Butter: A dollop of almond butter on the side adds a nutty richness, making this a satisfying and protein-packed combination.
- Matcha Green Tea: For a calming beverage pairing, serve with a freshly whisked matcha latte; its earthy flavors wonderfully balance the sweetness.
- Homemade Whipped Coconut Cream: Lighter than traditional whipped cream, this fluffy topping adds a delightful finishing touch to your High Protein Yogurt Cookie Dough Cups.
- Frozen Berries: Frozen berries can be a refreshing side, providing a burst of flavor and a cool touch on a warm day.
- Herbal Iced Tea: A lightly sweetened herbal iced tea can be a perfect refreshment; its coolness pairs beautifully with these creamy cups.
Expert Tips for High Protein Yogurt Cookie Dough Cups
Creamy Yogurt Choice: Use coconut yogurt for a rich texture. If your yogurt is too thin, the cups won’t set well.
Dough Consistency: Gradually add dairy-free milk to the cookie dough to avoid a sticky mess. Aim for a cohesive, slightly sticky dough for the best results.
Layering Technique: Make sure to smooth each layer evenly in the cups. This not only creates a beautiful presentation but also ensures a balanced blend of flavors in your High Protein Yogurt Cookie Dough Cups.
Freezing Storage: Store your cups in an airtight container to prevent freezer burn and maintain flavor. Thaw slightly before serving for the best creamy experience.
Customization Ideas: Feel free to explore different nut butters or add-ins like dried fruits. This keeps your high protein yogurt cookie dough cups exciting and suits various taste preferences.
High Protein Yogurt Cookie Dough Cups Recipe FAQs
What type of dairy-free yogurt is best for this recipe?
I recommend using coconut yogurt for its rich and creamy texture, which really elevates the flavor of the High Protein Yogurt Cookie Dough Cups. If you choose a thinner yogurt, it might not set as firmly, leading to a less satisfying bite.
How should I store my High Protein Yogurt Cookie Dough Cups?
For short-term storage, keep your cups in the refrigerator in an airtight container for up to 3 days. If you’ve made a larger batch, they can be stored in the freezer to last up to one month. Just make sure to pack them in an airtight container or freezer-safe bag to prevent freezer burn.
Can I freeze my High Protein Yogurt Cookie Dough Cups? If so, how?
Absolutely! To freeze, assemble your cups completely and place them in the freezer for 2-3 hours until solid. After that, transfer them to an airtight container or freezer-safe bag for storage. When you’re ready to enjoy, thaw them at room temperature for about 5 minutes for that perfect creamy texture.
What if my cookie dough is too sticky?
Don’t worry! If your cookie dough turns out too sticky, simply add more oat flour, a tablespoon at a time, until you achieve the desired consistency. Aim for a cohesive dough that is slightly sticky but manageable. This way, your cookie dough bites will hold together beautifully in your High Protein Yogurt Cookie Dough Cups.
Are there any allergy considerations with these cups?
Yes! If you have nut allergies, you can substitute peanut butter with sunflower seed butter or another nut-free alternative. Make sure your chocolate chips are dairy-free as well. Always double-check the packaging to ensure everything fits your dietary needs.
Can I customize my High Protein Yogurt Cookie Dough Cups?
Very much so! Get creative by swapping out the nut butter for your favorite type, or adding ingredients like dried fruits, seeds, or different flavored protein powders. This flexibility allows you to tailor the cups to your taste preferences and dietary requirements!
High Protein Yogurt Cookie Dough Cups for Guilt-Free Bliss
Ingredients
Equipment
Method
- In a mixing bowl, combine 1 cup of dairy-free yogurt, 1/2 cup of peanut butter, 1 scoop of vanilla protein powder, and 1 teaspoon of vanilla extract. Stir until smooth and creamy.
- In a separate bowl, mix 1 cup of protein powder, 1 cup of oat flour, 1 teaspoon of vanilla extract, 1/4 cup of dairy-free milk, and 1/4 cup of maple syrup until a soft dough forms.
- Fold in 1/2 cup of chocolate chips to the cookie dough until evenly combined.
- In small cups or silicone molds, add a spoonful of the yogurt mixture to the bottom to create the base.
- Place small rounds of cookie dough on top of the yogurt layer, pressing gently to flatten slightly.
- Add another layer of the yogurt mixture on top, smoothing it out evenly.
- Freeze the assembled cups for at least 2-3 hours until completely firm.
- Let the cups thaw for about 5 minutes at room temperature before serving for the best texture.