

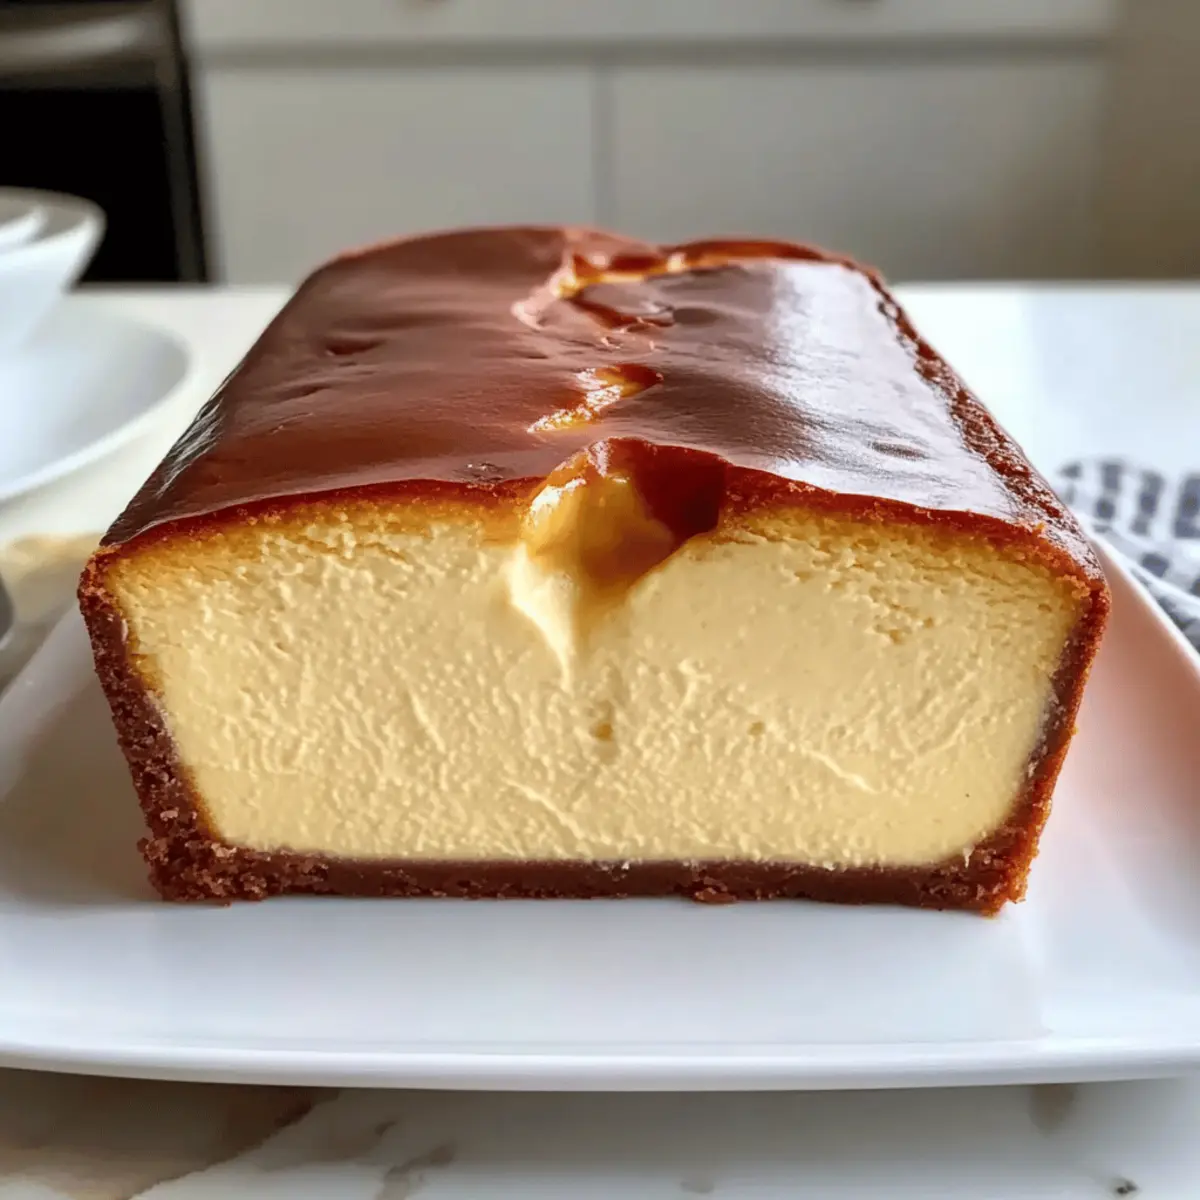
You know that magical moment when a dish turns out even better than you imagined? That’s exactly what happened the first time I baked this Loaf Pan Basque Cheesecake. This creamy indulgent delight is both simple to make and rewarding, boasting a lovely rustic appearance and a beautifully caramelized top that’s impossible to resist. Perfect for those times when you want to impress without spending all day in the kitchen, it offers the benefits of being forgiving for novice bakers and requires no crust—meaning less fuss and more flavor! Let me guide you through this easy-to-follow recipe that might just become your new go-to dessert. Are you ready to dive into this heavenly cheesecake experience?
Why Is This Cheesecake a Must-Try?
Simplicity: This Loaf Pan Basque Cheesecake is a breeze to whip up, making dessert accessible to every skill level.
Indulgent Flavor: With its caramelized top and creamy interior, each bite is a delightful blend of sweetness and depth.
No Crust Hassle: Say goodbye to crust-making! Enjoy all the cheesecake richness without the extra steps.
Perfect for Small Gatherings: The small-batch design is ideal for intimate occasions or satisfying cravings without leftovers.
Versatile Additions: Want to customize? Add citrus zest or chocolate chips for a unique twist that suits your taste.
For more delicious cheesecake ideas, check out my Oreo Cheesecake Indulge or these lovely Rhubarb Streusel Cheesecake bars!
Loaf Pan Basque Cheesecake Ingredients
For the Batter
• Cream Cheese – Use full-fat for the best creamy texture and structure.
• Sugar – This sweetens the cheesecake and helps achieve that deliciously caramelized top.
• Eggs – Fresh eggs are key for binding the ingredients and creating a custard-like experience.
• Heavy Cream – Provides richness and creaminess; swap with a non-dairy alternative if needed.
• Vanilla Extract – Enhances the flavor complexity for a more delightful indulgence.
• Salt – Balances sweetness and intensifies all the wonderful flavors in your loaf pan Basque cheesecake.
Optional Enhancements
• Citrus Zest – A sprinkle of lemon or orange zest can brighten the flavors beautifully.
• Chocolate Chips – Fold in some chips for a deliciously decadent twist!
Step‑by‑Step Instructions for Loaf Pan Basque Cheesecake
Step 1: Preheat the Oven
Begin by preheating your oven to 400°F (200°C). This high temperature is crucial for achieving the signature caramelization on top of your Loaf Pan Basque Cheesecake. Make sure your oven is fully heated before moving on to the next step, as it sets the stage for that perfect finish.
Step 2: Prepare the Batter
In a large mixing bowl, combine the room-temperature cream cheese and sugar using an electric mixer. Blend these ingredients on medium speed until the mixture is smooth and creamy, with no lumps remaining. This process should take about 3-5 minutes. By ensuring that your cream cheese is at room temperature, you’ll achieve a velvety batter for your delectable cheesecake.
Step 3: Incorporate the Eggs
Next, add in the eggs one at a time, mixing on low speed after each addition until well incorporated. This method helps to achieve a custardy texture in your Loaf Pan Basque Cheesecake. Take your time with this step; it’s essential for creating that rich, creamy consistency without introducing too much air.
Step 4: Add Cream and Flavor
After the eggs are well combined, gently pour in the heavy cream and vanilla extract. Mix on low speed until everything is smoothly blended. This step adds richness and depth to your cheesecake, bringing out the flavors spectacularly. Aim for a uniform mixture without over-mixing, which can lead to cracks during baking.
Step 5: Pour into the Loaf Pan
Grease your loaf pan thoroughly to prevent sticking, then carefully pour the cheesecake batter into it. Use a spatula to ensure an even distribution across the pan. This careful preparation is essential for a beautiful, even bake, ensuring that every slice of your Loaf Pan Basque Cheesecake will look as good as it tastes.
Step 6: Bake to Perfection
Place the loaf pan in the preheated oven and bake for 30-40 minutes. The top should turn a deep brown while the center remains slightly jiggly. This contrast creates that signature look and texture of a Basque cheesecake. Keep a close eye on it, as ovens can vary in temperature and baking time.
Step 7: Cool Before Serving
Once out of the oven, allow the cheesecake to cool completely in the pan. This resting period helps the cheesecake set further. You’ll know it’s ready to be removed when it is still slightly warm. Avoid rushing this step; a gentle cooling will enhance flavor and texture.
Step 8: Chill in the Refrigerator
For the best flavor and texture, transfer the cheesecake to the refrigerator and chill for at least 2 hours, or overnight if possible. This step allows the flavors to meld beautifully. Keeping the Loaf Pan Basque Cheesecake cold will also make it easier to slice when you’re ready to serve!
Step 9: Serve and Enjoy
When ready to serve, slice your cheesecake into portions and enjoy the creamy indulgence. Consider garnishing with a light dusting of powdered sugar or some fresh berries for a pop of color. Each bite of this Loaf Pan Basque Cheesecake, with its deliciously rich flavor and creamy texture, will surely be a hit!
What to Serve with Loaf Pan Basque Cheesecake?
Prepare to elevate your dessert experience with delightful pairings that will complement the rich flavors of this luscious cheesecake.
-
Fresh Berries: The tangy burst of strawberries or blueberries adds a refreshing contrast to the creamy cheesecake, enhancing every bite effortlessly.
-
Whipped Cream: A dollop of lightly sweetened whipped cream softens the richness, creating a light and airy finish that balances beautifully.
-
Chocolate Sauce: Drizzling warm chocolate sauce over your slice can intensify the indulgence and add a decadent touch to each forkful.
-
Coffee Pairing: A cup of bold, roasted coffee enhances sweetness, making each dessert moment feel cozy and indulgent—perfect for an after-dinner treat.
-
Zesty Lemon Curd: The bright, citrusy notes of lemon curd awaken the palate and provide a heavenly contrast to the cheesecake’s smooth texture.
-
Caramel Sauce: A drizzle of warm caramel sauce amplifies the dessert’s luxurious feel, enriching the overall flavor experience in a delightful way.
Serve any of these pairings alongside your Loaf Pan Basque Cheesecake to turn a simple dessert into a magnificent celebration of flavors!
How to Store and Freeze Loaf Pan Basque Cheesecake
Fridge: Store your Loaf Pan Basque Cheesecake in an airtight container in the refrigerator for up to 5 days. This keeps it fresh and creamy, ready for any sweet cravings!
Freezer: If you wish to freeze leftovers, wrap the cheesecake tightly in cling film and then place it in a freezer-safe bag. It will hold its flavor for up to 3 months.
Thawing: To enjoy frozen cheesecake, transfer it to the fridge to thaw overnight. This gradual process allows the lovely texture to return without losing its creaminess.
Serving After Storage: For best results, chill it in the fridge for a couple of hours after thawing before serving. This helps the flavors meld beautifully!
Expert Tips for Loaf Pan Basque Cheesecake
-
Room Temperature Cream Cheese: Ensure your cream cheese is at room temperature to create a smooth batter. Cold cream cheese can lead to lumps, ruining your cheesecake’s texture.
-
Mind the Baking Time: Watch closely as the cheesecake bakes; it should have a dark brown top while the center remains slightly jiggly. Overbaking may result in a dry cheesecake.
-
Mix Gently: Overmixing can introduce too much air, leading to cracks. Mix just until incorporated to maintain that creamy interior texture in your loaf pan Basque cheesecake.
-
Cool Properly: Let the cheesecake cool completely in the pan before refrigerating. This allows it to set correctly, enhancing flavor and making it easier to slice later.
-
Chill for Best Flavor: Refrigerate your cheesecake for at least two hours or overnight before serving. This resting time allows the flavors to develop fully and improves texture.
Make Ahead Options
This Loaf Pan Basque Cheesecake is a fantastic option for busy home cooks looking to save time without sacrificing quality! You can prepare the cheesecake batter up to 24 hours in advance—just cover and refrigerate it before pouring it into the loaf pan. Additionally, bake the cheesecake in advance, then allow it to cool completely and refrigerate for up to 3 days. To maintain its luscious texture, ensure it is well-wrapped to prevent it from absorbing any odors. When you’re ready to serve, simply slice and garnish as desired; it will taste just as fabulous as if it were freshly made!
Loaf Pan Basque Cheesecake Variations
Feel free to explore exciting twists and substitutions, making this cheesecake your own delightful creation!
- Dairy-Free: Substitute heavy cream with coconut cream for a dairy-free indulgence, offering a tropical twist.
- Lighter Option: Use evaporated milk in place of heavy cream to lighten the experience while maintaining creaminess.
- Flavor Boost: Add a tablespoon of citrus zest, like lemon or orange, for a refreshing burst of flavor that brightens each bite.
- Chocoholics Delight: Fold in chocolate chips or a rich chocolate swirl for decadence that complements the cheesecake’s creamy base.
- Fruit Fusion: Swirl in fruit puree, such as raspberry or strawberry, for a sweet-tart counterpart to the rich cheesecake.
- Nutty Crunch: Top with crushed nuts or praline for a delightful texture contrast and an added layer of flavor.
- Spiced Twist: Incorporate a touch of cinnamon or nutmeg for warmth that elevates the cheesecake experience to another level.
For more inspiration, you might enjoy trying an Oreo Cheesecake Indulge or these delightful Rhubarb Streusel Cheesecake bars!
Loaf Pan Basque Cheesecake Recipe FAQs
What type of cream cheese should I use for the best results?
Absolutely use full-fat cream cheese! This ensures that your Loaf Pan Basque Cheesecake has the creamy texture and structure it needs. Room temperature cream cheese is essential for easy blending—don’t skip this step, as cold cream cheese can lead to lumps.
How long can I store the cheesecake in the refrigerator?
You can keep your Loaf Pan Basque Cheesecake in an airtight container in the fridge for up to 5 days. Just be sure it’s well-sealed to maintain its freshness and creamy texture!
Can I freeze this cheesecake, and if so, how?
Very! To freeze your Loaf Pan Basque Cheesecake, wrap it tightly in cling film, then place it in a freezer-safe bag or container. This method prevents freezer burn and will keep it fresh for up to 3 months. When you’re ready to enjoy, just move it to the refrigerator to thaw overnight.
What should I do if the top of my cheesecake isn’t dark brown?
Don’t worry if your cheesecake doesn’t get that beautiful caramelized top! Make sure your oven temperature is accurately set and that you’re using a high baking temperature (400°F/200°C). If the top is pale, you might need to bake it a little longer—just keep an eye on the center to ensure it remains slightly jiggly.
Are there any dietary considerations for this cheesecake?
Definitely! This Loaf Pan Basque Cheesecake can be made gluten-free by ensuring that all ingredients are labeled gluten-free. If you have dairy allergies, consider substituting the heavy cream with a non-dairy alternative like coconut cream, which will provide a similar richness. Always check labels for potential allergens!
Can I make any substitutions in the ingredients?
Of course! You can replace heavy cream with evaporated milk for a lighter cheesecake. Additionally, feel free to enhance the flavor by adding citrus zest, like lemon or orange, right into the batter. And if you’re feeling adventurous, fold in chocolate chips or a swirl of fruit puree before baking for a fun twist!
Loaf Pan Basque Cheesecake: Creamy Indulgence Made Easy
Ingredients
Equipment
Method
- Preheat your oven to 400°F (200°C).
- In a large mixing bowl, combine the cream cheese and sugar using an electric mixer until smooth and creamy.
- Add eggs one at a time, mixing on low speed after each addition.
- Gently pour in heavy cream and vanilla extract, mixing on low speed until blended.
- Grease your loaf pan thoroughly, then pour the cheesecake batter into it.
- Bake in the preheated oven for 30-40 minutes until the top is brown and the center is slightly jiggly.
- Allow the cheesecake to cool completely in the pan.
- Transfer to the refrigerator and chill for at least 2 hours, or overnight if possible.
- Slice and enjoy your cheesecake, possibly garnishing with powdered sugar or fresh berries.