

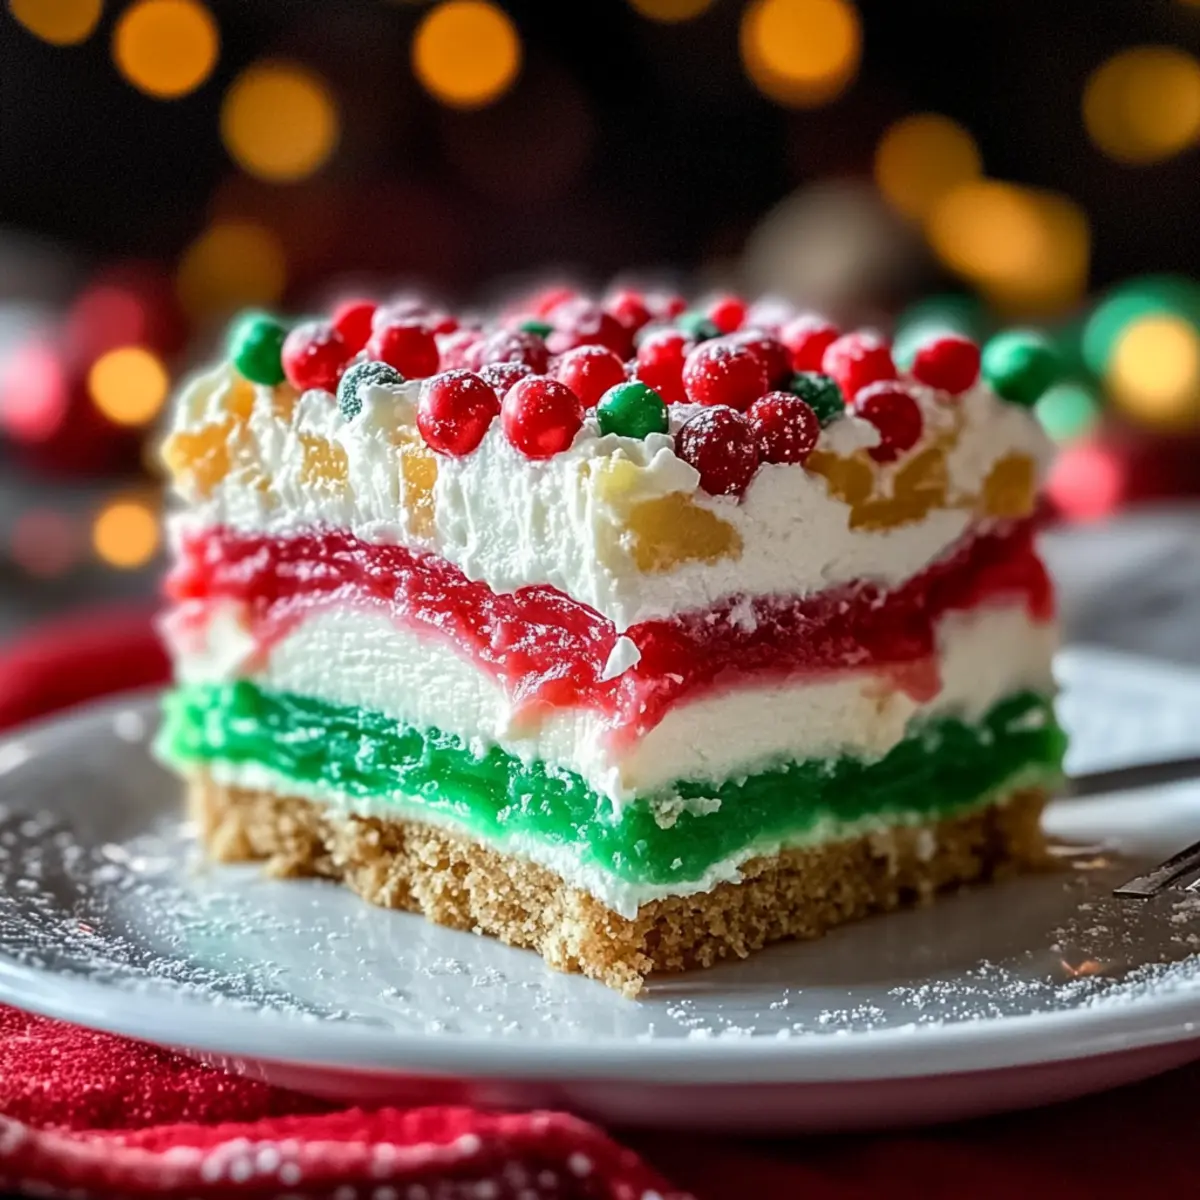
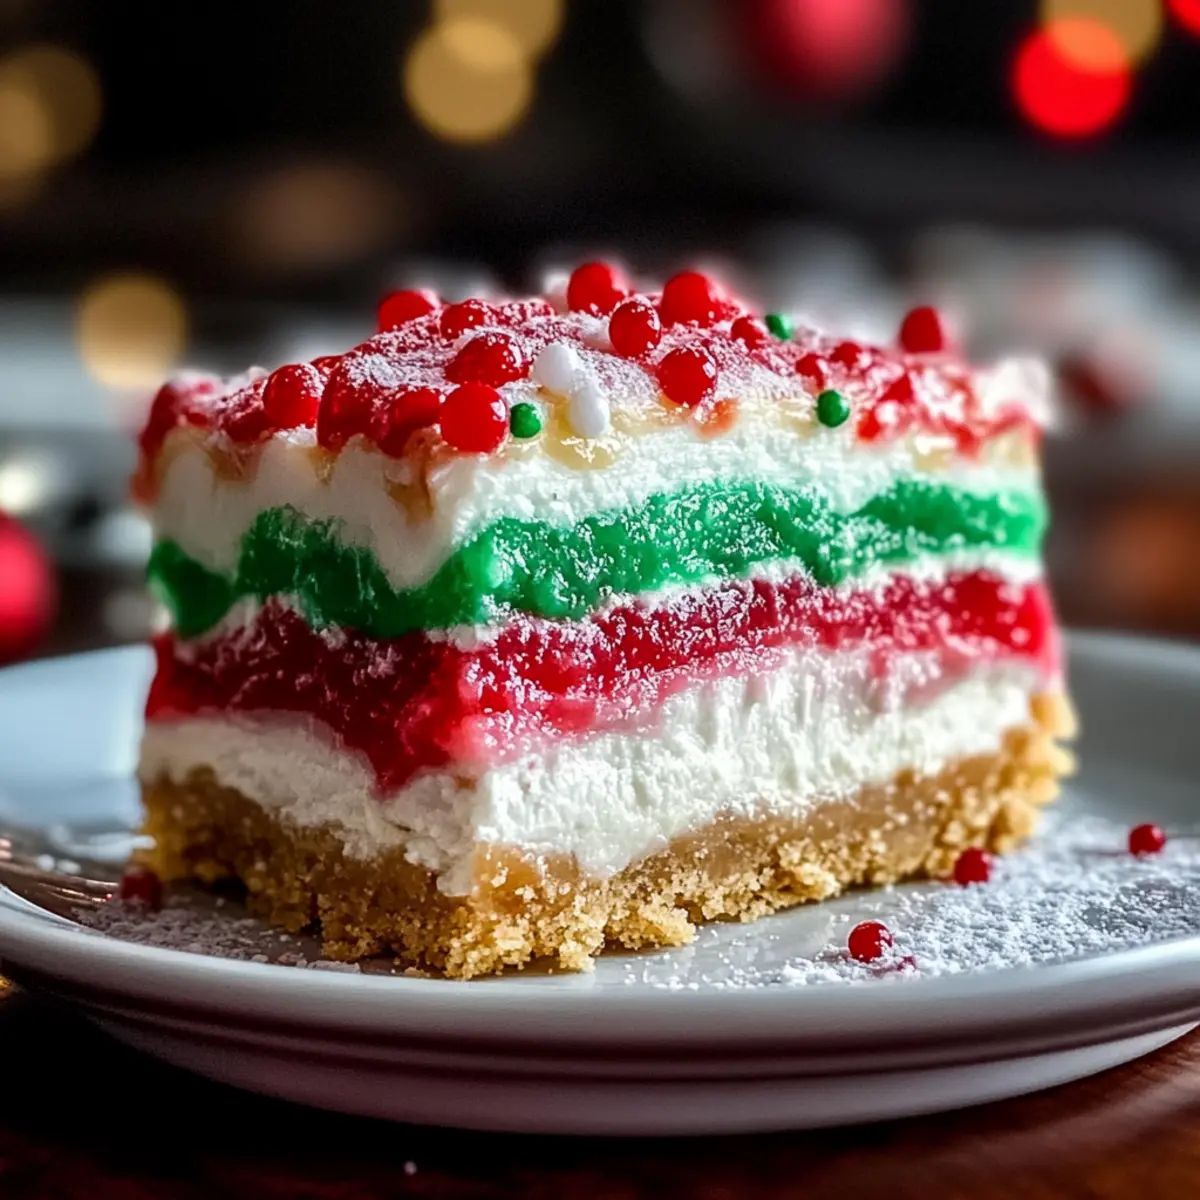
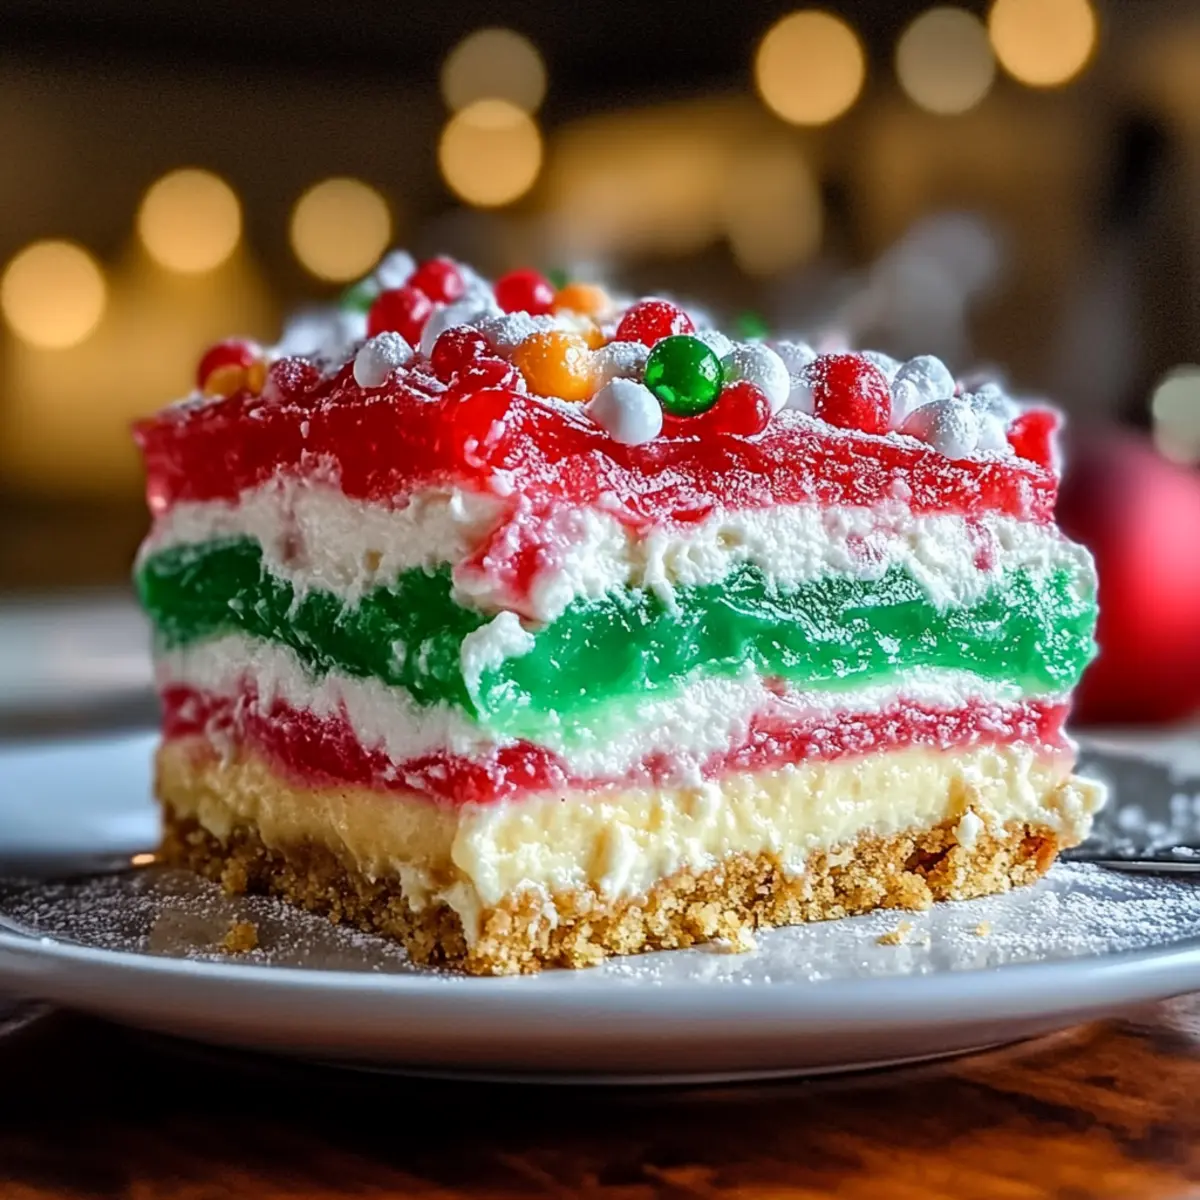
As I stood in my kitchen, the scent of sugar and cream enveloping me like a cozy blanket, I couldn’t help but feel the magic of the season. This No-Bake Christmas Lasagna is my go-to dessert that never fails to enchant both family and friends. With layers of creamy pudding and luscious cheesecake filling secured in a buttery cookie crust, this dessert is all about festive charm. Plus, it comes together in just 25 minutes without ever needing to turn on the oven! Whether you’re celebrating with a small gathering or a large feast, this delightful treat is sure to impress while saving you precious time to soak in those holiday moments. Curious about the colorful layers that make this dish so special? Let’s dive in!
What Makes This Lasagna Stand Out?
Convenience: With just a quick 25-minute prep time, this No-Bake Christmas Lasagna allows you to focus on the festive spirit without the stress of baking.
Endless Customization: Tailor it to your taste! Use different toppers like crushed candy canes or swap food coloring for unique holidays.
Family-Friendly: Everyone, from kids to adults, will love this creamy, colorful dessert — it’s a true crowd-pleaser!
Gluten-Free Option: Easily make it gluten-free by substituting the crust with gluten-free cookies, ensuring everyone can enjoy a slice.
Visual Appeal: Its vibrant layers not only taste amazing but also make for an eye-catching centerpiece on your holiday table. Don’t forget to check out my Truffles Bake Treat and Bake Oreo Cheesecake for more festive inspiration!
No-Bake Christmas Lasagna Ingredients
For the Crust
• Crushed Golden Oreos – Acts as the crust base; for a gluten-free version, substitute with gluten-free cookies.
• Unsalted Butter – Provides moisture and richness to the crust; ensure it’s melted before mixing.
For the Cheesecake Layer
• Cream Cheese – Adds creaminess and stable structure to the filling; use full-fat for the best texture.
• Powdered Sugar – Sweetens the filling and helps achieve a smooth consistency.
• Vanilla Extract – Enhances flavor in the cream cheese layer.
• Whipped Topping – Lightens the filling; can substitute with homemade whipped cream for a fresher taste.
For the Pudding Layers
• Instant Vanilla Pudding Mix – Gives structure and stability to the pudding layers; essential for the recipe.
• Cold Milk – Activates the pudding mix; must be cold for proper thickening.
• Red & Green Food Coloring – Used to create festive, layered pudding colors.
For the Topping
• Additional Whipped Topping – Forms the final decorative layer; ensure it’s spread evenly.
• Holiday Sprinkles or Crushed Candy Canes – Optional toppings for added festive flair.
This No-Bake Christmas Lasagna will be the star of your holiday celebrations, making sure every slice is a moment of joy for you and your guests!
Step‑by‑Step Instructions for No-Bake Christmas Lasagna
Step 1: Prepare Crust
Begin by crushing the Golden Oreos in a food processor until they resemble sand. Melt the unsalted butter and mix thoroughly with the crushed cookies until well combined. Firmly press this mixture into a 9×13-inch dish to form an even crust. Chill in the refrigerator for about 5-10 minutes to set while you prepare the filling.
Step 2: Make Cheesecake Layer
In a mixing bowl, beat the cream cheese until smooth and creamy, ensuring there are no lumps. Gradually add in the powdered sugar and vanilla extract, mixing until fully incorporated. Gently fold in 1 cup of whipped topping until you achieve a light and fluffy texture. Spread this luscious cheesecake mixture over the chilled cookie crust, ensuring a smooth layer.
Step 3: Prepare Pudding Layers
In two separate bowls, whisk together the instant vanilla pudding mix with 2 cups of cold milk in each until thickened—this should take about 2-3 minutes. Add red food coloring to one bowl and green food coloring to the other, mixing gently until fully combined. Carefully spread the red pudding layer over the cheesecake, followed by the green pudding, smoothing each layer as you go.
Step 4: Add Final Layer
Take the remaining whipped topping and spread it evenly over the top layer of green pudding. For a delightful finish, use a spatula to create peaks and swirls. Cover the dessert with plastic wrap and chill in the refrigerator for 4-6 hours or overnight to allow the layers to set beautifully in this No-Bake Christmas Lasagna.
Step 5: Serve
Once chilled and firm to the touch, remove the dessert from the refrigerator. Just before serving, sprinkle with festive toppings like holiday sprinkles or crushed candy canes, which will add a delightful touch. Slice into squares and present this colorful No-Bake Christmas Lasagna at your holiday gathering, where it’s sure to impress!

No-Bake Christmas Lasagna Variations
Feel free to make this festive treat uniquely yours with these delightful twists and swaps!
-
Gluten-Free Option:
Swap the crust with gluten-free cookies to ensure everyone can enjoy this colorful dessert. -
Cheesecake Flavor Boost:
Add a pinch of peppermint extract to the cheesecake layer for a refreshing holiday twist. -
Vibrant Colors:
Experiment with different food coloring combinations like blue and silver for a winter wonderland theme. -
Texture Twist:
Replace whipped topping with homemade whipped cream for a rich, fresh flavor that melts in your mouth. -
Coconut Crunch:
Top your lasagna with toasted coconut or shredded coconut for a tropical flair that balances out the sweetness. -
More Holiday Cheer:
Fold in crushed peppermint candies into the pudding layers for an additional festive crunch. -
Fruit Layers:
Add a layer of fresh berries like raspberries or strawberries between the pudding layers for a fruity surprise. -
Individual Servings:
Make mini versions of the lasagna in jars or cups for easy serving and a delightful presentation during holiday gatherings.
Embrace the spirit of creativity with these variations! Don’t forget to check out my Truffles Bake Treat and Bake Oreo Cheesecake for even more festive inspiration!
Make Ahead Options
These No-Bake Christmas Lasagna layers are perfect for busy cooks looking to save time during the holiday rush! You can prepare the crust and cheesecake layer up to 24 hours in advance and refrigerate them, ensuring they keep their delightful textures. The pudding layers can also be made ahead and colored; simply store them in separate airtight containers to maintain their vibrancy. When you’re ready to assemble, spread the cheesecake over the crust, layer in the puddings, and top with whipped cream. Chill for an additional 4 to 6 hours or overnight, if you prefer, so it’s just as delicious when serving! This way, you can enjoy your celebration without the last-minute chaos.
What to Serve with No-Bake Christmas Lasagna?
Elevate your festive meal by pairing this eye-catching dessert with delightful bites and sips that will leave everyone wanting more.
- Rich Hot Chocolate: The creamy, rich notes of hot chocolate are a perfect match for the sweet layers, adding warmth to your dessert table.
- Cranberry Bliss Bars: Their tart-sweet profile balances the sweetness of the lasagna, while the chewy texture adds variety to your spread.
- Minty Fruit Salad: A refreshing medley of fruits like strawberries and green apples punctuates the meal with lightness and color, complementing your dessert beautifully.
- Spiced Eggnog: A classic holiday drink, its creamy richness echoes the layered dessert, creating a comforting moment for holiday cheer.
- Ginger Bread Cookies: The warm spice of gingerbread cookies offers a cozy crunch that contrasts with the creamy lasagna, making for a delightful textural experience.
- Sugar Cookie Platter: Include a variety of decorated sugar cookies to add fun festivity alongside your dessert. Their sweetness will amplify the holiday spirit on the table.
- Vanilla Ice Cream: The cool creaminess of vanilla ice cream pairs deliciously with the layered lasagna, offering a delightful contrast in temperatures.
- Chocolate Covered Strawberries: These sweet treats provide a fruity freshness that brightens up the dessert course while the chocolate adds an indulgent touch.
- Sparkling Cider: A bubbly, non-alcoholic drink to toast the occasion, its acidity can cut through the richness and cleanse the palate.
- Holiday Cheeseboard: Include a mix of soft cheeses, seasonal fruits, and nuts to create a stunning visual centerpiece that enhances the entire meal experience.
Expert Tips for No-Bake Christmas Lasagna
• Layering Technique: Ensure each layer is spread evenly to maintain those vibrant colors. Gentle spoonfuls prevent colors from mixing.
• Chill Time Matters: Don’t rush the chilling! Allow at least 4-6 hours for the dessert to set properly, ensuring clean slices when served.
• Craft Your Crust: Substitute with gluten-free cookies for an inclusive dessert. Always double-check that the cookies are fresh for the best flavor.
• Flavor Variations: Feel free to experiment with flavorings in the cheesecake layer, like peppermint extract, to add a seasonal twist to your No-Bake Christmas Lasagna.
• Cut with Care: Use a sharp, warm knife for slicing. This helps cut through the creamy layers neatly, revealing those colorful segments beautifully.
How to Store and Freeze No-Bake Christmas Lasagna
Fridge: Store your No-Bake Christmas Lasagna in an airtight container in the refrigerator for up to 3 days. This will help maintain the layers’ texture and prevent the crust from becoming soggy.
Freezer: For longer storage, freeze the lasagna by wrapping it tightly in plastic wrap followed by aluminum foil. It will keep well for up to 2 months. Thaw it in the fridge overnight before serving.
Reheating: Although it’s best enjoyed chilled, if you prefer a softer texture, let it sit at room temperature for 30 minutes before serving after thawing.
Make-Ahead: This dessert can be prepared a day in advance, allowing time for flavors to meld beautifully while ensuring the layers remain intact for your holiday gatherings.
No-Bake Christmas Lasagna Recipe FAQs
What kind of cookies should I use for the crust?
You can use crushed Golden Oreos for a delightful buttery flavor and crunch. If you’re looking for a gluten-free option, simply substitute with gluten-free cookies that mimic the texture of Oreos for the crust.
How long can I store No-Bake Christmas Lasagna in the fridge?
You can store your No-Bake Christmas Lasagna in an airtight container in the refrigerator for up to 3 days. This storage method helps maintain the crispness of the crust while keeping the layers intact.
Can I freeze the No-Bake Christmas Lasagna?
Absolutely! To freeze, wrap the lasagna tightly in plastic wrap followed by aluminum foil. It can be stored in the freezer for up to 2 months. When you’re ready to serve, thaw it in the fridge overnight before enjoying.
What if I want to make a gluten-free version?
No problem! For a gluten-free No-Bake Christmas Lasagna, simply swap the crust with gluten-free cookies. Additionally, always double-check that the pudding mix and whipped topping you choose are gluten-free as well to keep this dessert safe for those with dietary restrictions.
How can I prevent the layers from mixing?
To maintain distinct layers, spread each layer gently and carefully. Use a spatula or the back of a spoon to smooth layers without mixing colors. Chill each layer before adding the next if you want to ensure ultra-clear separations.
Do I need to use food coloring, or can I skip it?
While the red and green food coloring adds a festive touch, feel free to skip it if you prefer a more traditional look. You can also use natural alternatives like beet juice for red and spirulina powder for green if you want to avoid artificial colors altogether.
Decadent No-Bake Christmas Lasagna for Effortless Holiday Joy
Ingredients
Equipment
Method
- Prepare the crust by crushing Golden Oreos and mixing with melted unsalted butter. Press into a 9x13-inch dish and chill for 5-10 minutes.
- Make the cheesecake layer by beating cream cheese, adding powdered sugar and vanilla extract, and folding in whipped topping. Spread over the crust.
- Prepare pudding layers by whisking pudding mix with cold milk until thickened, adding red and green food coloring to separate bowls.
- Spread red pudding over the cheesecake layer, followed by green pudding, smoothing each layer carefully.
- Spread the remaining whipped topping evenly over the green pudding layer and chill for 4-6 hours or overnight.
- Serve by sprinkling with holiday toppings, slicing, and presenting at your gathering.