

“Did I hear ‘cookie’ and ‘no-bake’ in the same sentence?” That was my reaction when I stumbled upon these No-Bake Cookie Butter Blossoms. The holidays can be chaotic, but these delightful treats promise all the festive cheer without the fuss of turning on the oven. Perfect for busy home chefs like us, these cookies combine the rich flavor of cookie butter with a touch of chocolate, creating a mouthwatering experience that’ll steal the spotlight at any gathering. Not only do they come together in minutes, but they also cater to those who want a sweet treat without the gluten. Whether you need a last-minute gift or simply want to indulge while binge-watching your favorite holiday movies, these blossoms are sure to elevate your festivities. Ready to whip up these enchanting bites? Grab your ingredients, and let the holiday magic begin!
Why are No-Bake Cookie Butter Blossoms Amazing?
Simplicity at Its Finest: These no-bake treats come together in just minutes, making them perfect for busy holiday schedules.
Decadent Flavor: The rich, creamy cookie butter pairs beautifully with chocolate, creating a mouthwatering combination that’s sure to impress.
Gluten-Free Delight: Perfect for guests with dietary restrictions, these blossoms ensure everyone can enjoy something sweet without the gluten.
Endless Versatility: Feel free to mix in your favorite add-ins like nuts or dried fruit for a personal twist.
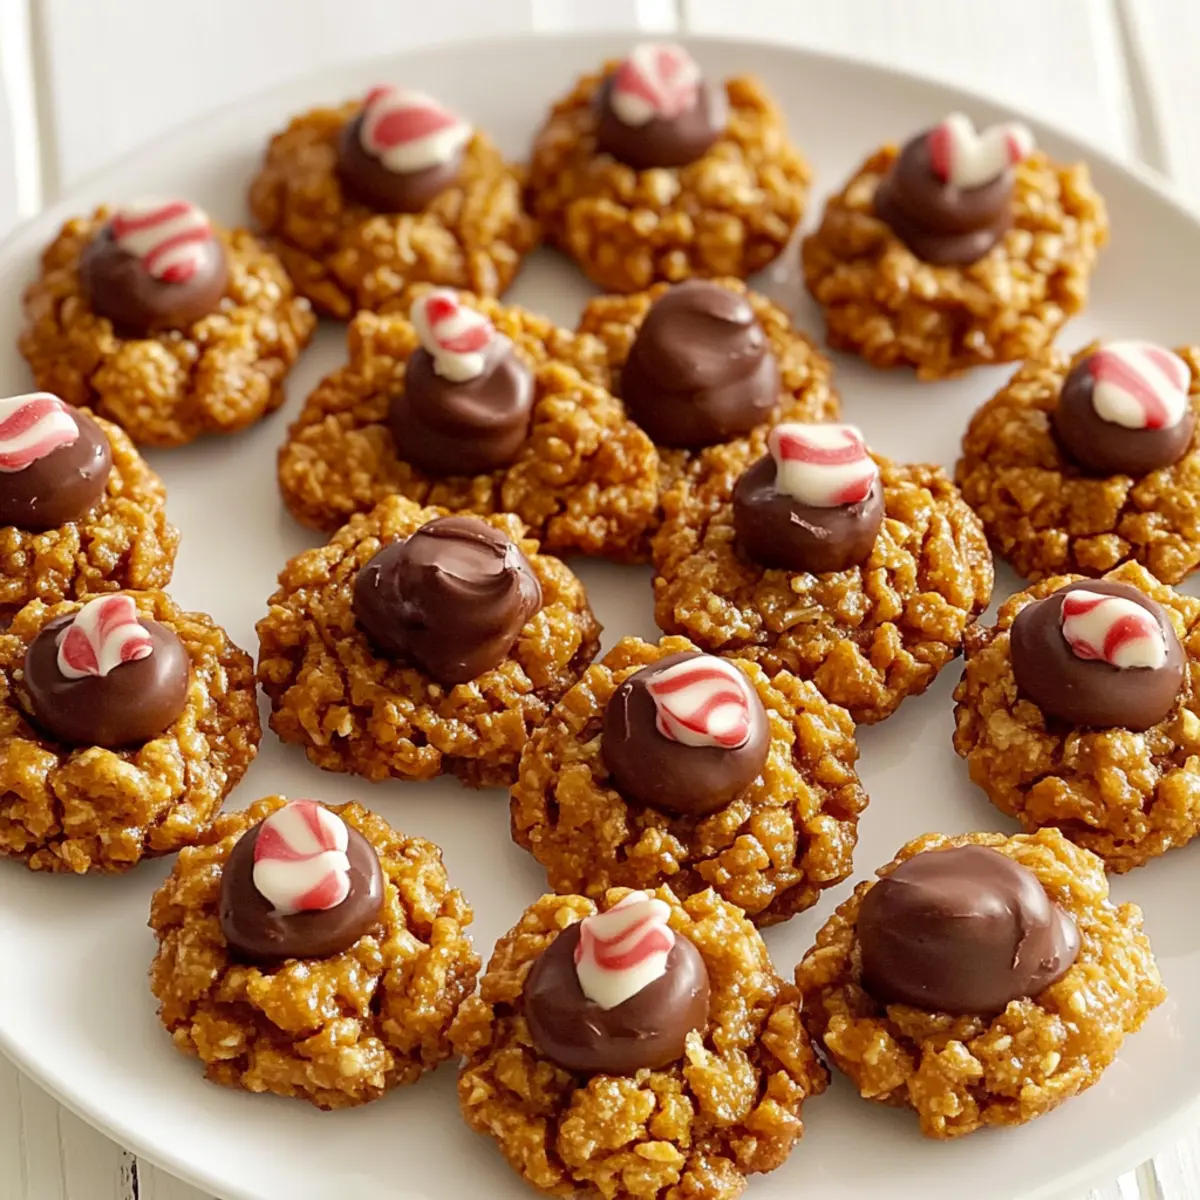
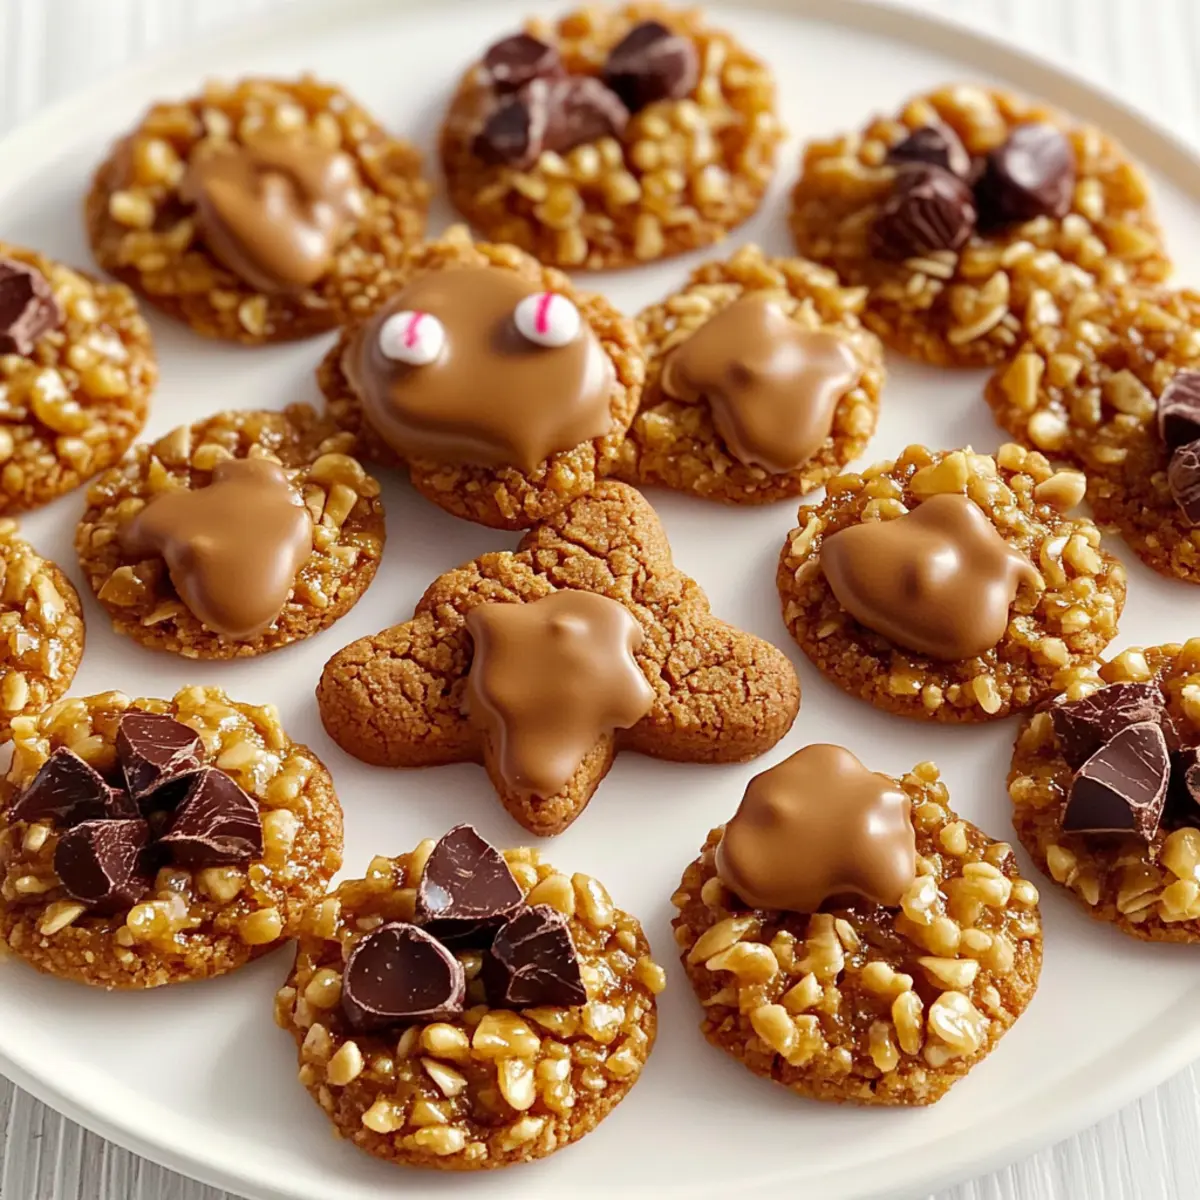
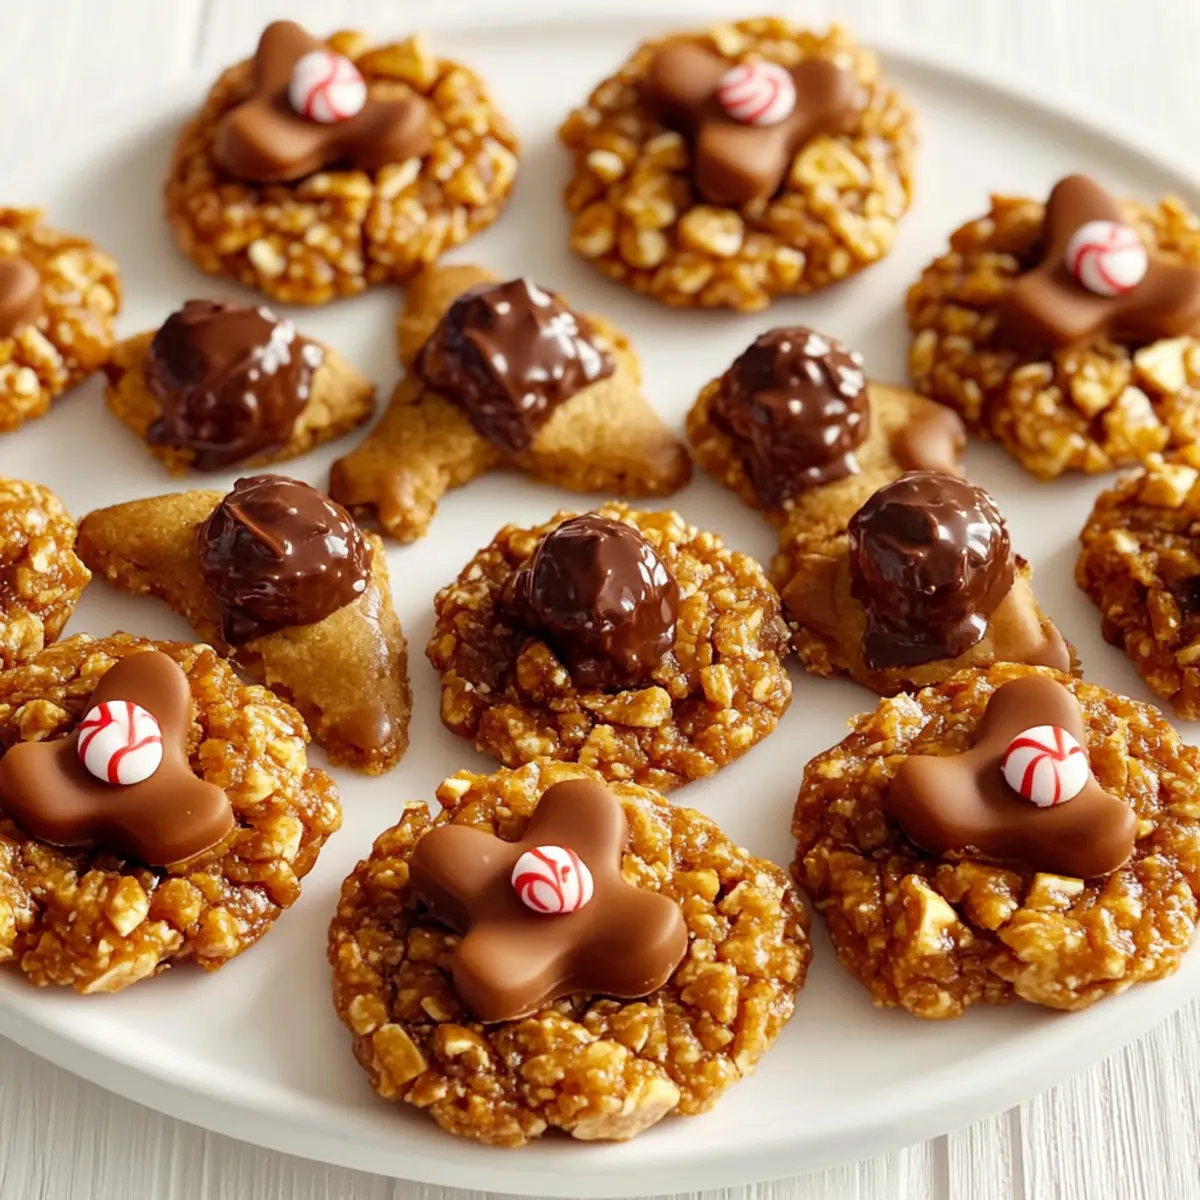
Eye-Catching Presentation: With just a sprinkle of decorative toppings, these bites are as beautiful as they are delicious—perfect for gifting or holiday gatherings!
For even more delightful ideas, check out my Oreo Truffles Minutes or explore other sweet options like Bake Oreo Cheesecake. Let’s spread the holiday cheer together!
No-Bake Cookie Butter Blossoms Ingredients
For the Cookie Base
• Cookie Butter – Gives these blossoms a rich, spiced flavor that’s perfect for the holidays.
• Rolled Oats – Adds texture and heartiness; you can use gluten-free oats if needed.
• Maple Syrup – Natural sweetener that helps bind the ingredients together; honey can be a great substitute.
• Dark Chocolate Chips – Provides a delicious pairing with cookie butter; feel free to swap for milk chocolate if preferred.
For the Toppings
• Chopped Nuts – Almonds or walnuts add a nice crunch; leave them out for a nut-free option.
• Cocoa Powder – Sprinkle for a sophisticated finishing touch; it enhances the chocolate flavor beautifully.
• Sprinkles – Fun for decoration; use festive colors to add a cheerful touch to your cookie blossoms.
These No-Bake Cookie Butter Blossoms are delightful treats, bringing joy to your holiday table without the fuss!
Step‑by‑Step Instructions for No-Bake Cookie Butter Blossoms
Step 1: Prep Your Ingredients
First, gather all your ingredients for the No-Bake Cookie Butter Blossoms. You’ll need cookie butter, rolled oats, maple syrup, dark chocolate chips, and optional toppings like nuts or sprinkles. Measure each ingredient precisely for the best results. Line a baking sheet with parchment paper to set the stage for your delightful treats.
Step 2: Mix the Base
In a large mixing bowl, combine the cookie butter, rolled oats, and maple syrup. Using a spatula or wooden spoon, mix the ingredients thoroughly until they form a cohesive dough that sticks together. This should take about 2-3 minutes. If the mixture feels too dry, add a touch more maple syrup for binding and sweetness.
Step 3: Add Chocolate Chips
Once your base is well combined, fold in the dark chocolate chips to incorporate them evenly throughout the dough. This adds richness and a delicious contrast to the cookie butter flavor. Continue mixing gently until the chocolate chips are distributed, ensuring each blossom has that irresistible chocolatey goodness.
Step 4: Shape the Cookies
Using your hands, scoop out small portions of the mixture and roll them into balls, about the size of a tablespoon. Place each ball onto the prepared baking sheet, leaving enough space between them. The No-Bake Cookie Butter Blossoms should be formed tightly so they hold their shape; this should take around 5-10 minutes.
Step 5: Add Toppings
Now it’s time to enhance your No-Bake Cookie Butter Blossoms! If desired, sprinkle chopped nuts or festive sprinkles on top of each ball for added crunch and visual appeal. You can also dust them lightly with cocoa powder for a sophisticated touch. This step takes only a couple of minutes but greatly enhances the presentation.
Step 6: Chill and Firm Up
Transfer the baking sheet to the refrigerator and let the cookie blossoms chill for at least 30 minutes. This allows them to firm up, making them easier to bite into. As they chill, the flavors meld beautifully, creating an even more delectable treat to enjoy during the festive season.
Step 7: Serve and Enjoy
Once chilled, remove the No-Bake Cookie Butter Blossoms from the refrigerator and serve them on a pretty platter. These delightful sweets are ready to be enjoyed as a festive snack, a sweet addition to your holiday gatherings, or as a thoughtful homemade gift.

Make Ahead Options
These No-Bake Cookie Butter Blossoms are ideal for prepping ahead of time, saving you precious minutes during the busy holiday season! You can easily prepare the cookie base up to 24 hours in advance; simply mix the cookie butter, oats, and maple syrup, then roll into balls and refrigerate. For the best texture and flavor, wait to add chocolate chips and toppings until just before serving. This ensures they maintain their fresh taste and crunchy texture. When you’re ready to enjoy, simply take them out of the fridge, add your finishing touches, and let the festive goodness melt in your mouth!
Storage Tips for No-Bake Cookie Butter Blossoms
Room Temperature: Store these delightful cookie butter blossoms in an airtight container at room temperature for up to 5 days to maintain their fresh taste and texture.
Fridge: For a longer shelf life, keep the cookies in the fridge, where they’ll stay fresh for up to 10 days. Make sure to store them in an airtight container to prevent moisture.
Freezer: Freeze the cookie butter blossoms in a single layer on a baking sheet, then transfer to a freezer-safe container for up to 3 months. Thaw in the fridge before serving.
Reheating: These blossoms are enjoyed chilled or at room temperature; there’s no need for reheating, making them a perfect no-fuss treat for gatherings!
No-Bake Cookie Butter Blossoms Variations
Feel free to get creative with these delightful No-Bake Cookie Butter Blossoms and customize them to suit your taste!
-
Nut-Free Version: Leave out the nuts entirely or swap in seeds like sunflower or pumpkin for a satisfying crunch.
These options ensure everyone can enjoy them, especially if allergies are a concern. -
Maple-Free: Substitute maple syrup with agave nectar or coconut syrup for sweetening.
This tweak keeps the sweetness while accommodating different flavor profiles. -
Chocolate Variants: Use white chocolate chips or milk chocolate in place of dark chocolate for a different flavor twist.
Each chocolate brings a unique richness, so you can find the perfect match for your palate. -
Spiced Up: Add a teaspoon of cinnamon or nutmeg to the base mix for an extra festive flavor.
Spices create warmth and depth, making these blossoms even cozier for holiday gatherings. -
Dairy-Free Option: Choose dairy-free chocolate chips for a completely vegan version of these treats.
This small swap ensures that everyone can indulge without concern for dietary restrictions.
For more inspiration, you might also enjoy my tempting Garlic Butter Brazilian for a savory twist or sweeten your day with my Oreo Truffles Minutes!
-
Add-Ins Galore: Mix in dried fruits or seeds for added texture and flavor—think raisins, cranberries, or chia seeds.
Each addition boosts nutrition and adds delightful surprises in every bite, elevating these blossoms to a new level. -
Healthier Crunch: Swap in crushed whole grain cereal for oats for a different texture and nutritional value.
Using cereals adds an exciting crunch that’s fun and gives your sweet treat a healthy edge!
Helpful Tricks for No-Bake Cookie Butter Blossoms
-
Ingredient Quality: Use high-quality cookie butter for the best flavor. A premium brand makes a noticeable difference in taste and texture.
-
Sticky Situation: If the dough is too sticky to form balls, sprinkle a little more oats or chill briefly in the refrigerator. This will make shaping easier.
-
Chill Time: Don’t skip the chilling step! It helps the blossoms maintain their shape and allows the flavors to meld, enhancing the overall taste.
-
Perfect Portioning: Use a cookie scoop or measuring spoon to ensure each blossom is uniform in size. This helps with even cooling and serving.
-
Decoration Fun: Get creative with toppings! Experiment with different nuts or festive sprinkles to make the No-Bake Cookie Butter Blossoms visually appealing and uniquely yours.
What to Serve with No-Bake Cookie Butter Blossoms?
Creamy hot chocolate, warm spices, and festive treats create the cozy vibes your holiday gathering craves.
-
Creamy Hot Chocolate: Warm and inviting, it complements the rich flavors of the cookie butter while creating a cozy holiday atmosphere.
-
Peppermint Bark: This festive treat adds a crunchy contrast to the smooth texture of the blossoms, perfect for those who love minty desserts.
-
Vanilla Ice Cream: A delightful scoop adds creaminess, perfectly balancing the cookie butter’s robust flavor for an indulgent experience.
-
Spiced Chai Latte: The warm spices in chai enhance the seasonal elements of the blossoms, bringing a touch of exotic comfort to your table.
Rich, dark chocolate pairs beautifully with cookie butter, making it a stellar side for those who crave a chocolatey indulgence.
-
Fruit and Nut Platter: Fresh fruits and seasonal nuts provide a refreshing crunch, balancing the sweetness of the blossoms and adding visual appeal.
-
Gingerbread Cookies: Overlapping flavors create a harmonious dessert table, inviting all to enjoy the holiday spirit. Their spiced sweetness echoes the essence of cookie butter delightfully.
-
Festive Cocktail (e.g., Eggnog): A splash of spiced eggnog adds a festive touch, making this duo a wonderful conversation starter at your holiday party.
Embrace the magic of the season by pairing these treats together for a memorable festive feast!
No-Bake Cookie Butter Blossoms Recipe FAQs
How do I choose the best cookie butter for this recipe?
Absolutely! When selecting cookie butter, opt for a brand that uses simple ingredients without artificial flavors or added sugars. Look for a creamy consistency with a rich aroma that showcases the spices and depth of flavor. Personally, I love using brands that emphasize natural ingredients for that homemade feel!
How long can I store my No-Bake Cookie Butter Blossoms?
You can store these delightful cookie butter blossoms in an airtight container at room temperature for up to 5 days. If you prefer them to last longer, refrigerate them, where they’ll stay fresh for up to 10 days. Remember to keep them sealed tightly to maintain their moist texture!
Can I freeze No-Bake Cookie Butter Blossoms?
Definitely! To freeze your cookie butter blossoms, lay them in a single layer on a baking sheet and freeze until firm. Once they’re set, transfer them to a freezer-safe container or bag for up to 3 months. When you’re ready to enjoy them, simply thaw in the fridge overnight. It’s that easy!
What if my dough is too sticky to shape into balls?
If you find that your dough feels a bit too sticky, don’t worry! You can sprinkle in a little more rolled oats or chill the mixture in the refrigerator for about 10-15 minutes. This will help solidify the dough, making it easier to roll into beautiful cookie blossoms. Just keep at it—every batch is a delicious adventure!
Can I make these cookie butter blossoms nut-free?
Absolutely! If you have guests with nut allergies, you can easily leave out the chopped nuts in the toppings. For added flavor and a different texture, consider using seeds like pumpkin or sunflower seeds instead. These will still give you that satisfying crunch without the worry!
Do I need to let them chill?
Yes! Chilling your No-Bake Cookie Butter Blossoms for at least 30 minutes is essential. This step not only helps the flavors meld together beautifully but also ensures that the cookies firm up, making them easier to enjoy. Trust me, the wait will be well worth it for that perfect bite!
No-Bake Cookie Butter Blossoms That Melt in Your Mouth
Ingredients
Equipment
Method
- Gather all your ingredients and line a baking sheet with parchment paper.
- Combine cookie butter, rolled oats, and maple syrup in a mixing bowl. Mix until a cohesive dough forms.
- Fold in dark chocolate chips until evenly distributed throughout the dough.
- Scoop out small portions of dough and roll into balls. Place on the baking sheet.
- Sprinkle chopped nuts or festive sprinkles on top of each ball and dust with cocoa powder if desired.
- Refrigerate for at least 30 minutes to firm up.
- Serve chilled or at room temperature on a pretty platter.