

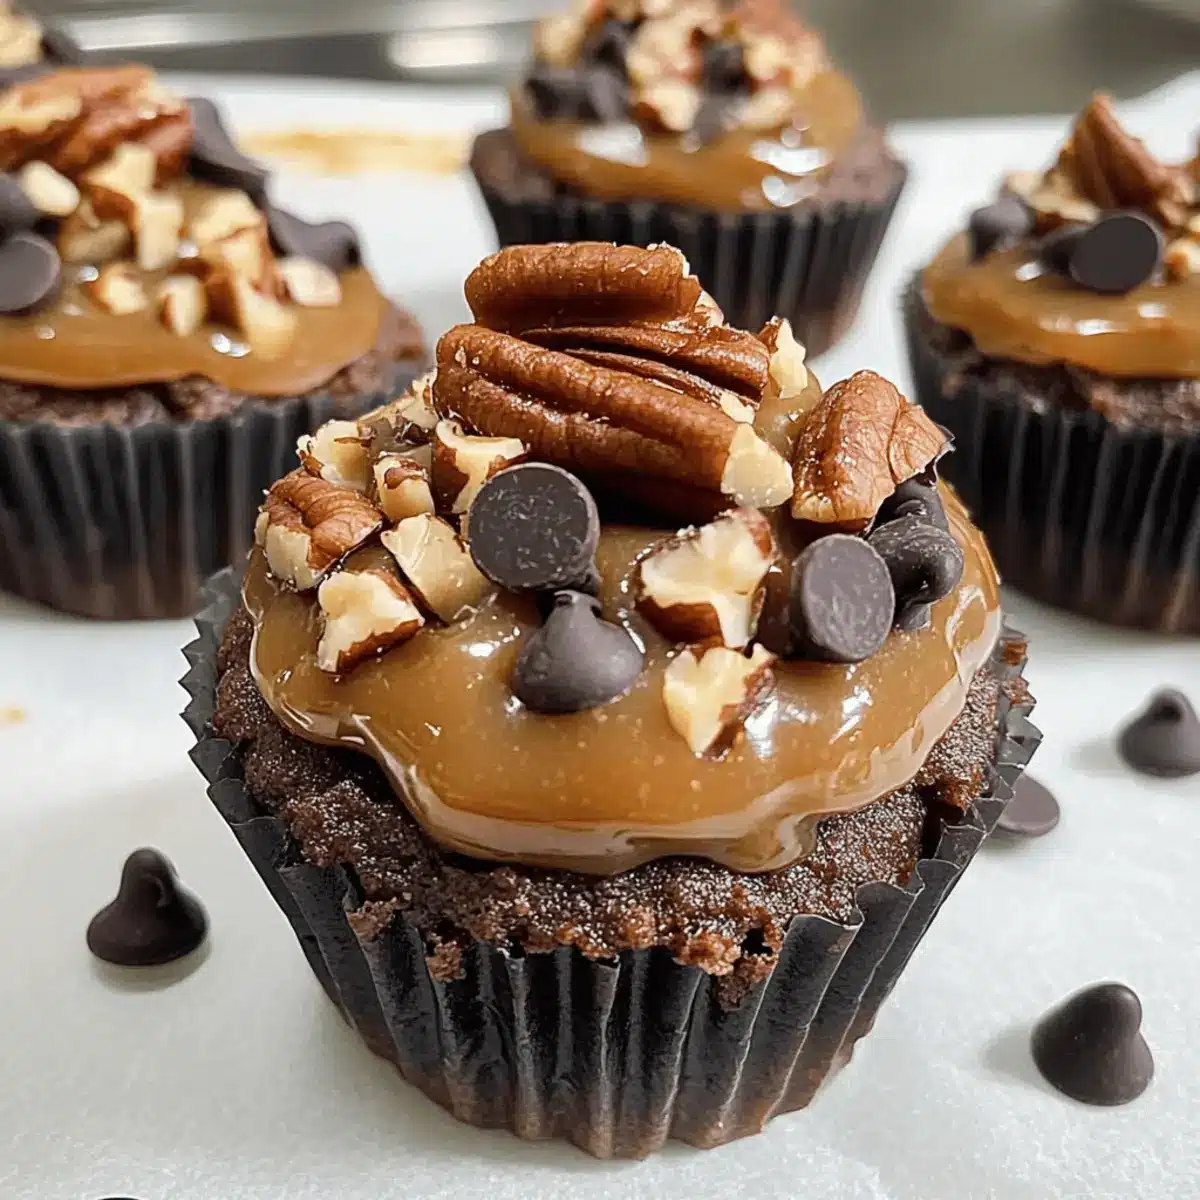
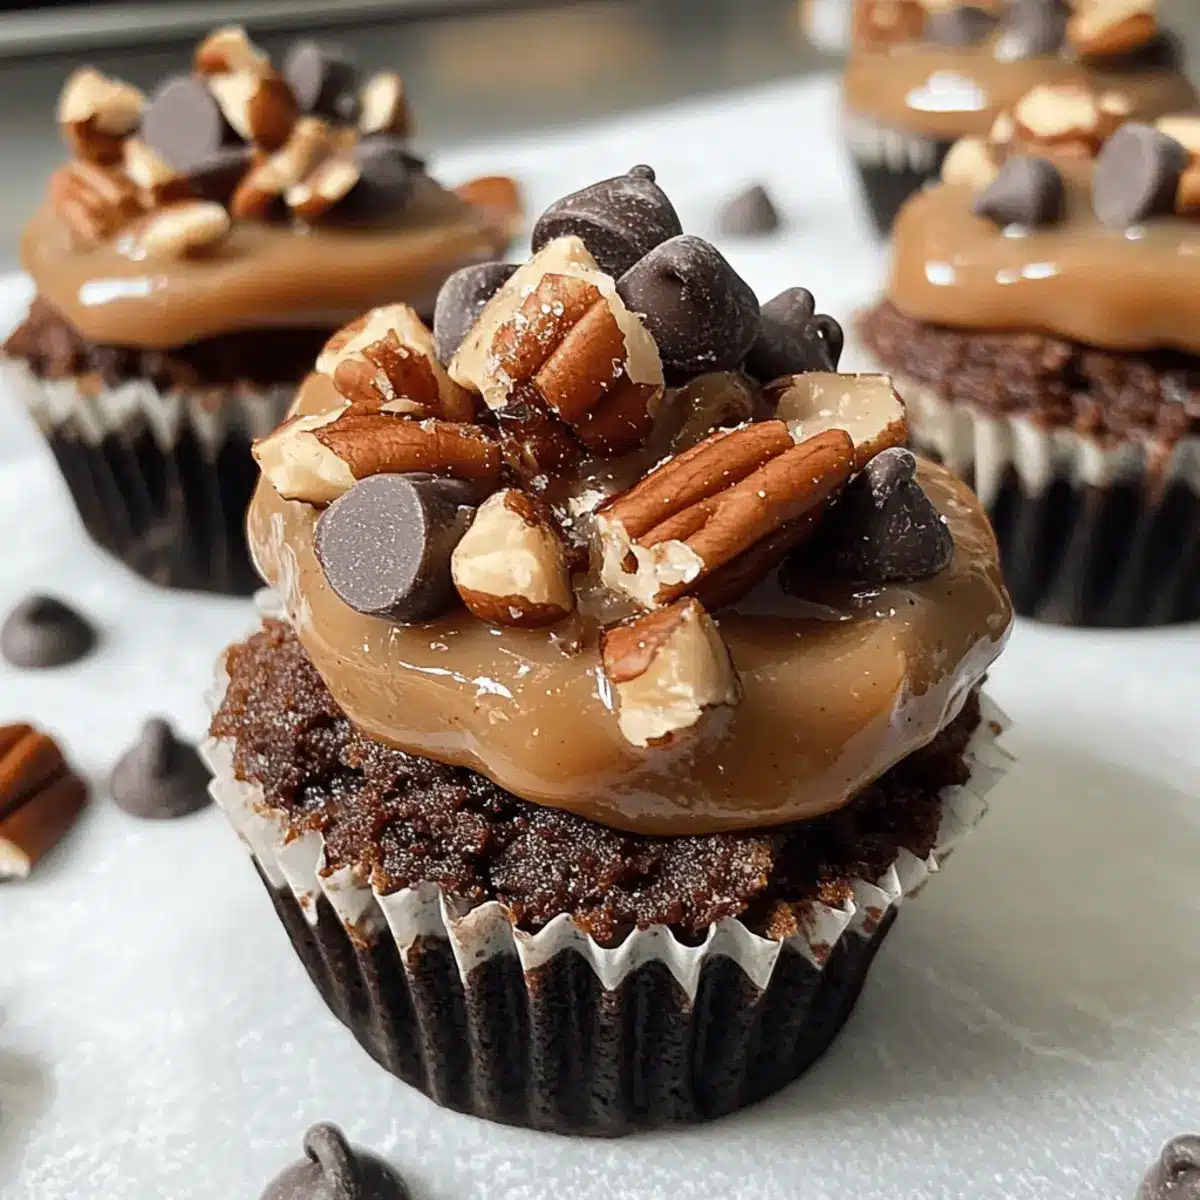
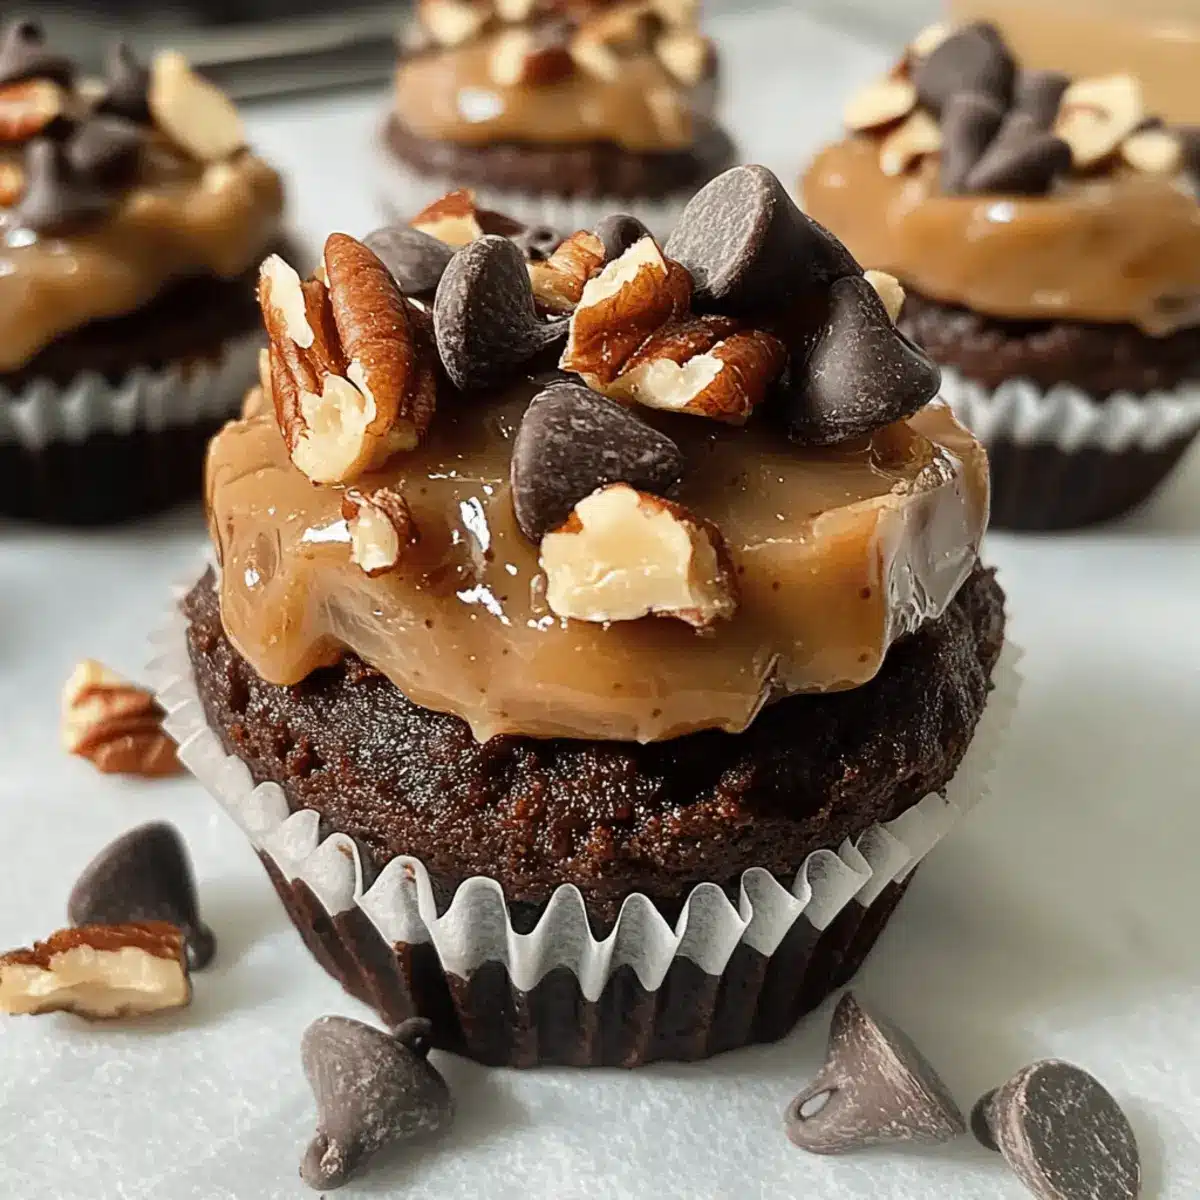
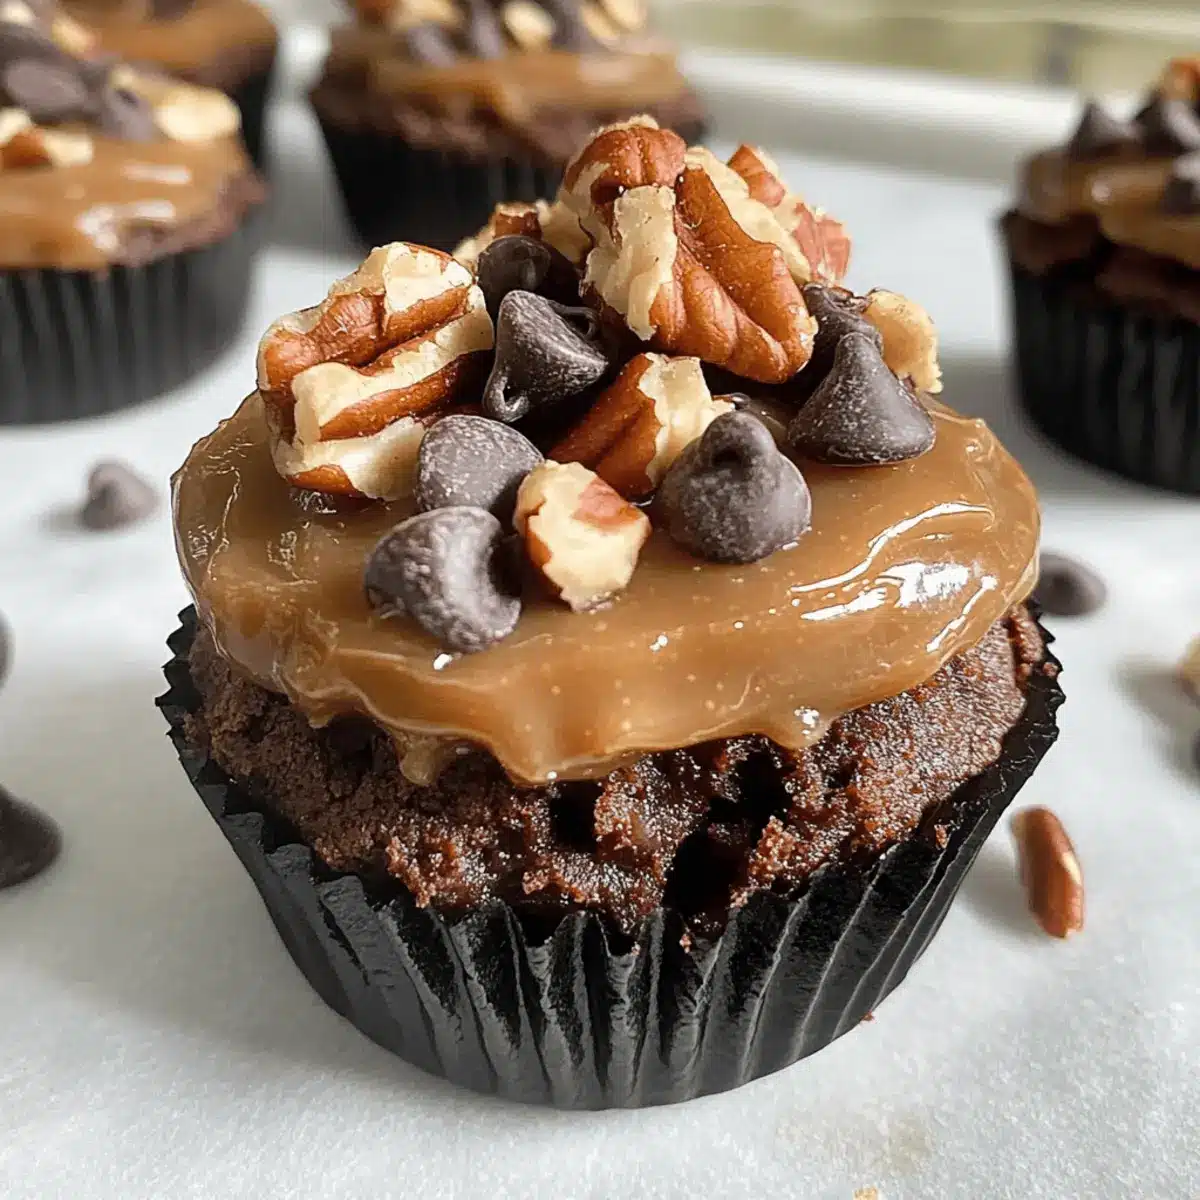
Scrolling through my favorite dessert recipes, I stumbled upon a hidden gem that’s about to become my new obsession: No Bake Turtle Brownie Cups. Imagine a rich, fudgy chocolate brownie base, lovingly topped with creamy date caramel, crunchy pecans, and delightful chocolate chips—pure magic! This no-bake wonder is not only quick to prepare but also vegan and gluten-free, making it the perfect guilt-free indulgence after a long day. Plus, you’ll love how only a handful of wholesome ingredients come together to create a treat that pleases both the health-conscious and dessert fanatics alike. Are you ready to take your dessert game to a whole new level? Let’s dive into this deliciously simple recipe!
Why Are No Bake Turtle Brownie Cups Amazing?
Irresistible Taste: The luscious combination of rich chocolate and creamy date caramel creates a dessert that satisfies every sweet tooth.
Health-Conscious Indulgence: With wholesome ingredients like almond flour and Medjool dates, these brownie cups are a guilt-free way to enjoy dessert.
Quick & Easy: Preparation is a breeze—no baking required! Just blend, layer, and refrigerate—perfect for busy weeknights.
Crowd-Pleasing Delight: Whether you’re hosting a get-together or enjoying a cozy night in, these cups are sure to impress family and friends.
Customizable: Feel free to switch up nut butters or add different toppings, like we do in our Cheesy Broccoli Bake—the possibilities are endless! Impress your guests and make these No Bake Turtle Brownie Cups—where indulgence meets health!
No Bake Turtle Brownie Cups Ingredients
For the Brownie Base
• Almond Flour – Provides structure to the brownie base; can substitute with coconut flour if needed.
• Walnuts – Adds crunch and nutty flavor; can be replaced with pecans, cashews, or almonds.
• Cocoa Powder – Gives the brownie its rich chocolate flavor; use unsweetened cocoa for a healthier option.
• Maple Syrup – Serves as a natural sweetener; agave syrup can be used as a substitute.
• Almond Butter – Adds creaminess and flavor; replace with other nut butters if they’re runny.
• Dairy-Free Milk – Moistens the mixture; almond or oat milk works well, but avoid sweetened varieties.
For the Date Caramel
• Medjool Dates – Acts as a natural sweetener and binder for the caramel; ensure they are soft.
• Coconut Oil – Helps the caramel set properly; can substitute with other neutral oils, but oil hardens in the fridge for better consistency.
• Vanilla Extract – Enhances overall flavor; use pure extract for a richer taste.
Feel free to explore and enjoy making these delicious No Bake Turtle Brownie Cups—your taste buds will thank you!
Step‑by‑Step Instructions for No Bake Turtle Brownie Cups
Step 1: Prepare the Brownie Base
Begin by placing almond flour, walnuts, cocoa powder, maple syrup, almond butter, and dairy-free milk into a food processor. Blend the mixture for about 2-3 minutes until a sticky dough forms that holds together when pressed. You’ll know it’s ready when it resembles a thick brownie batter. This rich chocolate base is the foundation of your No Bake Turtle Brownie Cups.
Step 2: Form the Brownie Layer
Line a muffin tin or silicone molds with parchment paper for easy removal. Press the brownie mixture evenly into the bottom of each mold, smoothing it out with the back of a spoon or your fingers. Ensure the layer is compact and around ¼ inch thick. This will create a sturdy base that supports the luscious caramel topping that follows.
Step 3: Prepare the Date Caramel
In your clean food processor, combine the soft Medjool dates, almond butter, coconut oil, dairy-free milk, and vanilla extract. Blend on high for about 2-4 minutes until the mixture is smooth and creamy, resembling a luscious caramel sauce. If the dates are tough, soak them in hot water for 10 minutes beforehand to achieve the best texture for the caramel layer over your brownie cups.
Step 4: Assemble the Cups
Evenly spread the creamy date caramel over the brownie layer in each mold using a spatula. Take your time to ensure the caramel layer is smooth and evenly distributed, making it as thick as you desire. This delightful layer of caramel will add richness and sweetness to your No Bake Turtle Brownie Cups.
Step 5: Add Finishing Touches
Sprinkle additional chopped pecans and chocolate chips on top of the caramel for that classic turtle dessert look and extra crunch. This step not only enhances the presentation but also adds texture, creating layers that make each bite delicious.
Step 6: Chill to Set
Refrigerate the cups for at least 1 hour or freeze them for about 30 minutes until they are set and firm. You’ll know they’re ready when they are nice and chilled, making them easy to remove from the molds. This chilling period ensures that the layers meld beautifully while giving you a perfect No Bake Turtle Brownie Cup to enjoy.
Step 7: Serve and Delight
Once set, gently remove the brownie cups from the molds and peel away the parchment paper. Serve chilled for a refreshing treat or allow them to sit at room temperature for a few minutes for a softer consistency. Enjoy these indulgent No Bake Turtle Brownie Cups as a delightful finish to any meal!
What to Serve with No Bake Turtle Brownie Cups
Indulging in rich, fudgy brownie cups is just the beginning; let’s create a well-rounded meal that tantalizes all your senses.
-
Fresh Berries: The tartness of strawberries, raspberries, or blueberries cuts through the chocolate richness, adding a refreshing contrast.
-
Coconut Whipped Cream: Creamy and light, coconut whipped cream enhances the dessert’s tropical vibe and balances the brownie cups perfectly.
-
Peppermint Tea: A warm cup of soothing peppermint tea can cleanse the palate after each decadent bite, adding a cozy finishing touch.
-
Vanilla Almond Ice Cream: A scoop of creamy, vegan vanilla almond ice cream brings delightful creaminess and a cold contrast to the chewy brownie cups.
It’s all about balance! Consider pairing these No Bake Turtle Brownie Cups with something light and refreshing, like a crisp salad, to create a beautiful meal that feels both indulgent and nourishing.
Storage Tips for No Bake Turtle Brownie Cups
Fridge: Store your No Bake Turtle Brownie Cups in an airtight container in the refrigerator for up to 7 days. This keeps them fresh and ready to enjoy whenever cravings strike!
Freezer: For longer storage, freeze the brownie cups for up to 2 months. Wrap each cup individually in plastic wrap, then place them in a freezer-safe bag to prevent freezer burn.
Thawing: When ready to enjoy, simply transfer the desired amount to the fridge to thaw overnight or leave them at room temperature for about 30 minutes before serving.
Reheating: These delights are best enjoyed chilled, but if you prefer a gooey texture, warm them slightly in the microwave for about 10-15 seconds. Enjoy your indulgent treat!
Make Ahead Options
These No Bake Turtle Brownie Cups are perfect for busy home cooks who want to save time during the week! You can prepare the brownie base up to 24 hours in advance by blending all the ingredients and pressing the mixture into your molds. Simply store them in the refrigerator, wrapped tightly in plastic wrap to prevent drying out. The date caramel layer can also be made ahead and refrigerated for up to 3 days; just give it a good stir before spreading it on the brownie base. When ready to serve, sprinkle with pecans and chocolate chips, then refrigerate for an hour to firm up again if necessary for the best taste and texture. Enjoy this hassle-free dessert any time!
No Bake Turtle Brownie Cups Variations
Feel free to get creative with these No Bake Turtle Brownie Cups and make them your own delightful creation!
- Gluten-Free Flour: Use gluten-free all-purpose flour instead of almond flour for a different texture that everyone can enjoy.
- Nut-Free Transformation: Swap almond butter for sunbutter or tahini to make these cups nut-free, ensuring they’re suitable for schools and allergies.
- Carob Option: Replace cocoa powder with carob powder for a non-chocolate version that’s equally delicious and a fun twist on flavor!
For a delightful fruity surprise, consider mixing in dried cherries or cranberries, giving these brownie cups an extra burst of sweetness.
- Add Spices: Sprinkle in a dash of cinnamon or a pinch of sea salt to enhance flavor and add a tantalizing twist to your dessert!
If you’re feeling adventurous, try making a salted caramel version by adding a pinch of sea salt to the date caramel—this will elevate your dessert to a new level!
- Tropical Delight: Incorporate shredded coconut into the brownie base or as a topping for a tropical flair that brings a sunny twist to this treat.
Give these variations a try or mix and match to create your favorite version! And while you’re at it, check out my irresistible Oreo Truffles Bake for another no-bake delight!
Expert Tips for No Bake Turtle Brownie Cups
-
Date Quality Matters: Use soft Medjool dates for the caramel. If they’re hard, soak them in hot water to ensure a smooth consistency.
-
Nut Butter Choice: Opt for high-quality almond butter that is runny. This helps achieve the right texture in your No Bake Turtle Brownie Cups.
-
Layer Thickness: Adjust the thickness of the brownie and caramel layers to suit your preference. A thicker caramel can enhance the overall indulgence.
-
Food Processor Cleanup: Enjoy an easy cleanup by preparing both components in one food processor. Just scrape the sides between blending!
-
Presentation Tip: For a decorative touch, drizzle some melted dairy-free chocolate over the set brownie cups before serving.
No Bake Turtle Brownie Cups Recipe FAQs
What should I look for when selecting Medjool dates?
Absolutely! When selecting Medjool dates, look for ones that are soft and plump with a rich caramel color. Avoid dates with dark spots or a dry appearance, as these can indicate they are past their prime. If they’re too firm, soak them in hot water for about 10 minutes to soften them up.
How should I store my No Bake Turtle Brownie Cups?
To keep your No Bake Turtle Brownie Cups fresh, store them in an airtight container in the refrigerator. They will stay delicious for up to 7 days. If you want to save them for a later treat, you can freeze them for up to 2 months. Just wrap each one in plastic wrap and place them in a freezer-safe bag.
Can I freeze No Bake Turtle Brownie Cups?
Yes, you can absolutely freeze these treats! To freeze, wrap each brownie cup individually in plastic wrap and then place them in a freezer-safe container or zip-top bag. This helps prevent freezer burn while keeping them fresh. When you’re ready to enjoy them, simply thaw overnight in the fridge, or let them sit at room temperature for about 30 minutes.
What if my date caramel isn’t smooth?
If your date caramel isn’t coming together smoothly, don’t worry! This could be due to hard dates. Soak them in hot water for 10-15 minutes before blending. Additionally, ensure you’re using enough liquid (like dairy-free milk) while blending. If it still isn’t blending well, you can add a splash more milk until you achieve that creamy consistency.
Are No Bake Turtle Brownie Cups suitable for a gluten-free diet?
Yes, indeed! The No Bake Turtle Brownie Cups are made with almond flour, which is gluten-free. Just make sure that any substitutions you use, like maple syrup or nut butter, are also labeled gluten-free. This way, you can enjoy these tasty treats without any worries!
Indulge in No Bake Turtle Brownie Cups Everyone Will Love
Ingredients
Equipment
Method
- Begin by placing almond flour, walnuts, cocoa powder, maple syrup, almond butter, and dairy-free milk into a food processor. Blend for 2-3 minutes until a sticky dough forms.
- Line a muffin tin or silicone molds with parchment paper. Press the brownie mixture into the bottom of each mold, ensuring a compact layer.
- In a clean food processor, combine Medjool dates, almond butter, coconut oil, dairy-free milk, and vanilla extract. Blend on high for 2-4 minutes until smooth.
- Spread the date caramel over the brownie layer in each mold evenly.
- Sprinkle chopped pecans and chocolate chips on top of the caramel.
- Refrigerate for at least 1 hour or freeze for 30 minutes until set.
- Once set, gently remove the brownie cups from the molds and serve.